Cradle-Rear Body: Installation
 Courtesy of DAIMLERCHRYSLER CORP.
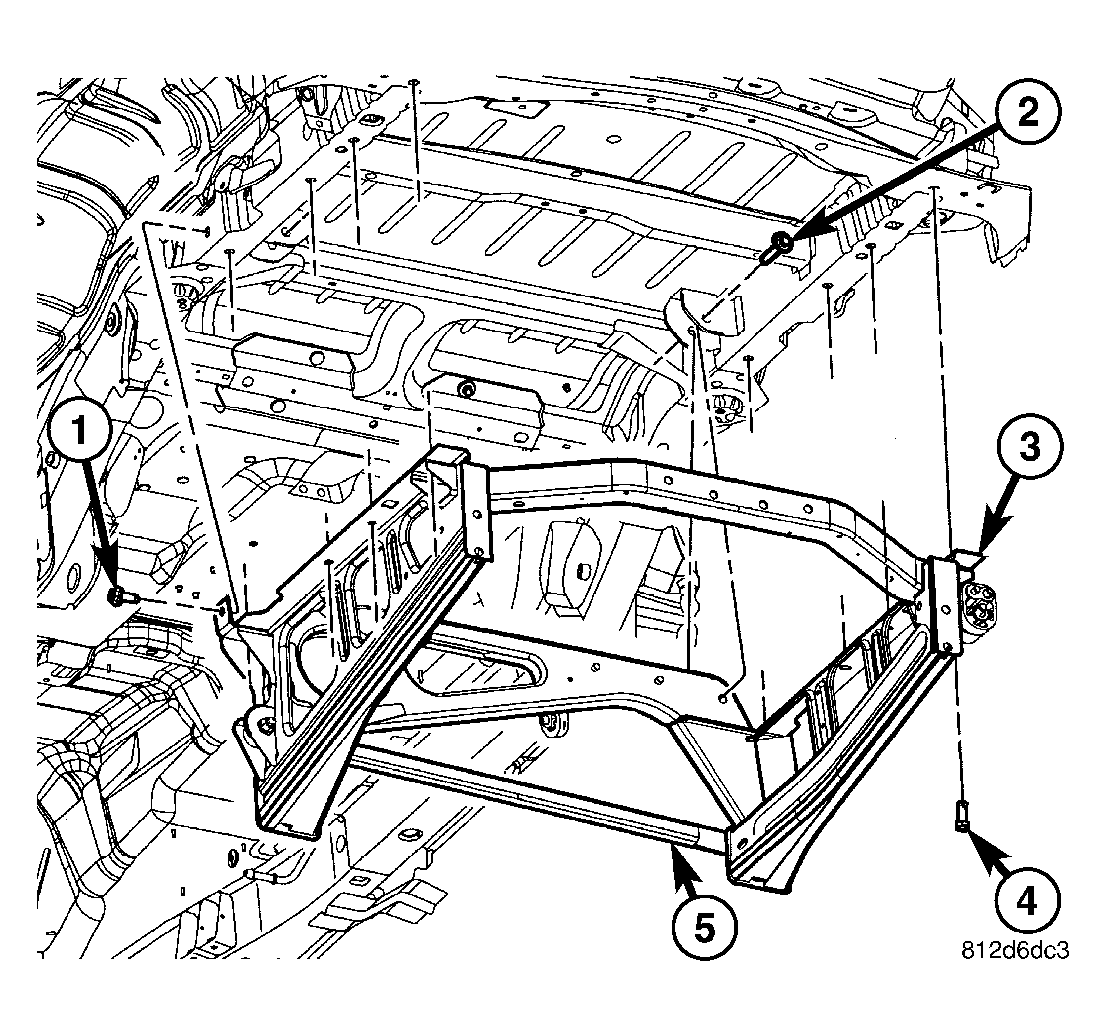
- Install the cradle and install the rail bolts (4).
- Align the cradle to the marks made previously.
- Tighten the bolts (4) to 108 N.m (80 ft. lbs.).
- Install the side cradle bolt (1).
- Tighten the bolt (1) to 108 N.m (80 ft. lbs.).
- Install the upper cradle bolts (2).
- Tighten the bolts (2) to 102 N.m (75 ft. lbs.).
 Courtesy of DAIMLERCHRYSLER CORP.
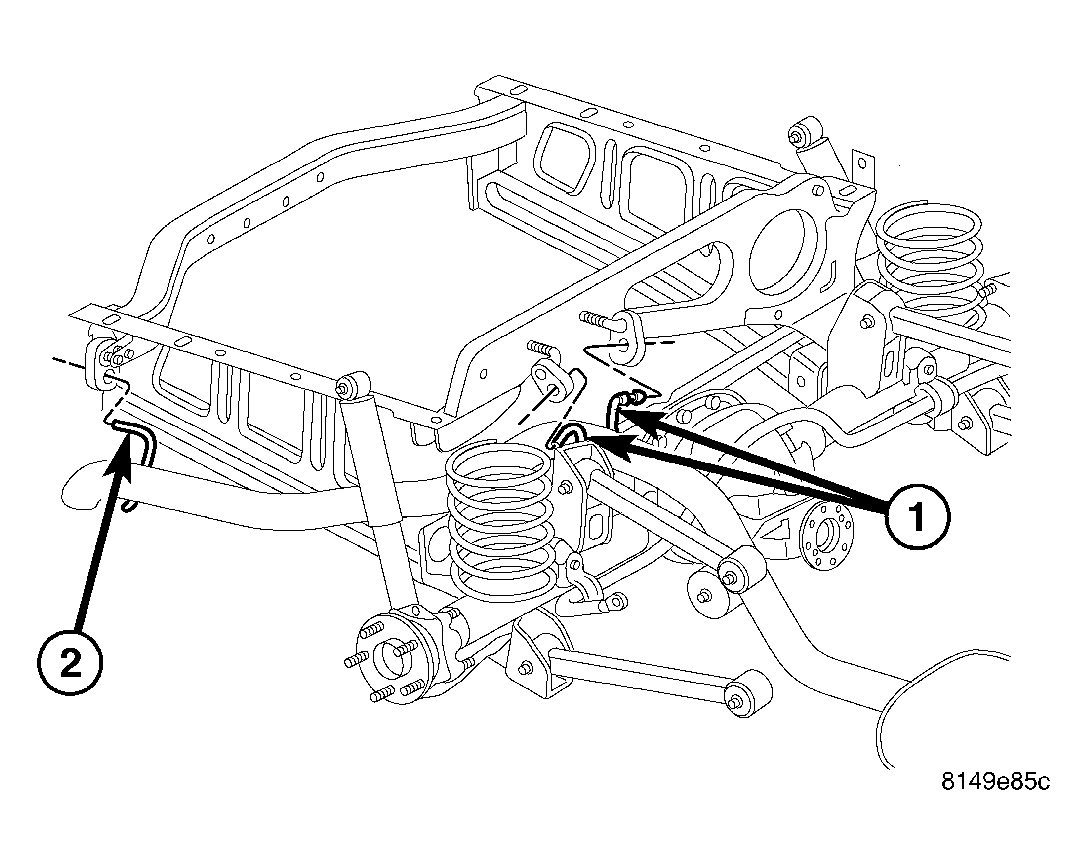
- Connect the exhaust hangers (1 and 2).
 Courtesy of DAIMLERCHRYSLER CORP.
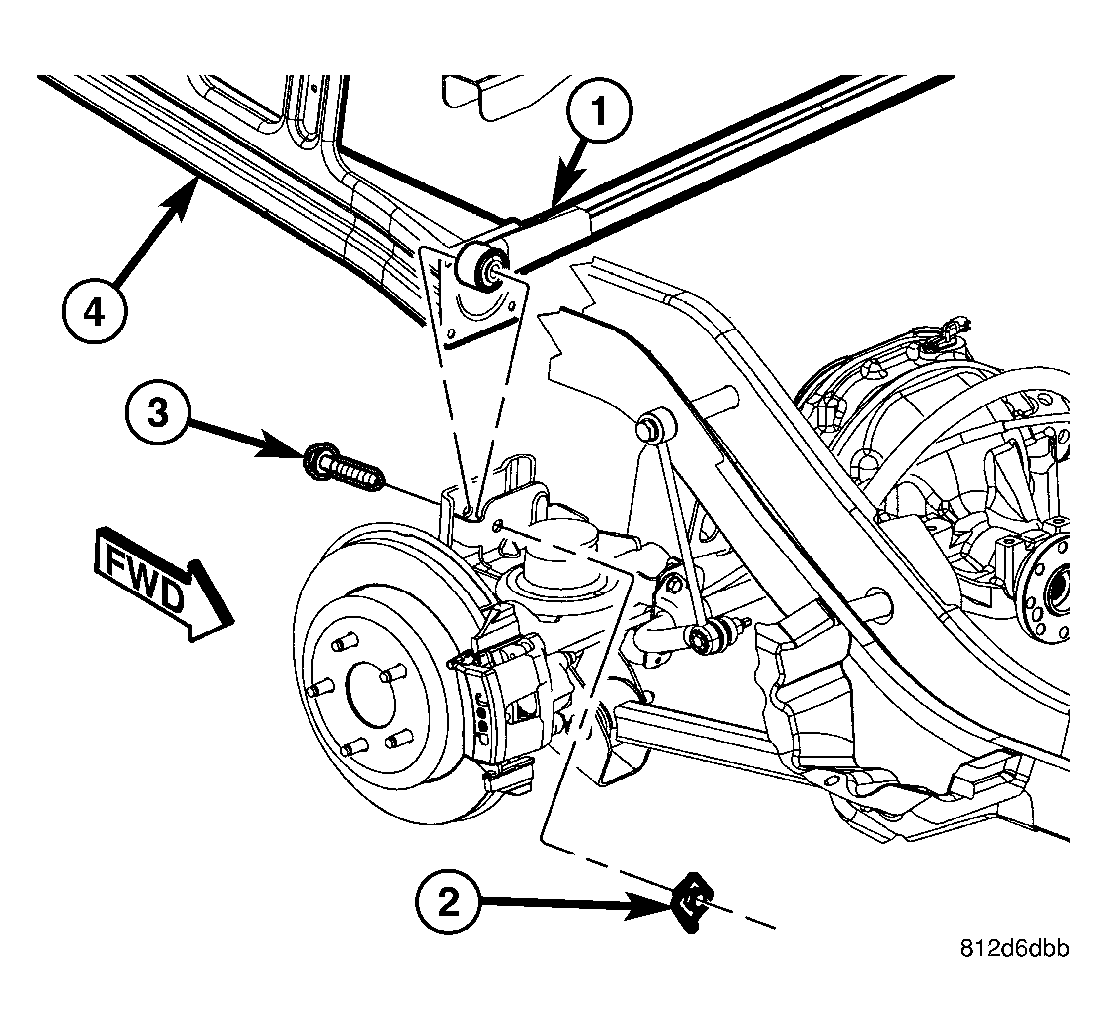
- Attach the track bar (1) and install the outer bolt (3) and nut (2).
- Tighten the bolt (3) to 190 N.m (140 ft. lbs.).
 Courtesy of DAIMLERCHRYSLER CORP.
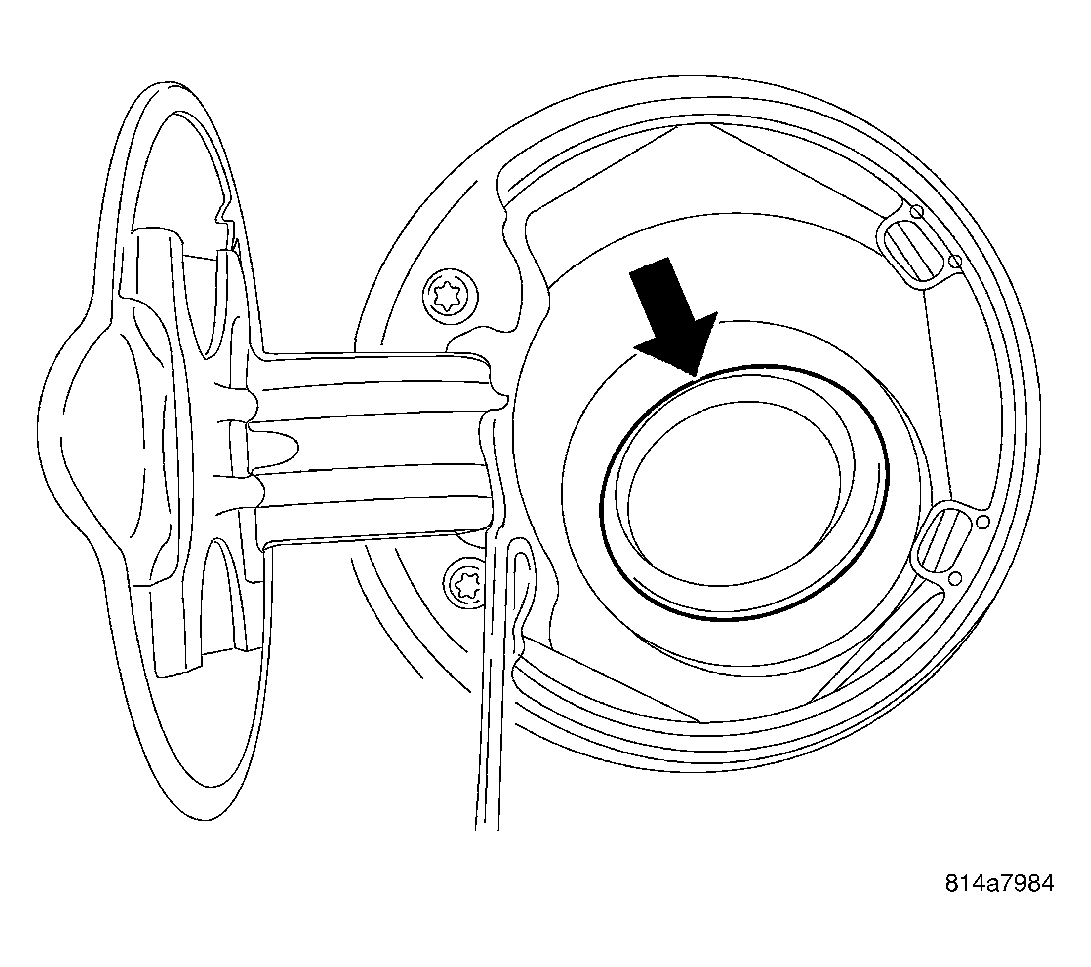
- Verify that the fuel filler tube grommet is in place and lube the grommet to aid installation of the filler tube.
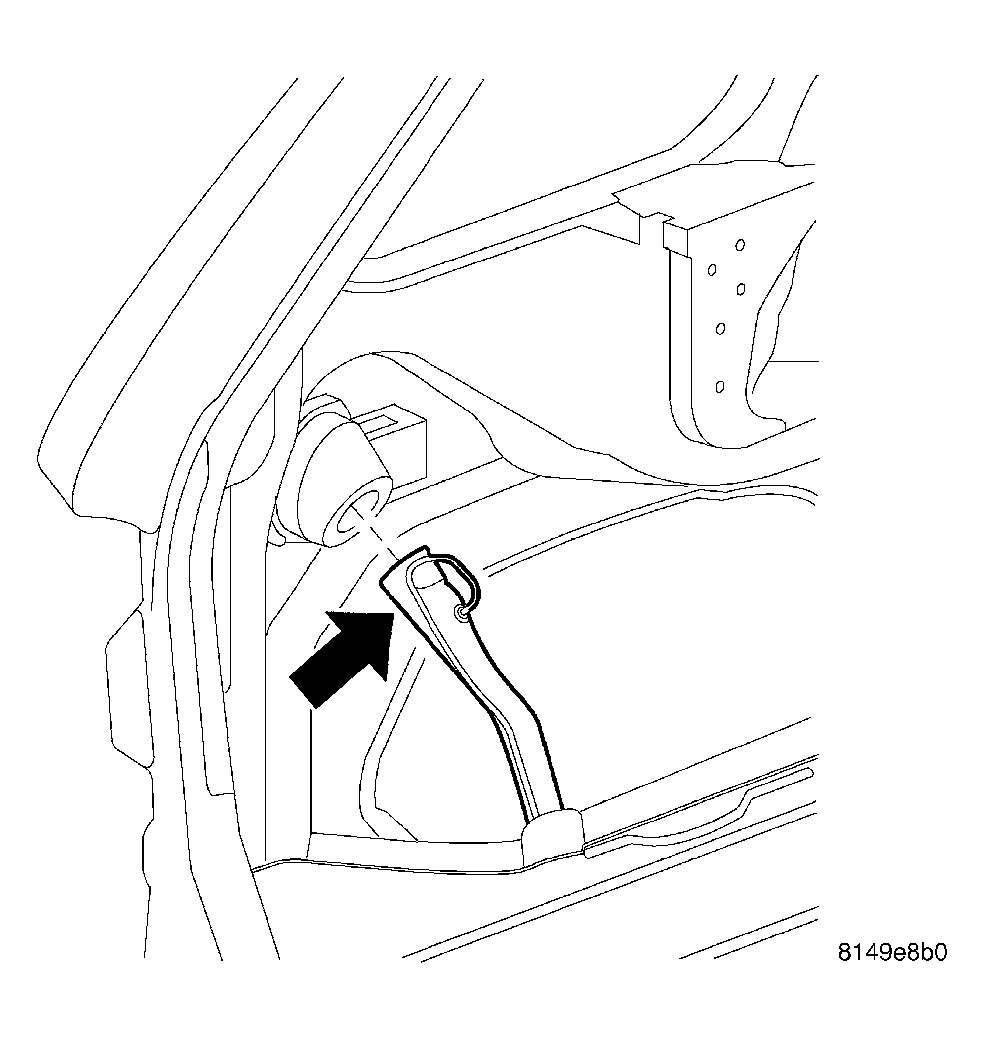 Courtesy of DAIMLERCHRYSLER CORP.
- Install the filler tube through the grommet.
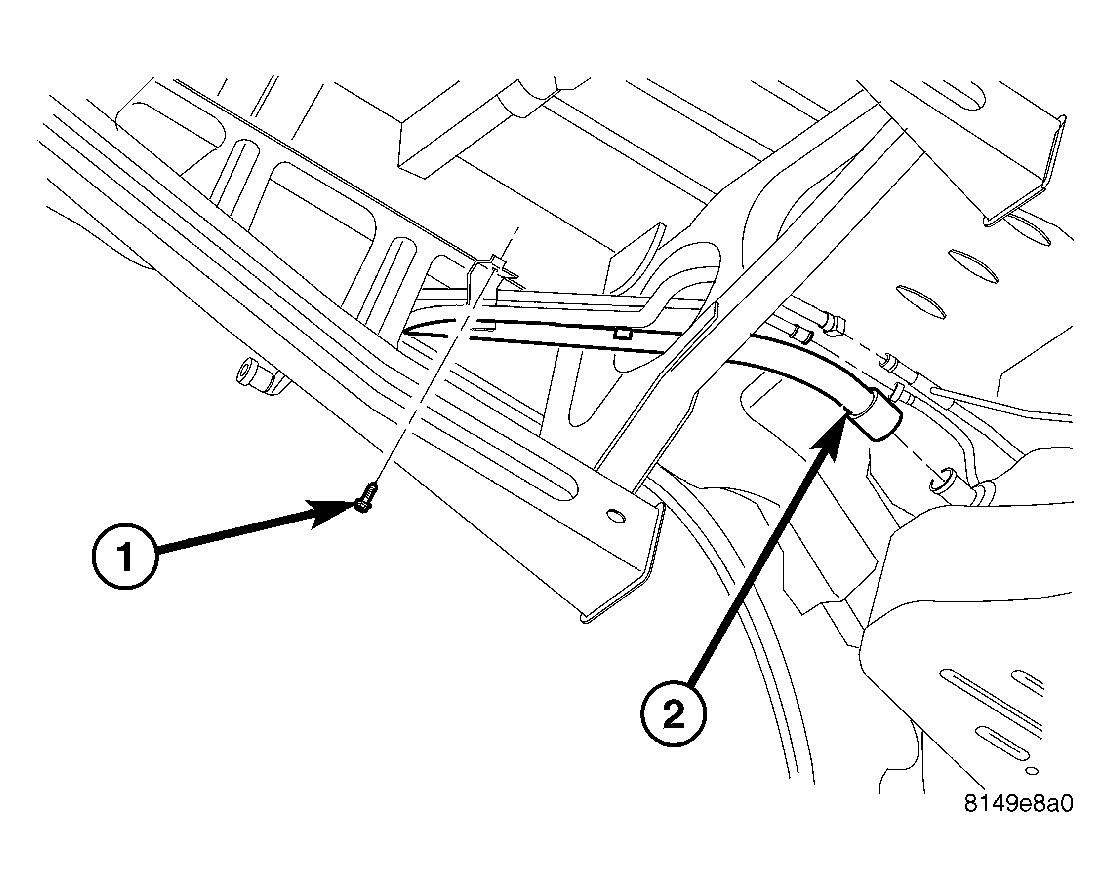 Courtesy of DAIMLERCHRYSLER CORP.
- Install the bolt (1) supporting the fuel filler tube (2) and tighten to 14 N.m (10 ft. lbs.).
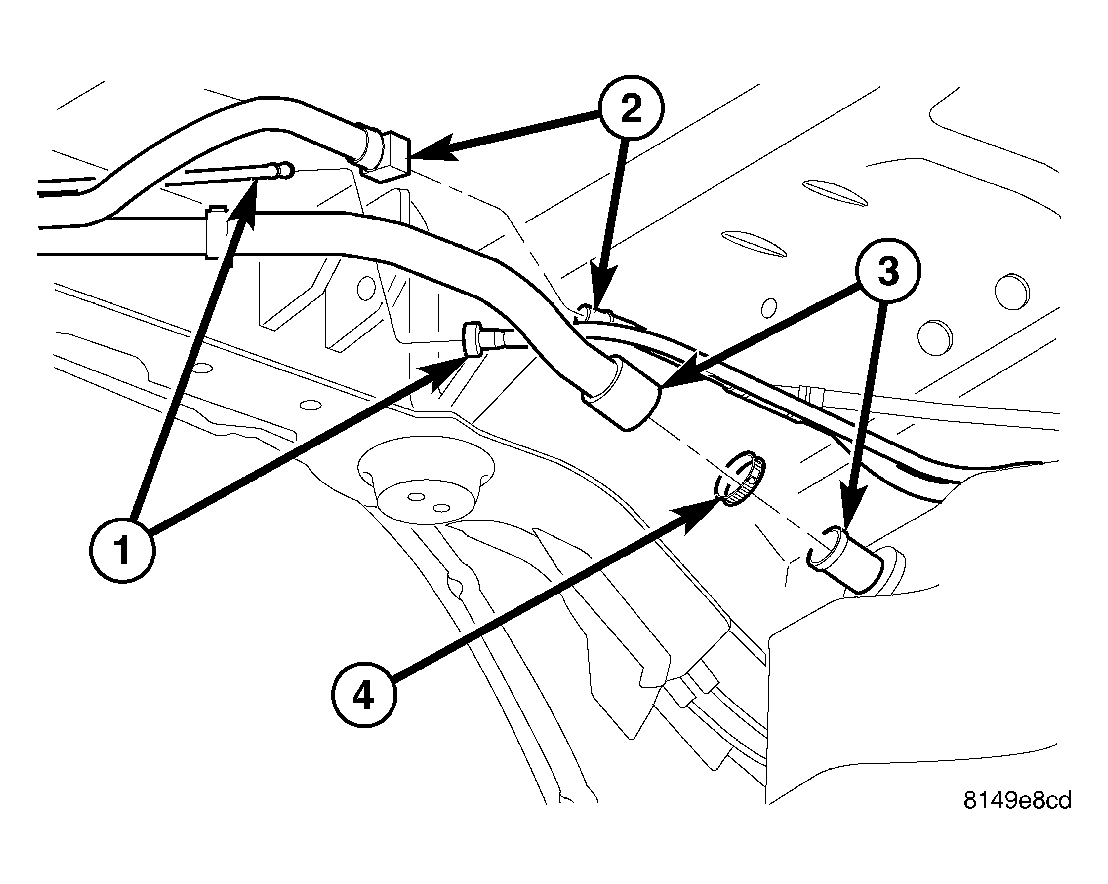 Courtesy of DAIMLERCHRYSLER CORP.
- Connect the fuel filler hose (3) to the fuel tank and install the clamp (4).
- Connect the fuel line (1).
- Connect the vapor canister line (2).
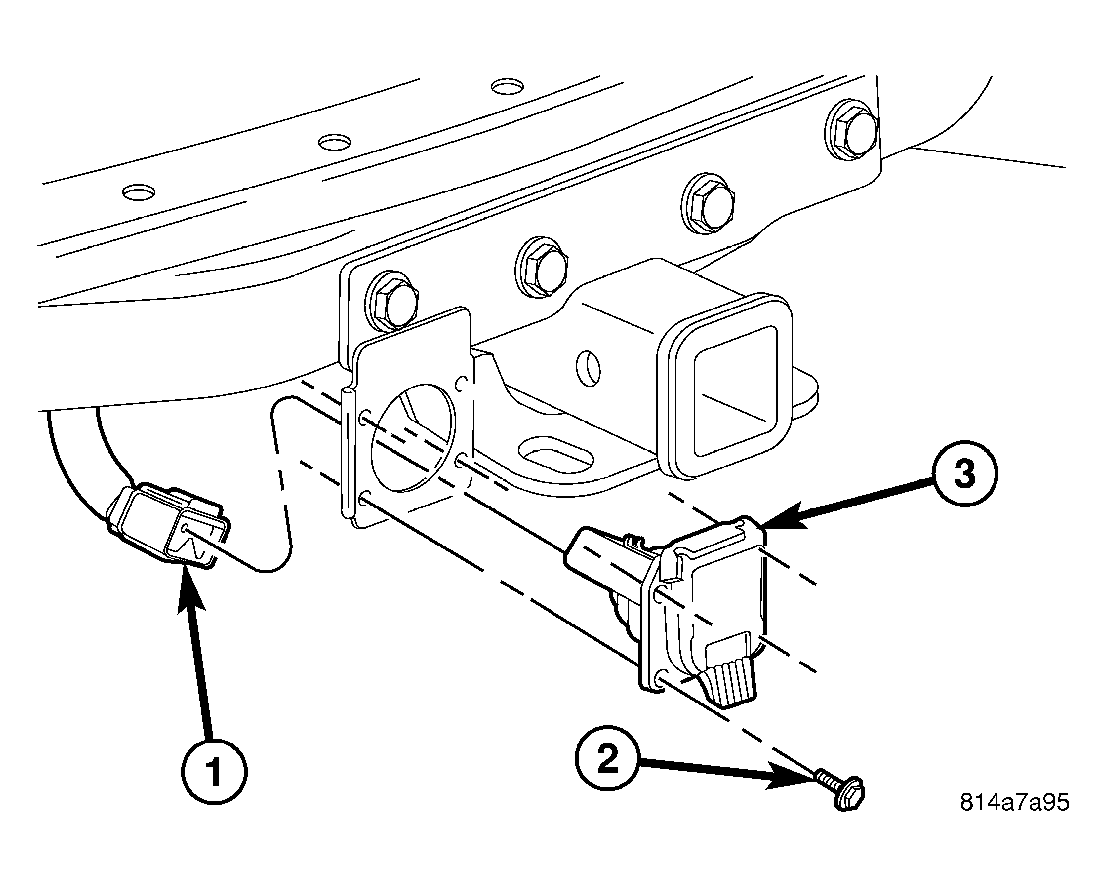 Courtesy of DAIMLERCHRYSLER CORP.
- Connect the trailer wiring electrical connector (1).
 Courtesy of DAIMLERCHRYSLER CORP.
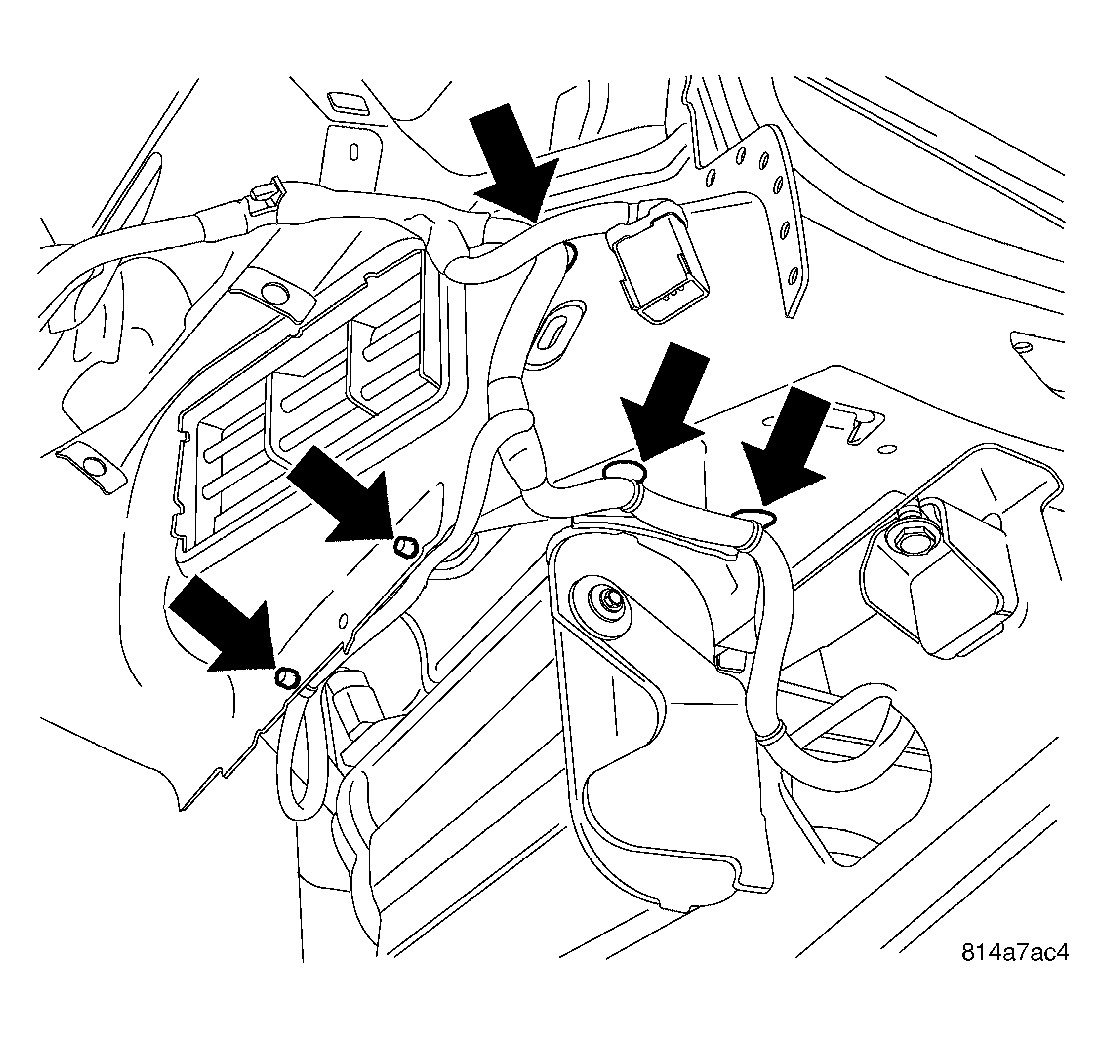
- Position the left wire harness through the cradle and secure the harness hangers.
 Courtesy of DAIMLERCHRYSLER CORP.
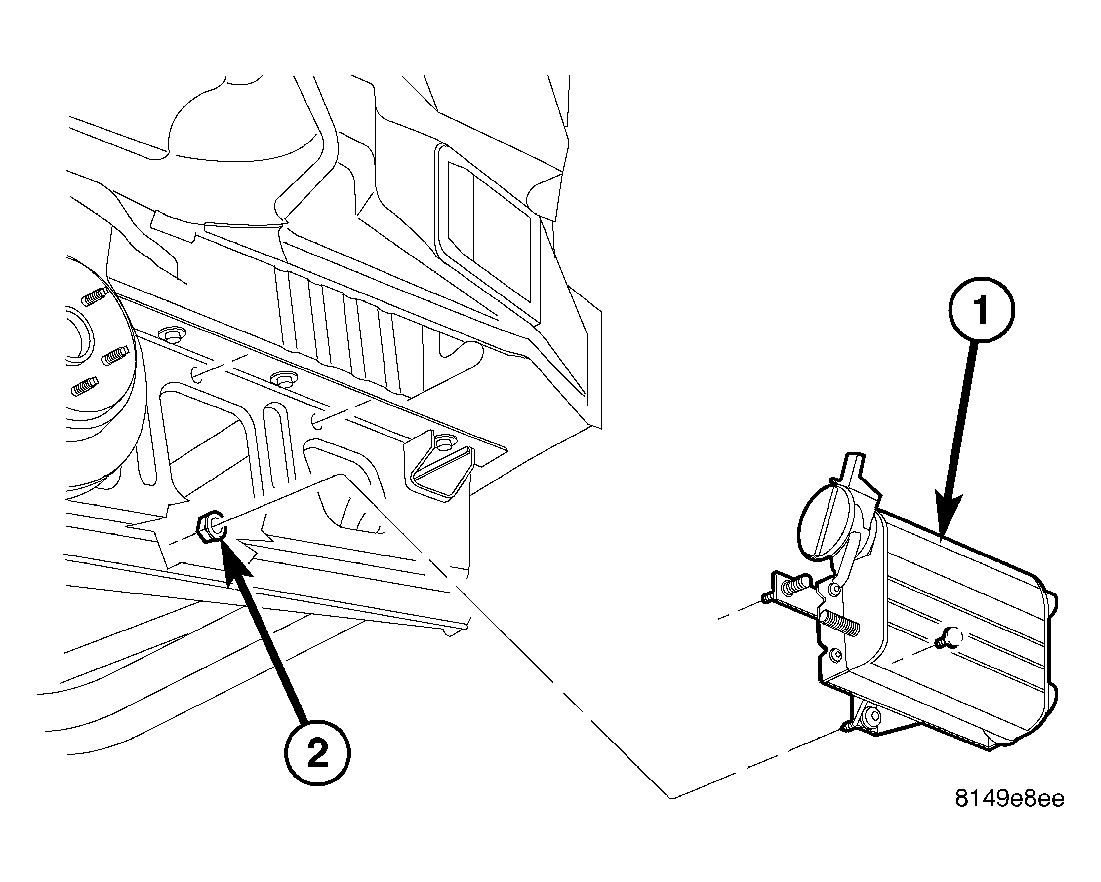
- Install the vapor canister (1) and install the lower canister nut (2).
- Tighten the nuts to 24 N.m (17 ft. lbs.).
 Courtesy of DAIMLERCHRYSLER CORP.
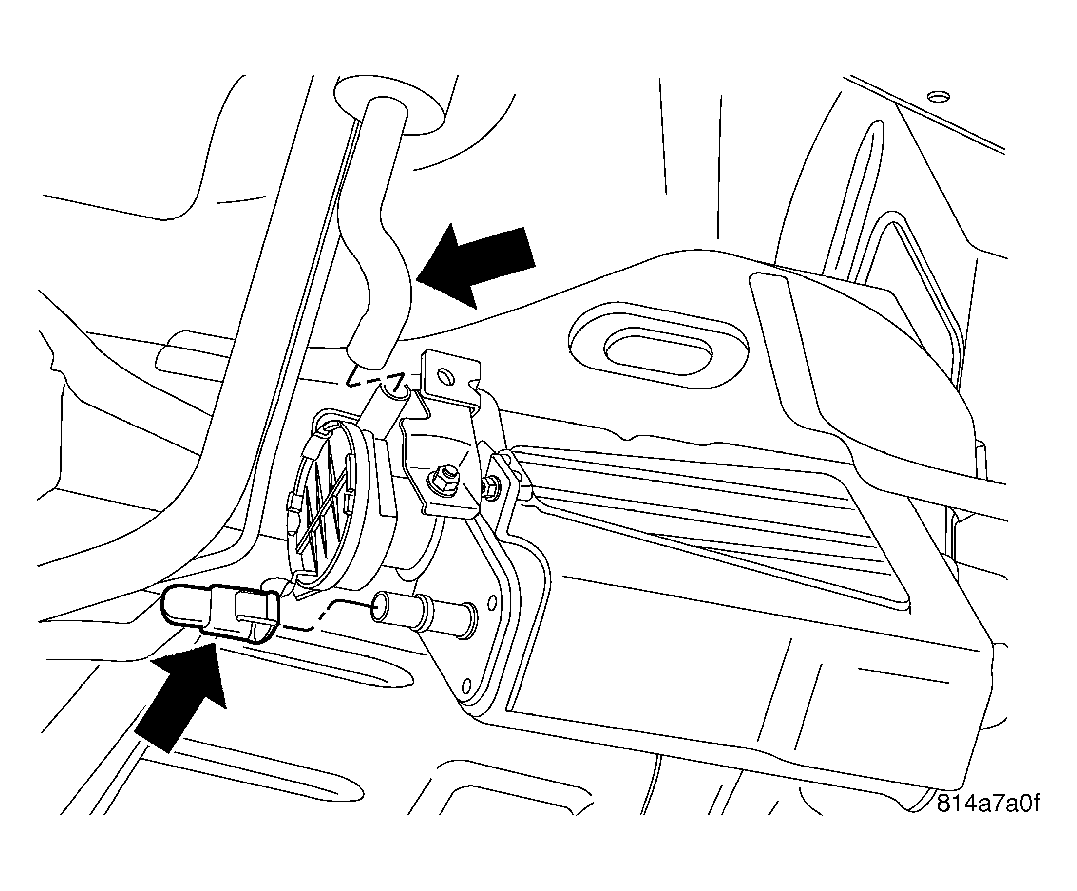
- Connect the vapor canister hoses.
 Courtesy of DAIMLERCHRYSLER CORP.
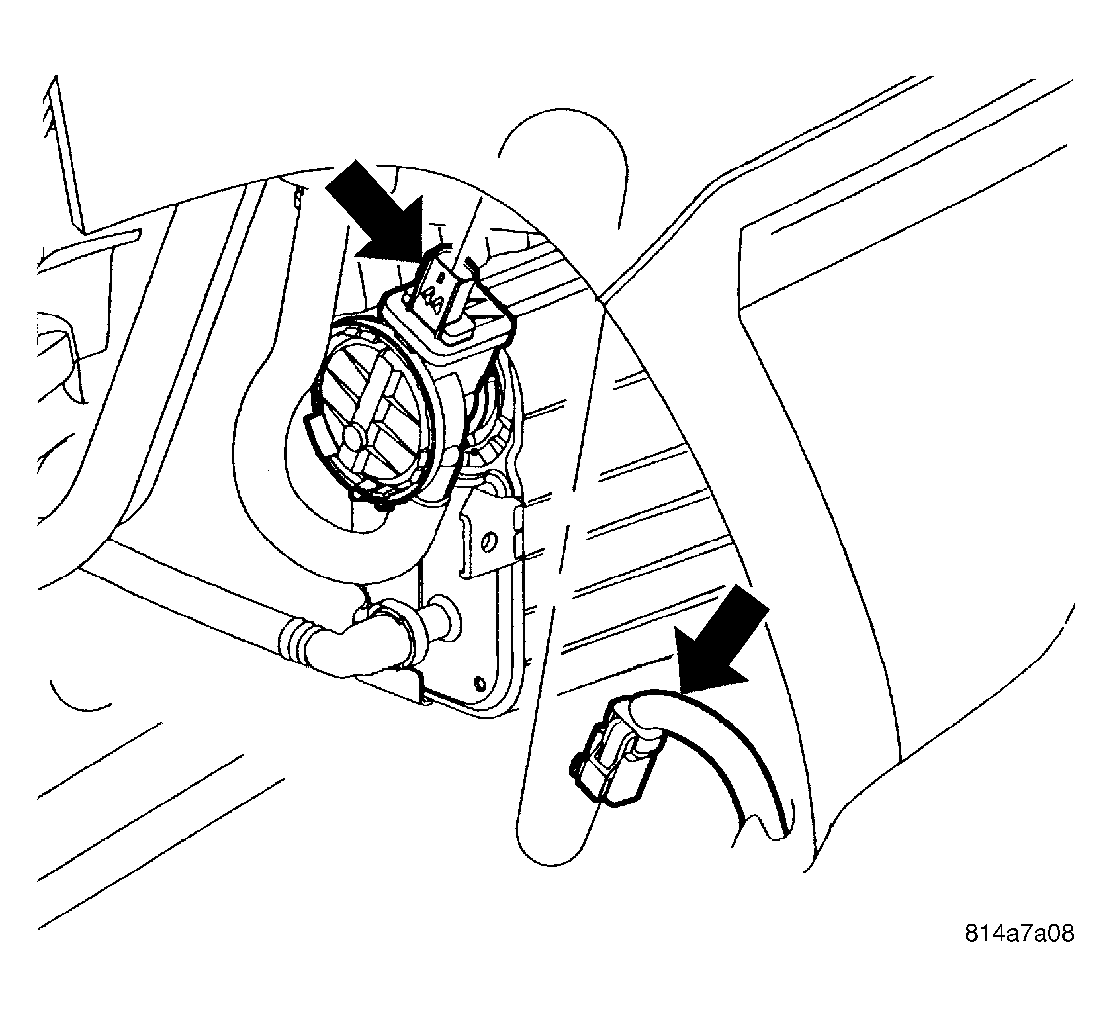
- Connect the vapor canister electrical connector.
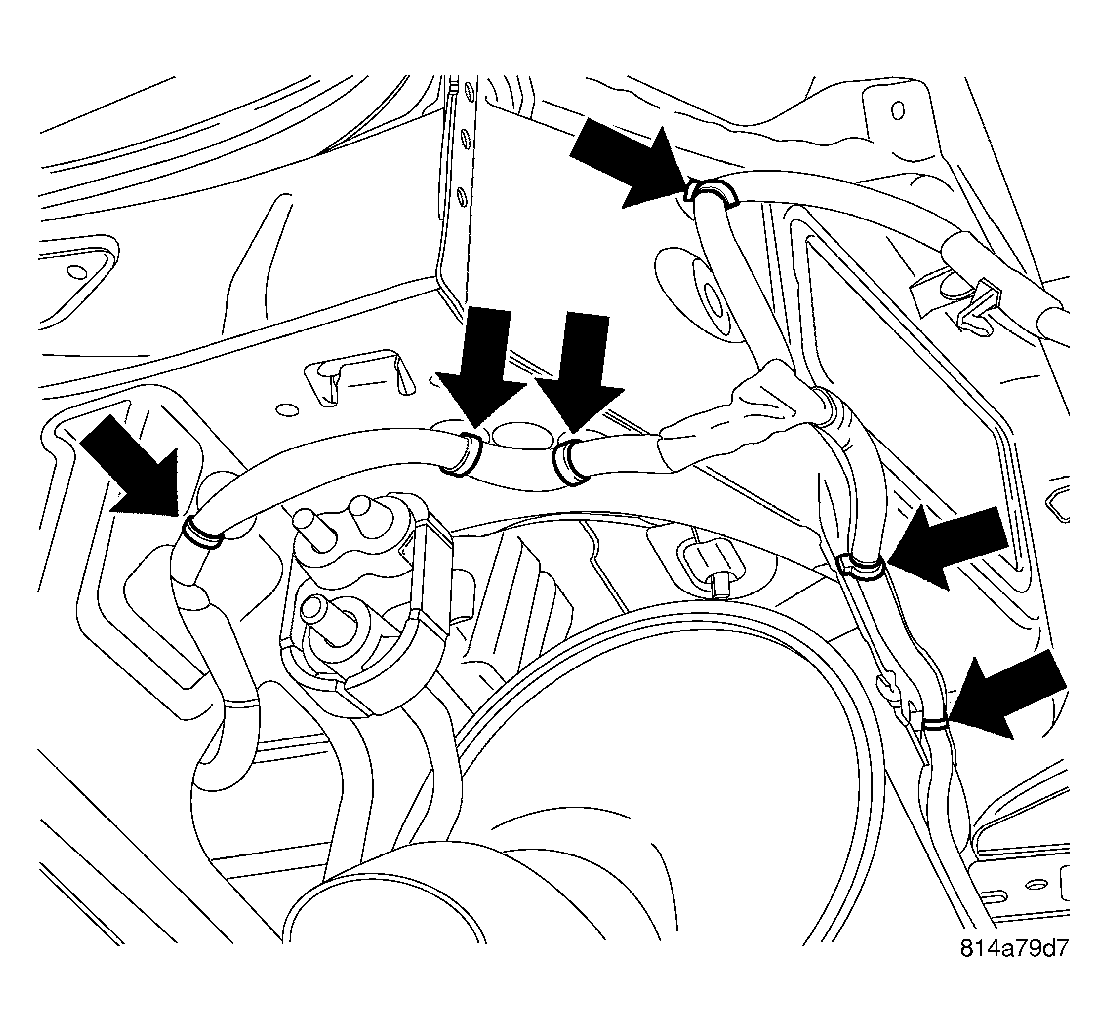 Courtesy of DAIMLERCHRYSLER CORP.
- Position the right wire harness through the cradle and secure the harness hangers.
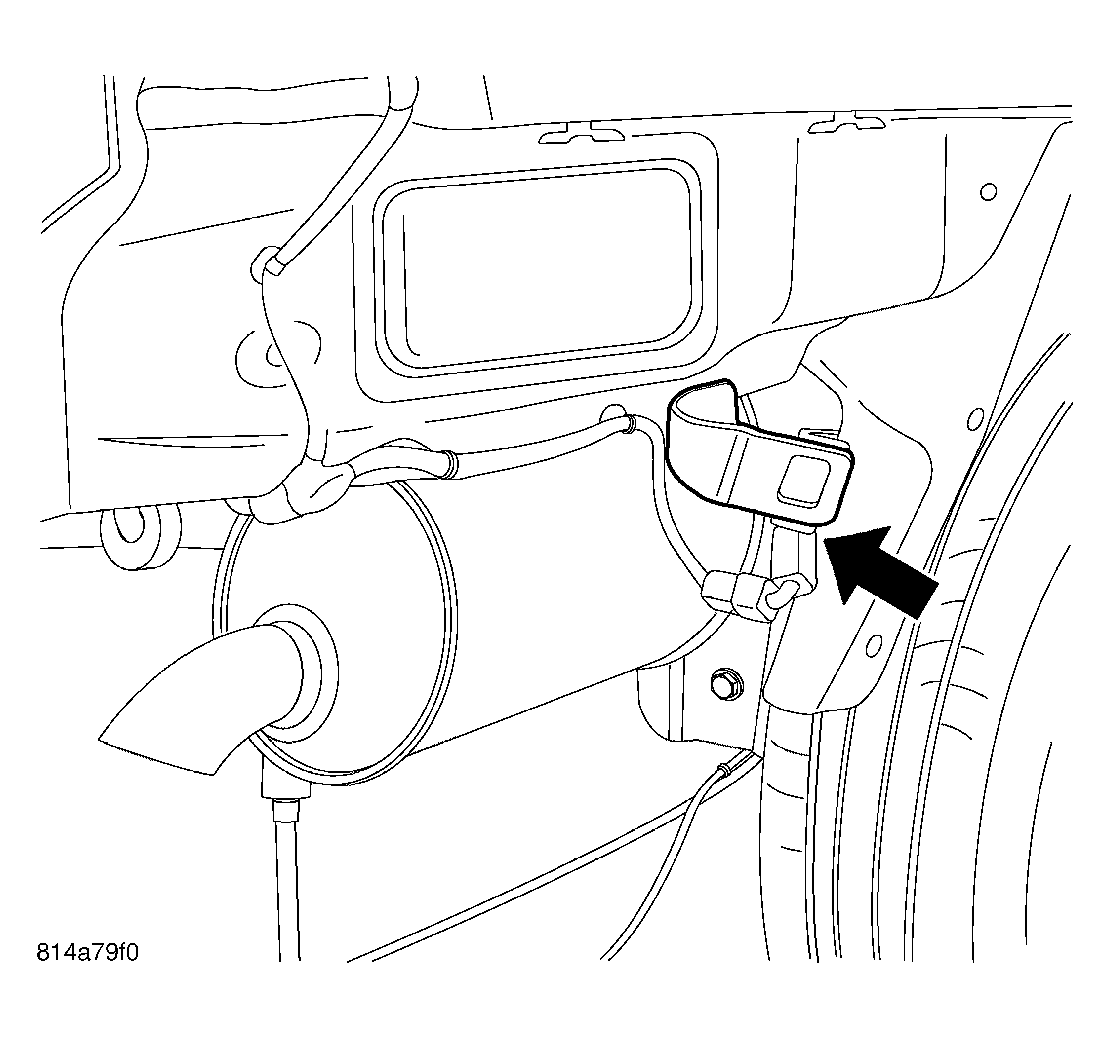 Courtesy of DAIMLERCHRYSLER CORP.
- Connect the tire pressure monitor sensor, if equipped.
- Install the tail lamps.
(Refer to REAR LAMP UNIT - INSTALLATION
).
- Install the fascia. (Refer to FRAME & BUMPERS/BUMPERS/FASCIA-REAR - INSTALLATION) .
- Install the spare wheel.