- Move the vehicle to a 2 post lift. See Raise Vehicle - 2 Post Lift
.
- Connect a laptop with Toolbox 3 to the vehicle. See Toolbox 3 (Connect and Disconnect)
.
- Release the electronic parking brake. See Park Brake Caliper - Release - Toolbox
.
- Disconnect the laptop with Toolbox 3 from the vehicle. See Toolbox 3 (Connect and Disconnect)
.
- Remove the rear underhood apron. See Underhood Apron - Rear (Remove and Replace)
.
- Disconnect LV power. See LV Power (Disconnect and Connect)
.
- Set the high voltage multimeter to DC voltage, lightly touch the probes to the auxiliary battery connector contacts, and verify that the multimeter displays a voltage.
NOTE:
Battery voltage is typically 14.5 to 15.5 volts.
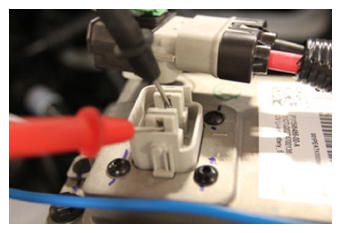 Courtesy of TESLA, INC. Courtesy of TESLA, INC.
|
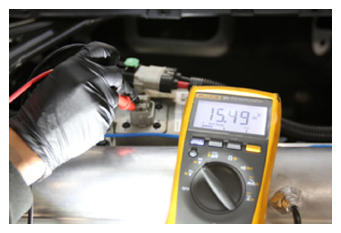 Courtesy of TESLA, INC. Courtesy of TESLA, INC.
|
- Remove the rear wheels. See Wheel (Remove and Install)
.
- Remove the mid aero shield panel. See Panel - Aero Shield - Mid (Remove and Replace)
.
- Perform the vehicle electrical isolation procedure. See Vehicle Electrical Isolation Procedure
.
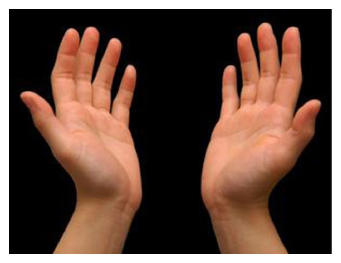
- Remove the leather glove protectors and HV insulating gloves.
 Courtesy of TESLA, INC. Courtesy of TESLA, INC.
|
- Remove the rear fascia diffuser. See Diffuser - Rear Fascia (Remove and Replace)
.
- Remove the LH and RH rear wheel arch liners. See Wheel Arch Liner - Rear - LH (Remove and Replace)
.
- Remove the nut that attaches the rear drive unit ground strap to the body stud, and then remove the ground strap from the stud.
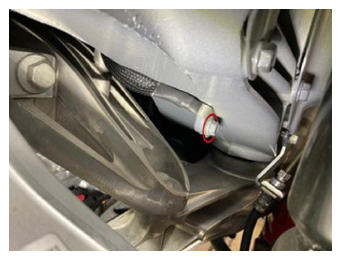 Courtesy of TESLA, INC. Courtesy of TESLA, INC.
|
- Disconnect the electrical harness from the LH rear active damper connectors (x2) and release the grommet that attaches the electrical harness to the damper.
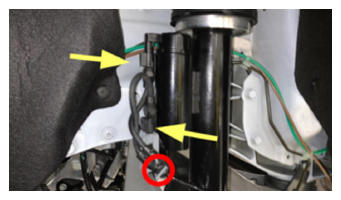 Courtesy of TESLA, INC. Courtesy of TESLA, INC.
|
- Release the connector red locking tab, and then disconnect the electrical harness from the LH electronic parking brake motor connector.
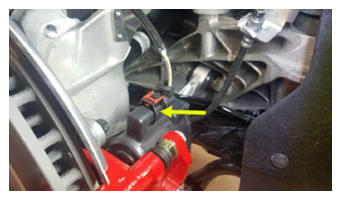 Courtesy of TESLA, INC. Courtesy of TESLA, INC.
|
- Release the fir tree clip that attaches the electrical harness to the LH lower control arm.
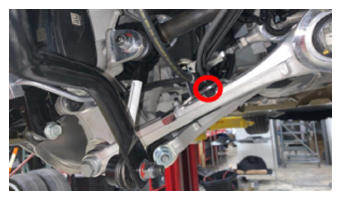 Courtesy of TESLA, INC. Courtesy of TESLA, INC.
|
- Remove the bolt that attaches the LH rear jounce hose to LH rear lower control arm, and then separate the jounce hose from the control arm.
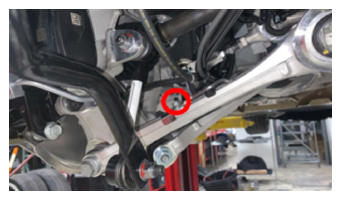 Courtesy of TESLA, INC. Courtesy of TESLA, INC.
|
- Remove and discard the nut that attaches the LH rear stabilizer bar link to the rear stabilizer bar, and then remove the link from the stabilizer bar.
NOTE:
To prevent ball joint damage, use a 5 mm Allen wrench to prevent the LH link ball joint stud from turning while removing the nut.
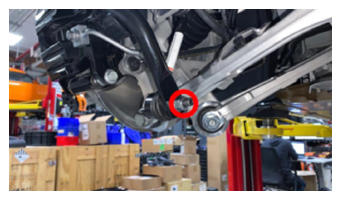 Courtesy of TESLA, INC. Courtesy of TESLA, INC.
|
- Remove the bolts (x2) that attach the LH rear brake caliper to the LH rear knuckle.
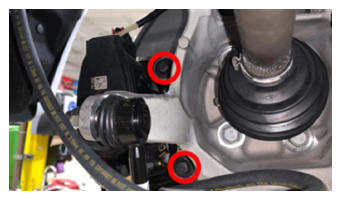 Courtesy of TESLA, INC. Courtesy of TESLA, INC.
|
- Remove the LH rear brake caliper from the LH rear knuckle, and then hang the caliper from an S-hook.
NOTE:
Route the jounce hose so that it does not get caught on the stabilizer bar.
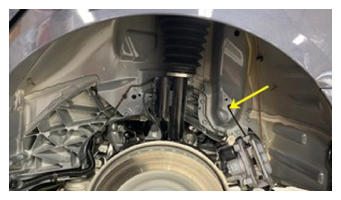 Courtesy of TESLA, INC. Courtesy of TESLA, INC.
|
- If the retention screw is missing from the LH rear rotor, remove the rotor from the LH rear hub.
NOTE:
Without the retention screw in place, the rotor might fall off the hub in subsequent steps.
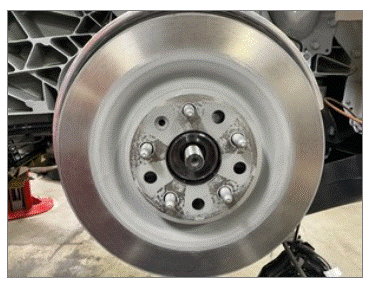 Courtesy of TESLA, INC. Courtesy of TESLA, INC.
|
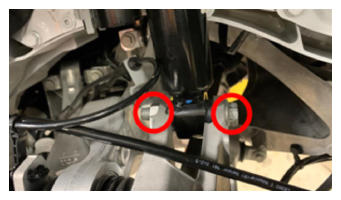
- Remove the nut that attaches the LH rear active damper to the LH rear knuckle.
NOTE:
Do not remove the bolt.
 Courtesy of TESLA, INC. Courtesy of TESLA, INC.
|
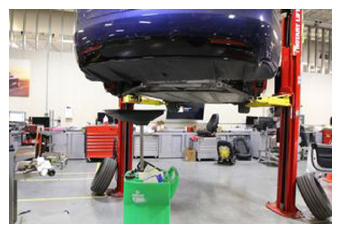
- Position a coolant drain collector underneath the LH rear of the HV battery.
 Courtesy of TESLA, INC. Courtesy of TESLA, INC.
|
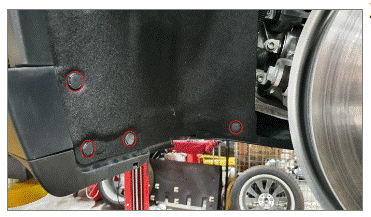
- Release the clips (x4) that attach the lower front of the LH rear wheel arch liner to the LH wheel fairing, and move the liner aside for access.
 Courtesy of TESLA, INC. Courtesy of TESLA, INC.
|
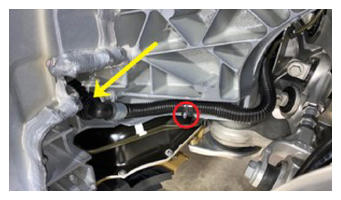
- Release the clip that attaches the powertrain coolant supply hose to the LH rear casting, release the clip and disconnect the powertrain coolant supply hose from the powertrain coolant side sill supply hose, and then immediately plug both fittings.
NOTE:
Use a clean shop towel to wipe up any spilled coolant.
 Courtesy of TESLA, INC. Courtesy of TESLA, INC.
|
- Repeat step 15 through step 25 for the RH side of the vehicle.
NOTE:
On the RH side, there is the powertrain coolant return hose and the powertrain coolant side sill return hose.
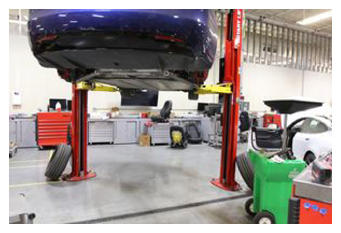
- Remove the coolant drain container from underneath the vehicle.
 Courtesy of TESLA, INC. Courtesy of TESLA, INC.
|
- Remove the LH and RH rear subframe shear plates. See Shear Plate - Rear Subframe - LH (Remove And Replace) .
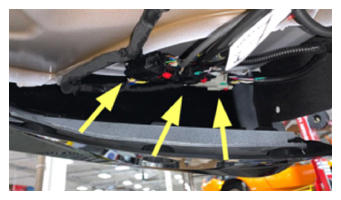
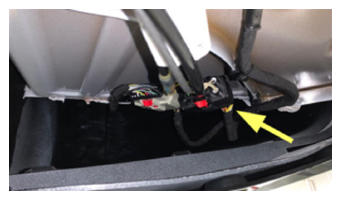
- Release the connector red locking tabs, and then disconnect the rear subframe electrical harness connectors (x4) from the main electrical harness.
 Courtesy of TESLA, INC. Courtesy of TESLA, INC.
|
 Courtesy of TESLA, INC. Courtesy of TESLA, INC.
|
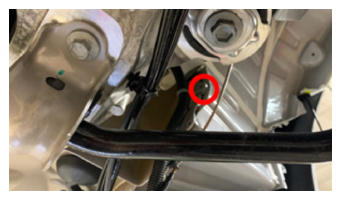
- Release the clip that attaches the rear subframe electrical harness from the LH wheel well.
 Courtesy of TESLA, INC. Courtesy of TESLA, INC.
|
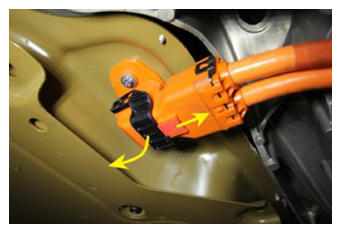
- Slide the red connector locking tab, open the black release lever, and then disconnect the rear drive unit LH HV harness from the HV battery.
NOTE:
Repeat for the rear drive unit RH HV harness.
 Courtesy of TESLA, INC. Courtesy of TESLA, INC.
|
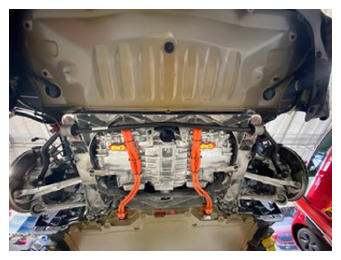
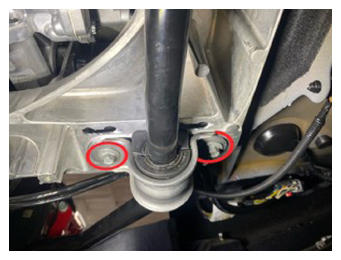
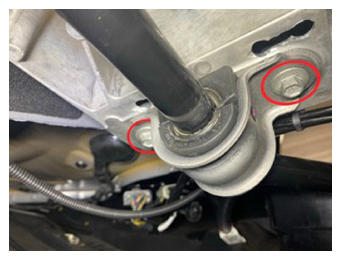
- Remove the bolts (x4) that attach the rear stabilizer bar to the rear subframe, and then remove the stabilizer bar from the subframe.
 Courtesy of TESLA, INC. Courtesy of TESLA, INC.
|
 Courtesy of TESLA, INC. Courtesy of TESLA, INC.
|
 Courtesy of TESLA, INC. Courtesy of TESLA, INC.
|
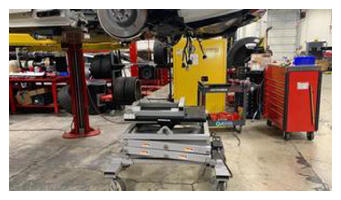
- Position the subframe lift underneath the rear subframe.
 Courtesy of TESLA, INC. Courtesy of TESLA, INC.
|
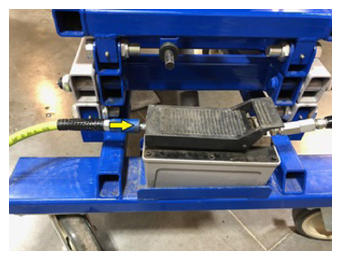
- Connect the supply air hose to the subframe lift.
 Courtesy of TESLA, INC. Courtesy of TESLA, INC.
|
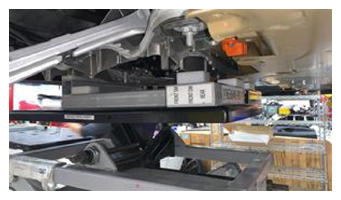
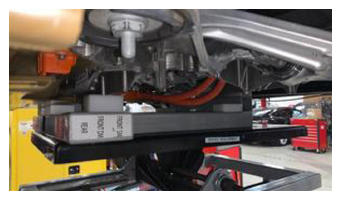
- Raise the subframe lift to the vehicle subframe, and preload.
NOTE:
If the vehicle is too high, lower the subframe lift, lower the vehicle, and then raise the subframe lift.
 Courtesy of TESLA, INC. Courtesy of TESLA, INC.
|
 Courtesy of TESLA, INC. Courtesy of TESLA, INC.
|
- Route a ratchet strap between the rear drive unit and the subframe lift, and then use the ratchet strap to secure the drive unit to the lift.
- Loosen, but do not remove the bolts (x4) that attach the rear subframe to the body.
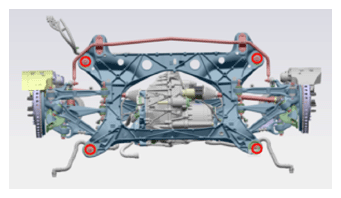 Courtesy of TESLA, INC. Courtesy of TESLA, INC.
|
- Use a power tool to remove the bolts (x4) that attach the rear subframe to the body.
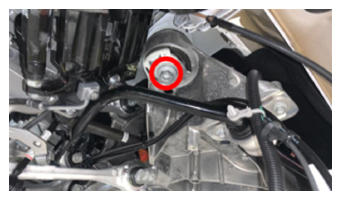 Courtesy of TESLA, INC. Courtesy of TESLA, INC.
|
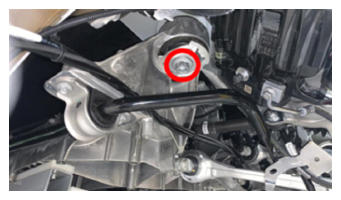 Courtesy of TESLA, INC. Courtesy of TESLA, INC.
|
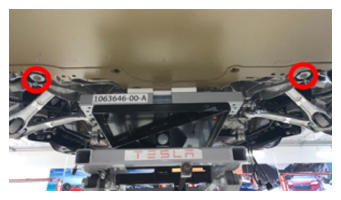 Courtesy of TESLA, INC. Courtesy of TESLA, INC.
|
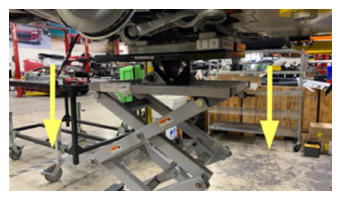
- Slightly lower the subframe lift to unload the rear active dampers.
 Courtesy of TESLA, INC. Courtesy of TESLA, INC.
|
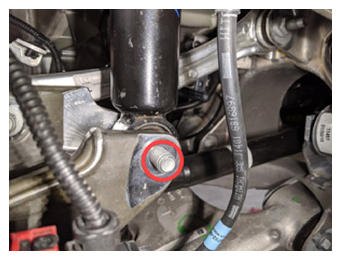
- Remove the bolt attaching the LH rear active damper to the LH rear knuckle.
NOTE:
Adjust the subframe lift height as necessary to relieve loading on the bolt.
 Courtesy of TESLA, INC. Courtesy of TESLA, INC.
|
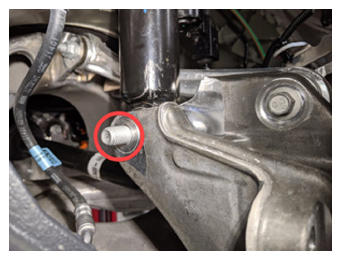
- Remove the bolt attaching the RH rear active damper to the RH rear knuckle.
NOTE:
Adjust the subframe lift height as necessary to relieve loading on the bolt.
 Courtesy of TESLA, INC. Courtesy of TESLA, INC.
|
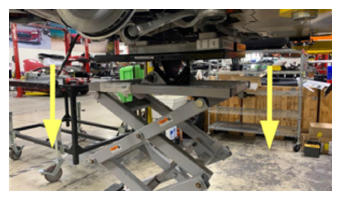
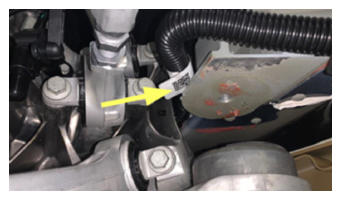
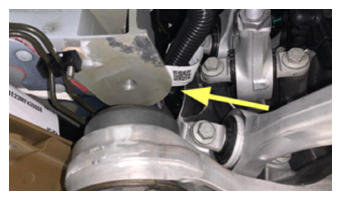
- With the help of an assistant, fully lower the subframe lift.
CAUTION:
Move and tilt the subframe lift as it is lowered to make sure that the coolant hoses don't get caught, or that the HV battery is damaged by the front motor mount of the rear subframe.
 Courtesy of TESLA, INC. Courtesy of TESLA, INC.
|
 Courtesy of TESLA, INC. Courtesy of TESLA, INC.
|
 Courtesy of TESLA, INC. Courtesy of TESLA, INC.
|
- Disconnect the supply air hose from the subframe lift.
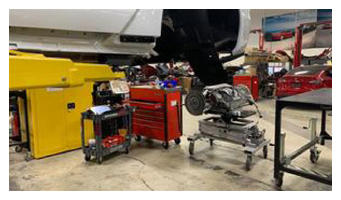
- Move the rear subframe out from under the vehicle.
 Courtesy of TESLA, INC. Courtesy of TESLA, INC.
|