Module - 2nd Row Seat Controller - LH - Remove And Replace: Installation
- Use a pick to remove the 2 covers that cover the screws on the bottom of the seat.
- Remove the screws that secure the lower trim panel to the bottom of the seat frame.
- Use a trim tool to release the clips that secure the lower trim panel to the bottom of the seat frame, and then release the trim panel.
- Check the forward end of the pitch mechanism for a hall-effect sensor and sensor wire:
| Without hall-effect sensor |
Without hall-effect sensor |
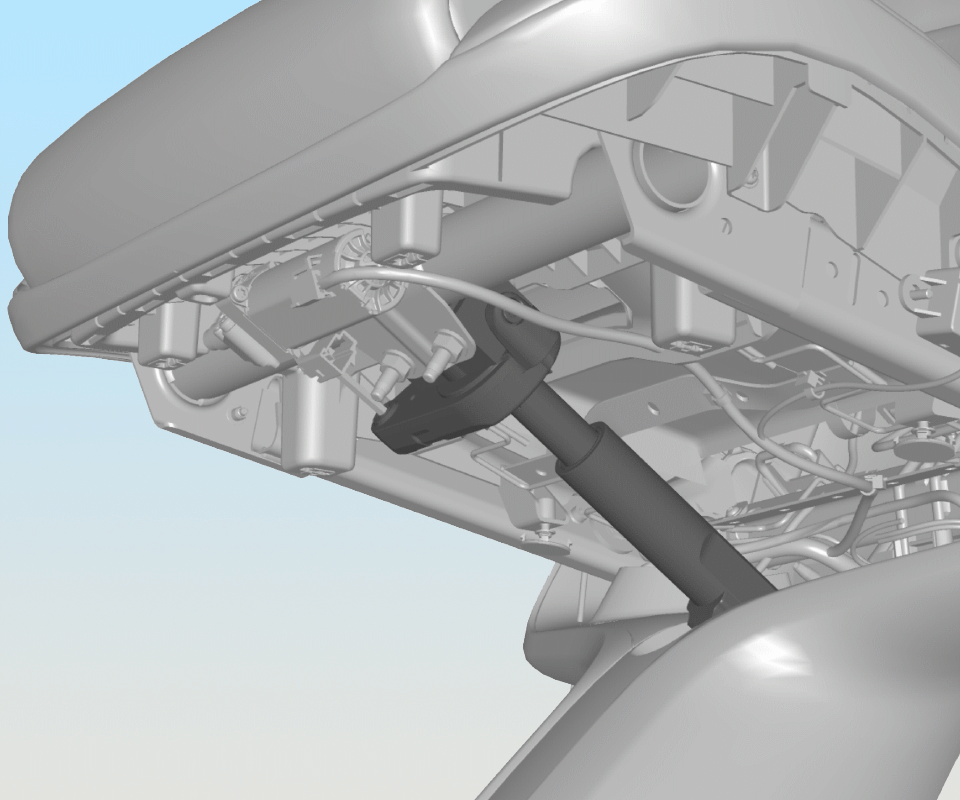 Courtesy of TESLA, INC. Courtesy of TESLA, INC.
|
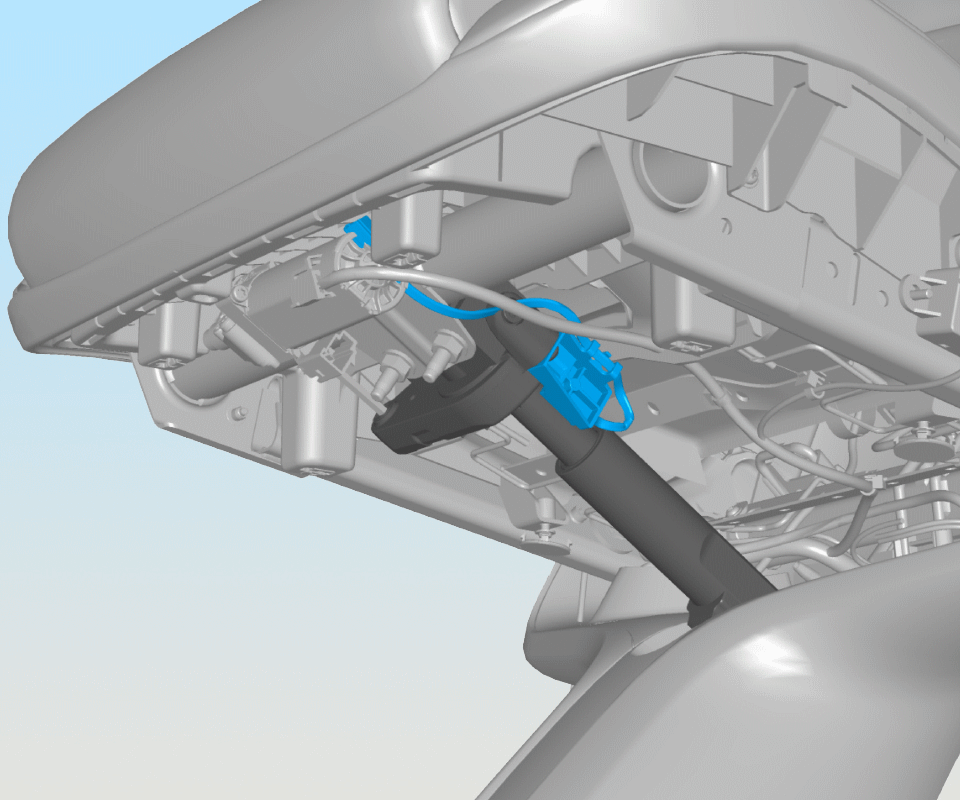 Courtesy of TESLA, INC. Courtesy of TESLA, INC.
|
- Connect a laptop with Toolbox 3 to the vehicle. See Toolbox 3 (Connect And Disconnect)
.
- Unlock the vehicle gateway. See Gateway Unlock
.
- To enable seat install mode, in Toolbox 3, click the Actions
tab, type "Seat-Install" into the search field, click PROC_BCREAR_X_SEAT-INSTALL-MODE-ON
, click Run, and allow the routine to complete.
- Remove the LH 2nd row seat back cover. See Cover - Seat Back - 2nd Row - LH (Without 2nd Row Bench Seats) (Remove And Replace)
- Disconnect the electrical harness from the seat controller module connectors.
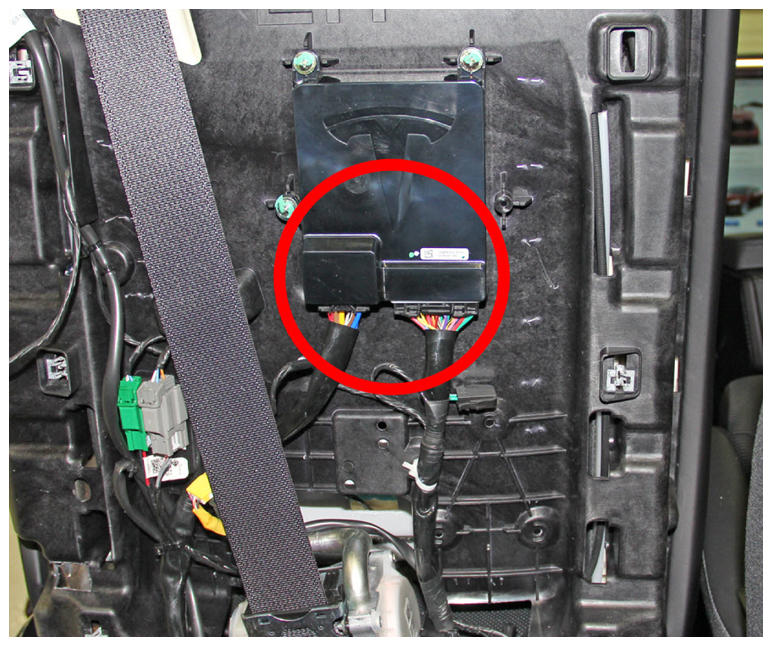 Courtesy of TESLA, INC. Courtesy of TESLA, INC.
|
- Remove the fasteners that attach the seat controller module to the seat back.
- Remove the seat controller module from the vehicle.
- Install the seat controller module to the seat back, and then install the fasteners that secure the module to the seat back (torque 1 N.m).
- Connect the electrical harness to the seat controller module connectors.
Courtesy of TESLA, INC.
|
- Install the LH 2nd row seat back cover. See Cover - Seat Back - 2nd Row - LH (Without 2nd Row Bench Seats) (Remove And Replace) .
- Install the lower trim panel to the bottom of the seat frame, and then fasten the clips that attach the panel to the frame.
- Install the screws that attach the lower trim panel to the bottom of the seat frame.
- Install the covers (x2) over the screws on the bottom of the seat.
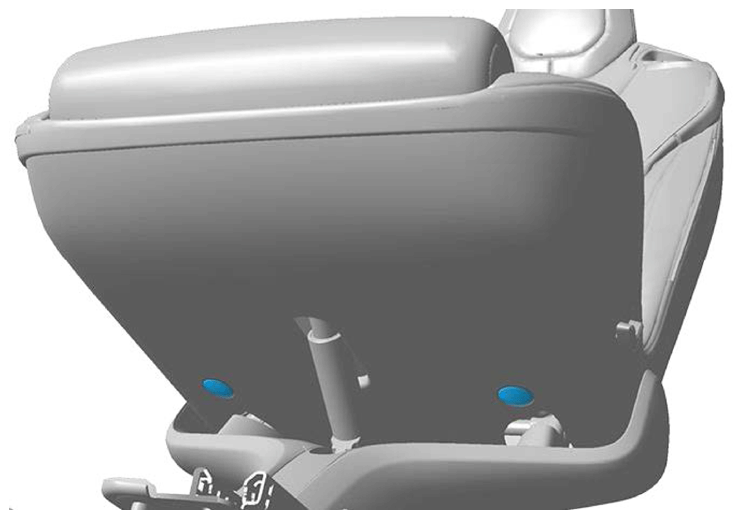 Courtesy of TESLA, INC. Courtesy of TESLA, INC.
|
- Connect a laptop with Toolbox 3 to the vehicle. See Toolbox 3 (Connect And Disconnect)
.
- Unlock the vehicle gateway. See Gateway Unlock
.
- To disable seat install mode, in Toolbox 3, click the Actions
tab, type "Seat-Install" into the search field, click PROC_BCREAR_X_SEAT-INSTALL-MODE-OFF,
click Run
, and allow the routine to complete.
- Calibrate the seat controller module:
- LH Seat
- In Toolbox 3, click the Actions
tab, type "PROC_BCS2L" in the search field, click PROC_BCS2L_R2-L_CALIBRATE-S2L-TRACK
, click Run
, and allow the routine to complete.
- In Toolbox 3, click the Actions
tab, type "PROC_BCS2L" in the search field, click PROC_BCS2L_R2-L_CALIBRATE-S2L-PITCH
, click Run
, and allow the routine to complete.
- Center Seat
- In Toolbox 3, click the Actions
tab, type "PROC_BCS2C" in the search field, click PROC_BCS2C_R2-C_CALIBRATE-S2C-TRACK
, click Run
, and allow the routine to complete.
- In Toolbox 3, click the Actions
tab, type "PROC_BCS2C" in the search field, click PROC_BCS2C_R2-C_CALIBRATE-S2C-PITCH
, click Run
, and allow the routine to complete.
- RH Seat
- In Toolbox 3, click the Actions
tab, type "PROC_BCS2R" in the search field, click PROC_BCS2R_R2-R_CALIBRATE-S2R-PITCH
, click Run
, and allow the routine to complete.
- In Toolbox 3, click the Actions
tab, type "PROC_BCS2R" in the search field, click PROC_BCS2R_R2-R_CALIBRATE-S2R-PITCH
, click Run
, and allow the routine to complete.
- Perform a software reinstall. See Firmware Reinstall - Toolbox
.
- Once all Toolbox 3 routines have been completed, disconnect the laptop with Toolbox 3 from the vehicle. See Toolbox 3 (Connect And Disconnect)
.