Air Spring Module - Front - RH - Remove And Replace: Removal
- Remove the rear center apron and inspect the vehicle for a Schrader fill valve on the RH shock tower. See UNDERHOOD APRON - CENTER - REAR (REMOVE AND REPLACE)
.
- If the vehicle does not have a Schrader fill valve, install it now. See FILL VALVE - AIR (RETROFIT) . Then continue to the next step.
- If the vehicle has a Schrader fill valve, continue to the next step.
- Raise the vehicle and depressurize the front RH air spring module. See AIR SUSPENSION - PRESSURIZE/DEPRESSURIZE - ONE AIR SPRING .
- Remove the front RH arch liner. See WHEEL ARCH LINER - FRONT - LH (REMOVE AND REPLACE)
.
- Use a stand to partially support the front RH suspension.
- Remove the bolt that secures the bottom of the air spring module to the lower control arm (torque 140 N.m).
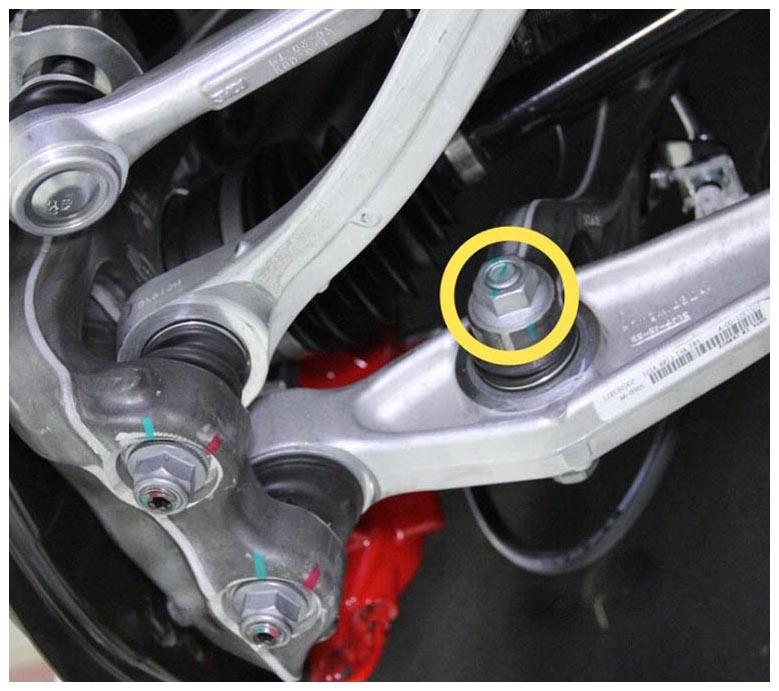 Courtesy of TESLA, INC. Courtesy of TESLA, INC.
|
- Remove the bolt that secures the upper control arm ball joint to the knuckle (torque 60 N.m).
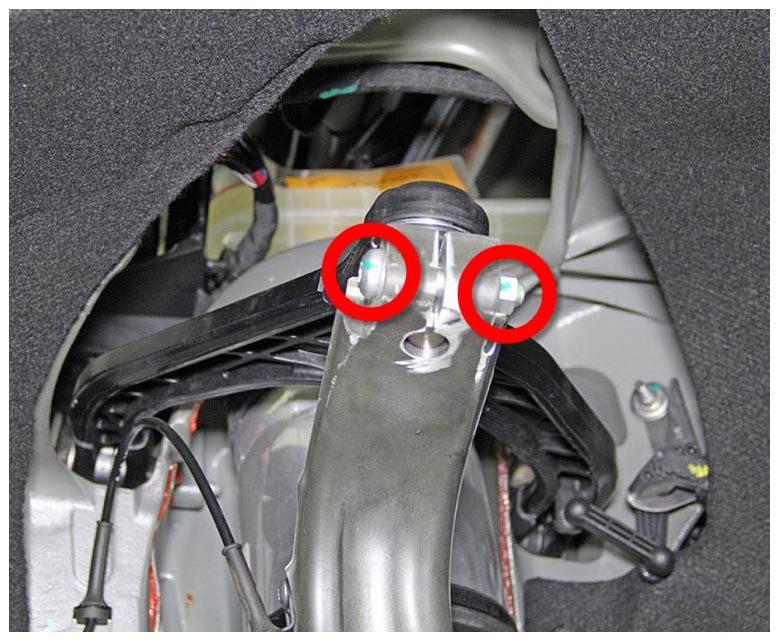 Courtesy of TESLA, INC. Courtesy of TESLA, INC.
|
- Remove the bolt that secures the brake line bracket to the air spring module (torque 7 N.m).
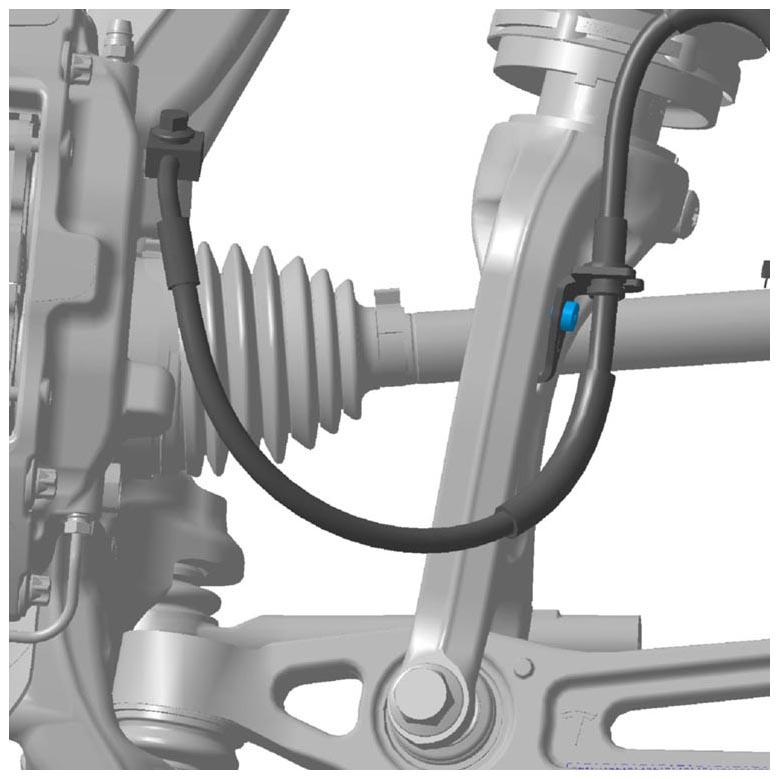 Courtesy of TESLA, INC. Courtesy of TESLA, INC.
|
- Release the wheel speed sensor harness from the bracket on the control arm.
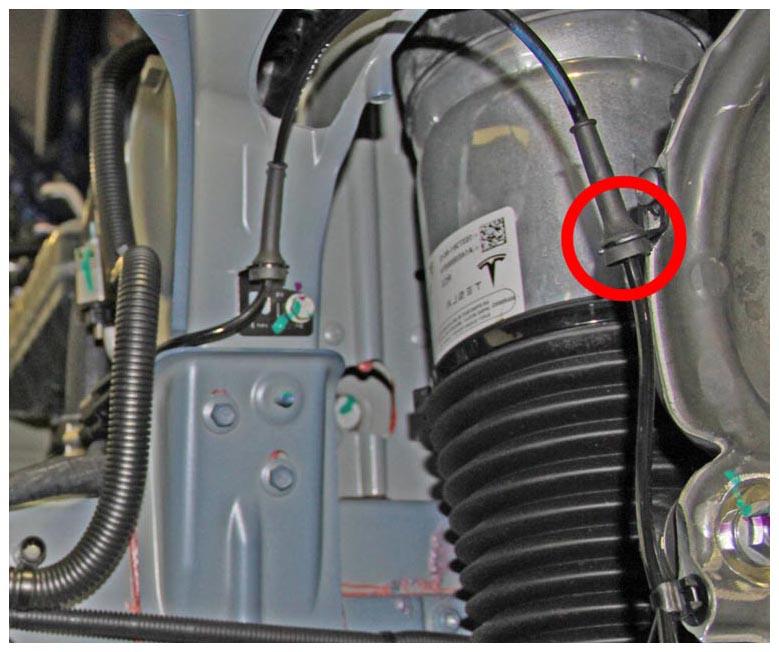 Courtesy of TESLA, INC. Courtesy of TESLA, INC.
|
- Remove the stand and lower the vehicle to a working height.
- Remove the cowl screen. See PANEL - COWL SCREEN (REMOVE AND REPLACE)
.
- Use a crowfoot extension to release the fitting for the air suspension line (yellow) from the top of the front RH shock tower (torque 2 N.m).
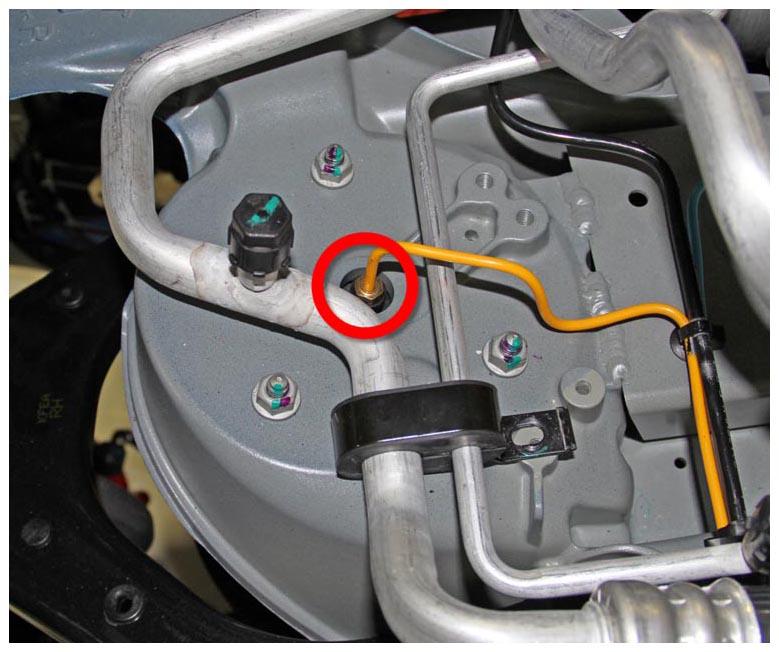 Courtesy of TESLA, INC. Courtesy of TESLA, INC.
|
- For each released end of an air suspension line, use a flat blade screwdriver to snap off the old collet, and discard the collet and nut (VOSS fitting).
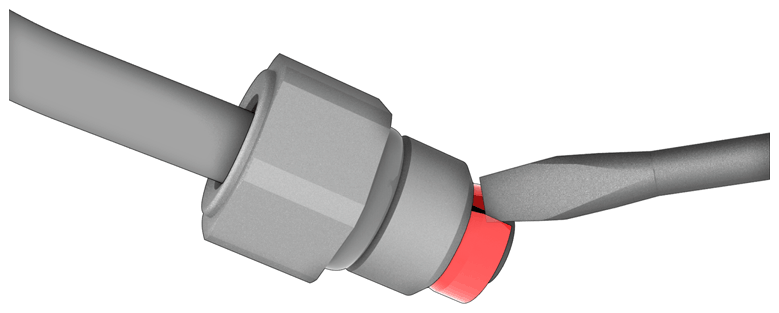 Courtesy of TESLA, INC. Courtesy of TESLA, INC.
|
- Remove the nuts that secure the RH air spring module to the shock tower (torque 39 N.m).
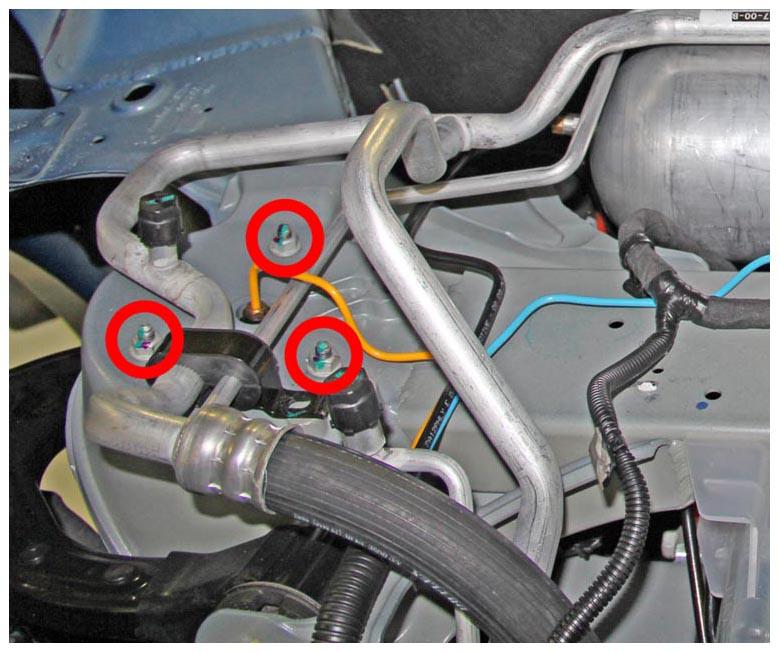 Courtesy of TESLA, INC. Courtesy of TESLA, INC.
|
- Carefully remove the air spring module from the vehicle.