Center Console Assembly - Remove And Install: Removal
- Open both front doors and one of the 2nd row doors.
- Remove the center console air outlet AIR OUTLET - CENTER CONSOLE (REMOVE AND REPLACE) .
- Remove the rear center console trim TRIM - CENTER CONSOLE - REAR (REMOVE AND REPLACE) .
- Remove the LH and RH center console closeout extensions CLOSEOUT EXTENSION - CENTER CONSOLE - LH (REMOVE AND REPLACE) .
- Remove the storage center compartment bin Assembly - Bin - Storage Center Compartment (Remove And Replace)
.
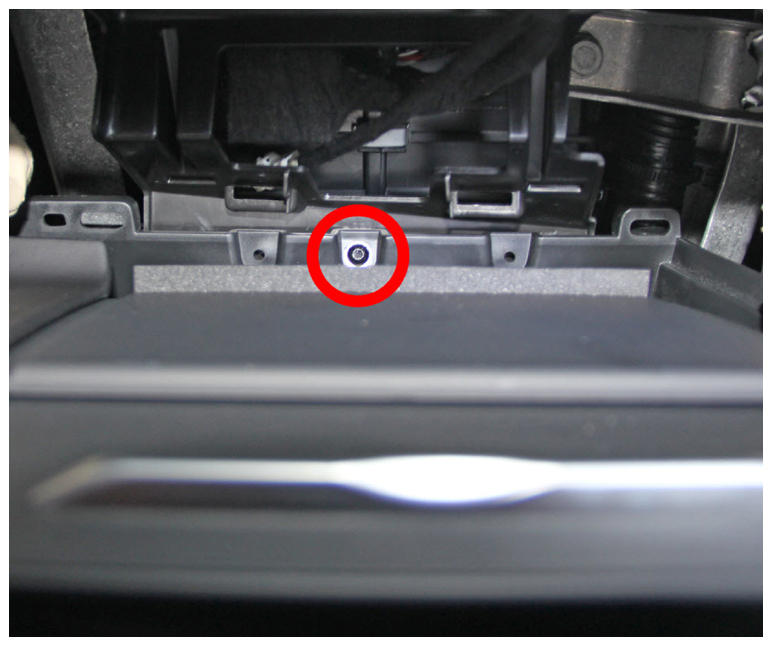
- Remove the screw that secures the front of the center console (torque 2.5 N.m).
 Courtesy of TESLA, INC. Courtesy of TESLA, INC.
|
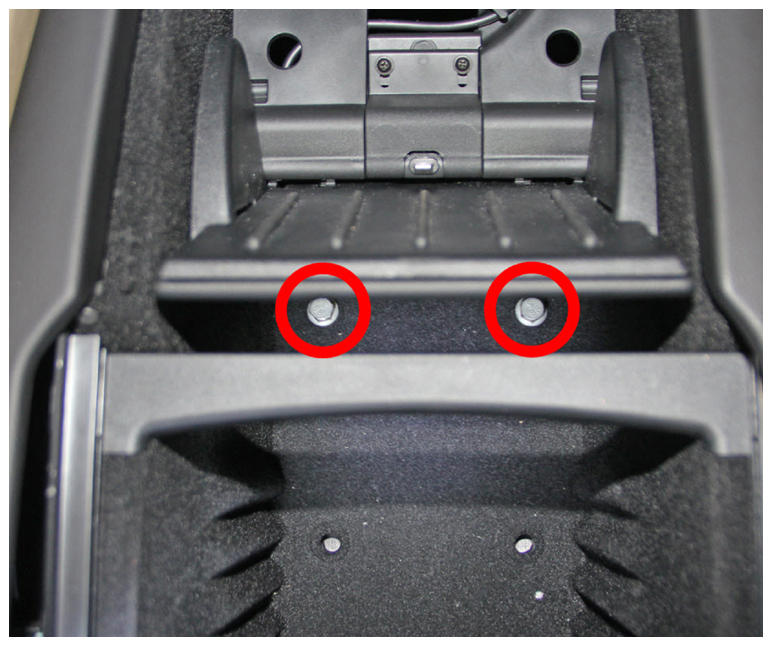
- Remove the front cup holder dividers, then remove the rubber mat at the base of the console.
- Remove the front bolts that secure the base of the center console (torque 2.5 N.m).
 Courtesy of TESLA, INC. Courtesy of TESLA, INC.
|
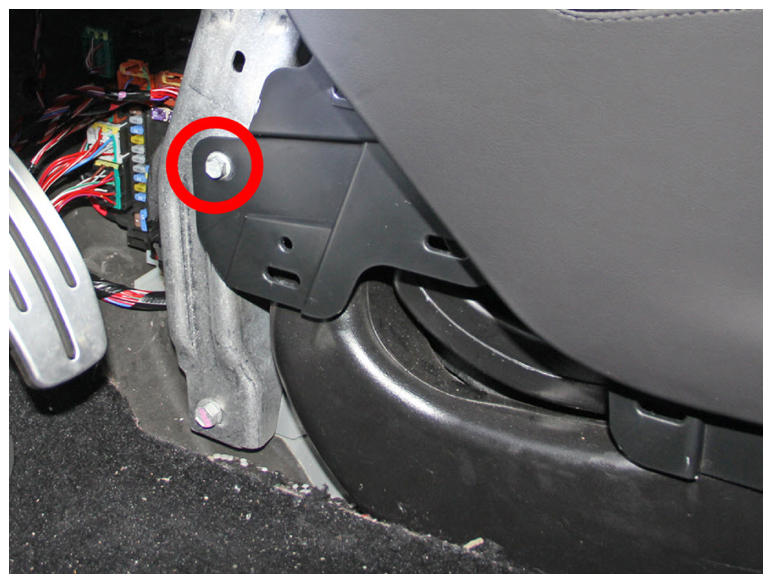
- Working in the footwell areas, remove the bolt that secures each side of the center console to the instrument panel carrier (torque 2.5 N.m).
 Courtesy of TESLA, INC. Courtesy of TESLA, INC.
|
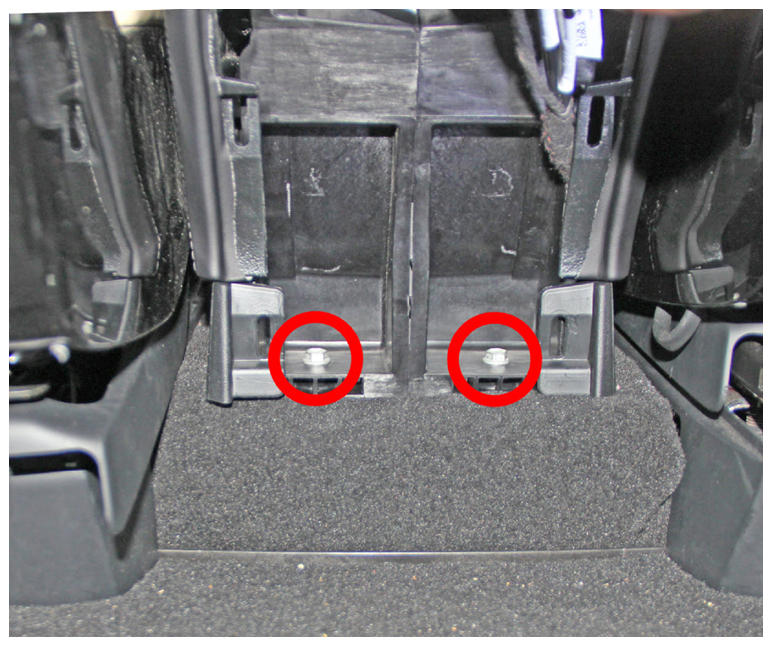
- Remove the bolts that secure the rear of the center console to the vehicle (torque 7.5 N.m).
 Courtesy of TESLA, INC. Courtesy of TESLA, INC.
|
- Working from the RH footwell, disconnect the USB electrical connector.
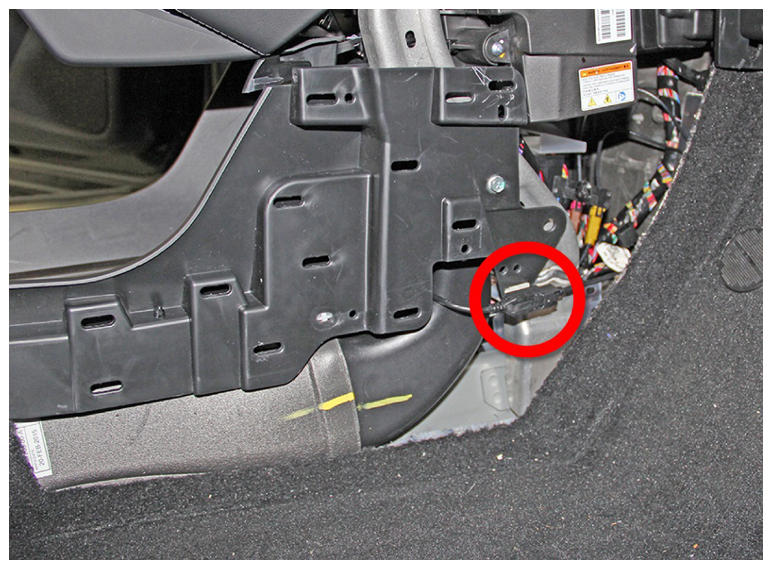 Courtesy of TESLA, INC. Courtesy of TESLA, INC.
|
- Release the fir tree clip that secures the 12V electrical connector to the center console.
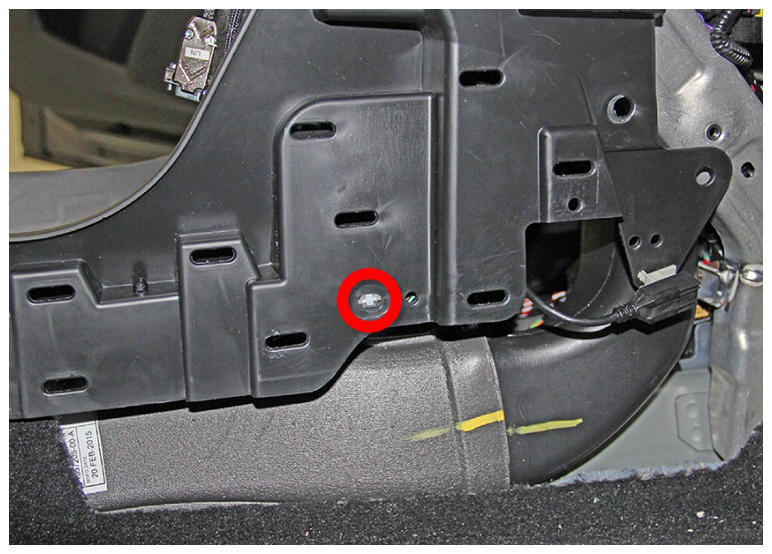 Courtesy of TESLA, INC. Courtesy of TESLA, INC.
|
- Disconnect the 12V electrical connector.
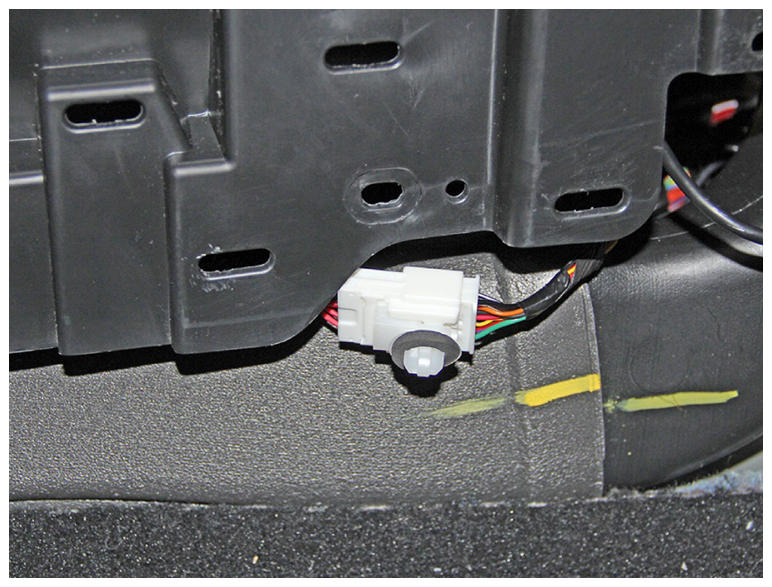 Courtesy of TESLA, INC. Courtesy of TESLA, INC.
|
- Position the LH front seat all the way forward and the RH front seat all the way back.
- Slide the center console upwards and towards the rear of the vehicle to remove it.
- Set the console onto a padded surface.