- Open the front doors and lower the front windows.
- Remove the LH instrument panel side cover assembly. See Assembly - Instrument Panel Side Cover - LH (Remove and Replace)
- Remove the LH middle A-pillar trim panel. See Panel - A Pillar Trim - Middle - LH (Remove and Replace)
- Remove the LH A-pillar trim. See Trim - A-Pillar - LH (Remove and Install)
- Remove the driver sun visor. See Sun Visor - LH (Remove and Replace)
- Remove the driver sun visor center support. See Center Support - Sun Visor - LH (Remove and Replace)
- Vehicles without Autopilot:
- Remove the rear view mirror trim. See Trim - Rear View Mirror (Remove and Replace)
- Remove the rear view mirror:
- Vehicles without Autopilot or with 1st Generation Autopilot:
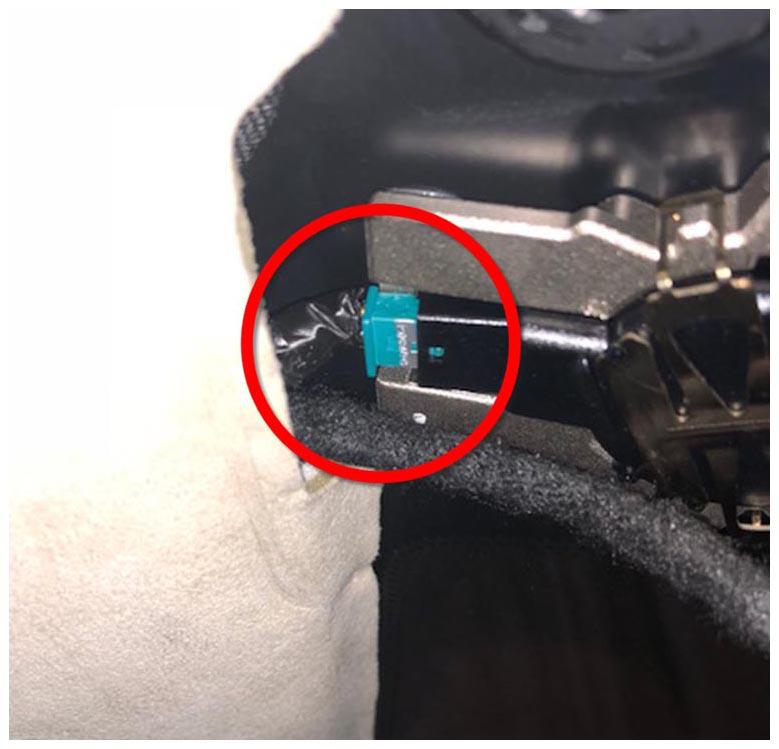
Disconnect the light/rain sensor electrical connector.
NOTE:
Disconnecting the light/rain sensor electrical connector prevents damage to the headliner harness or the light/rain sensor while the headliner is being lowered during the next steps.
 Courtesy of TESLA, INC. Courtesy of TESLA, INC.
|
- Vehicles with 1st or 2nd Generation Autopilot:
- Remove the rear view mirror. See Rear View Mirror - 2nd Generation (Remove and Replace)
- Remove the forward facing camera. See Camera - Forward Facing (Remove and Replace)
- Remove the front passenger sun visor center support. See Center Support - Sun Visor - LH (Remove and Replace)
- Remove the RH instrument panel side cover assembly. See Assembly - Instrument Panel Side Cover - LH (Remove and Replace)
- Remove the RH middle A-pillar trim panel. See Panel - A Pillar Trim - Middle - LH (Remove and Replace)
- Remove the RH A-pillar trim. See Trim - A-Pillar - LH (Remove and Install)
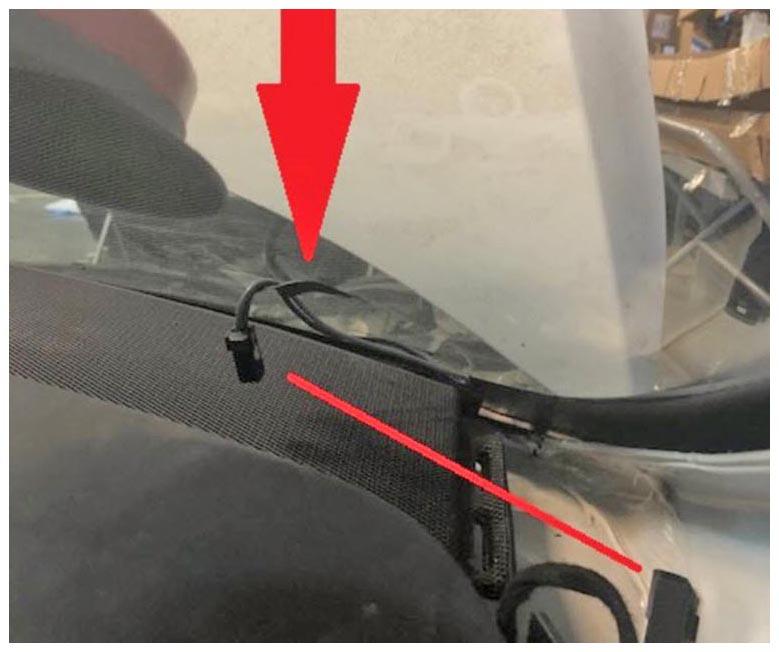
- Disconnect the heated wiper area electrical connector, and then tape windshield side of the electrical connector to the windshield.
 Courtesy of TESLA, INC. Courtesy of TESLA, INC.
|
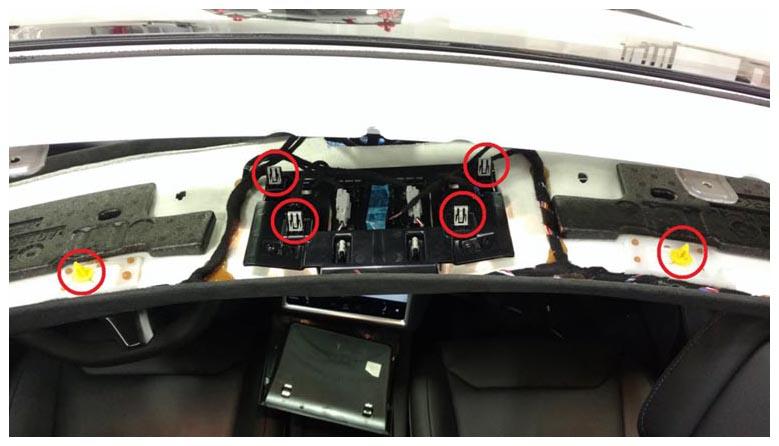
- Release the clips (x6) that attach the headliner at the front of the vehicle.
 Courtesy of TESLA, INC. Courtesy of TESLA, INC.
|
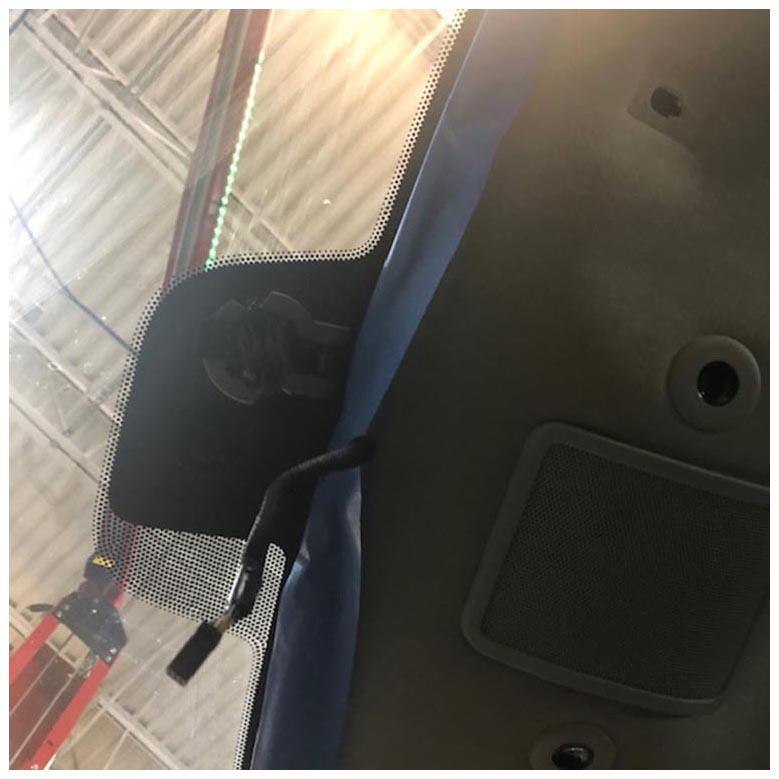
- Put tape in front of the headliner to prevent damage to the headliner.
 Courtesy of TESLA, INC. Courtesy of TESLA, INC.
|
- Open the hood.
- Remove the rear underhood apron. See Underhood Apron - Rear (Remove and Replace)
- Remove the LH and RH underhood aprons. See Underhood Apron - LH (Remove and Replace)
- Vehicles with 2nd Generation Autopilot:
Remove the inlet HEPA filter duct. See Duct - HEPA Filter - Inlet (Remove and Replace)
- Remove the LH and RH wiper arms. See Wiper Arm - LH (Remove and Replace)
- Vehicles without Autopilot or with 1st Generation Autopilot:
Remove the particulate filter. See Filter - Particulate (Remove and Replace)
- Remove the cowl screen panel. See Panel - Cowl Screen (Remove and Replace)
- Apply masking tape to the exterior of both A-pillars to protect the paint.
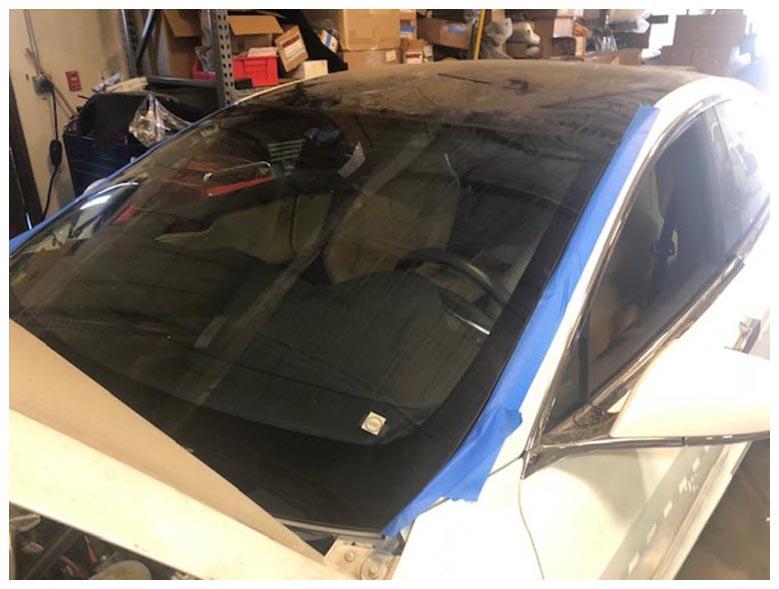 Courtesy of TESLA, INC. Courtesy of TESLA, INC.
|
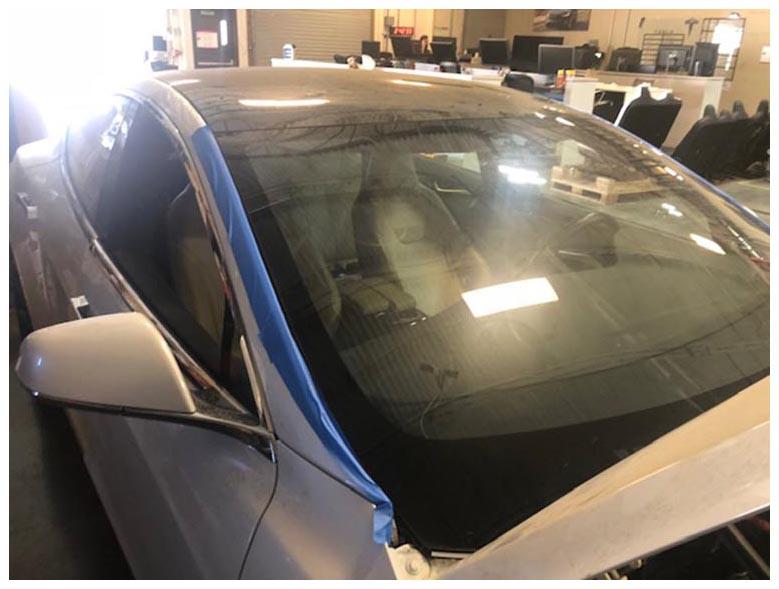 Courtesy of TESLA, INC. Courtesy of TESLA, INC.
|
- Cut a piece of square wire with diagonal cutters to use with T-handles.
NOTE:
Make sure to cut adequate length of square wire, and then attach it to one of the T-handle using needle nose pliers.
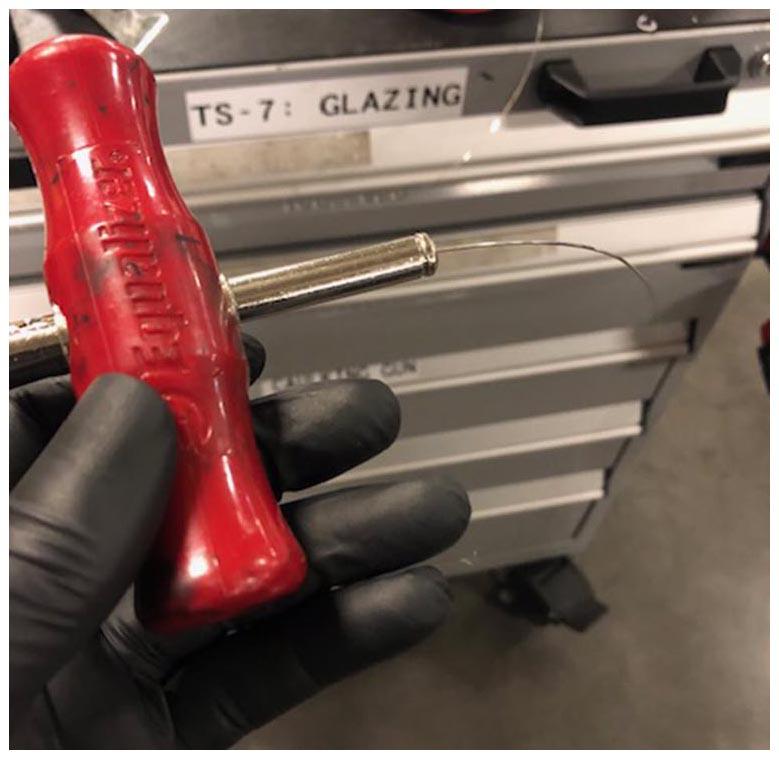 Courtesy of TESLA, INC. Courtesy of TESLA, INC.
|
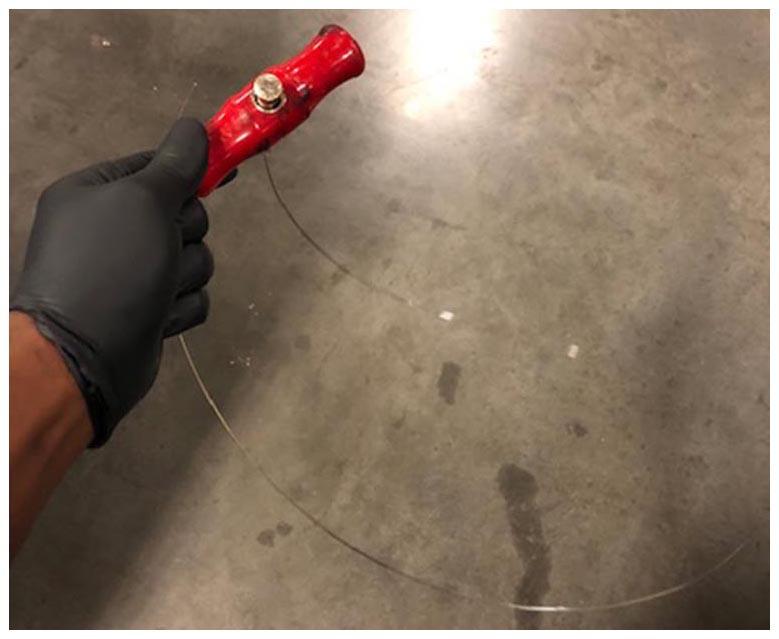 Courtesy of TESLA, INC. Courtesy of TESLA, INC.
|
- Secure the square wire to the starter tool, and then push the tool through the urethane at the RH lower side of the windshield.
CAUTION:
Use protective material to prevent damage to the speaker grille.
- Remove the square wire from the starter tool, and then secure the wire into the other T-handle.
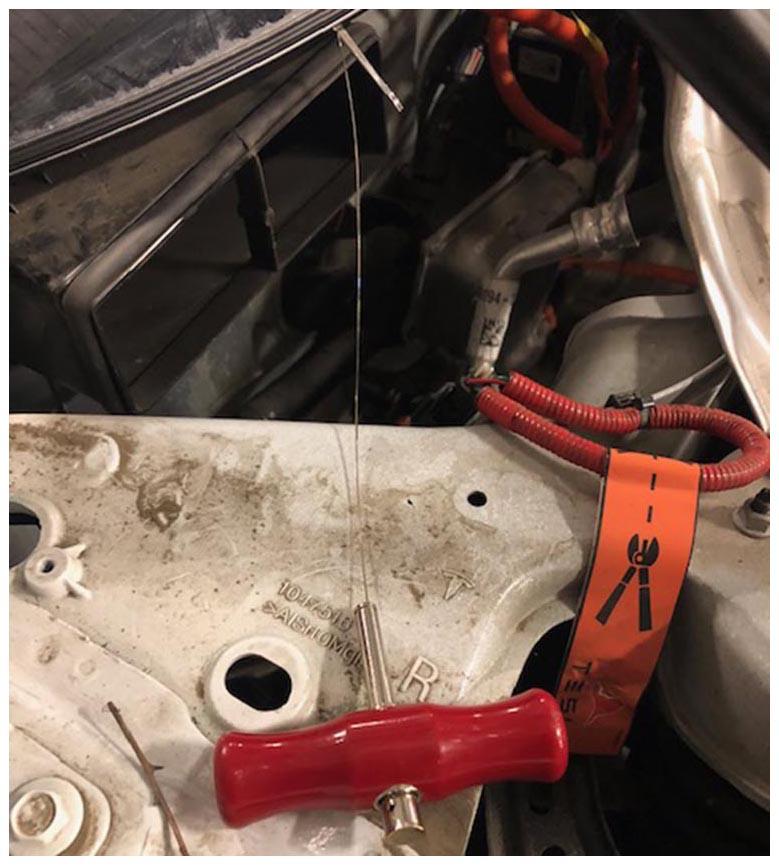 Courtesy of TESLA, INC. Courtesy of TESLA, INC.
|
- With an assistant holding the other end of the wire with needle nose pliers, pull the square wire tool back through into the vehicle.
- With an assistant, use the T-handles to cut the urethane that attaches the windshield to the body.
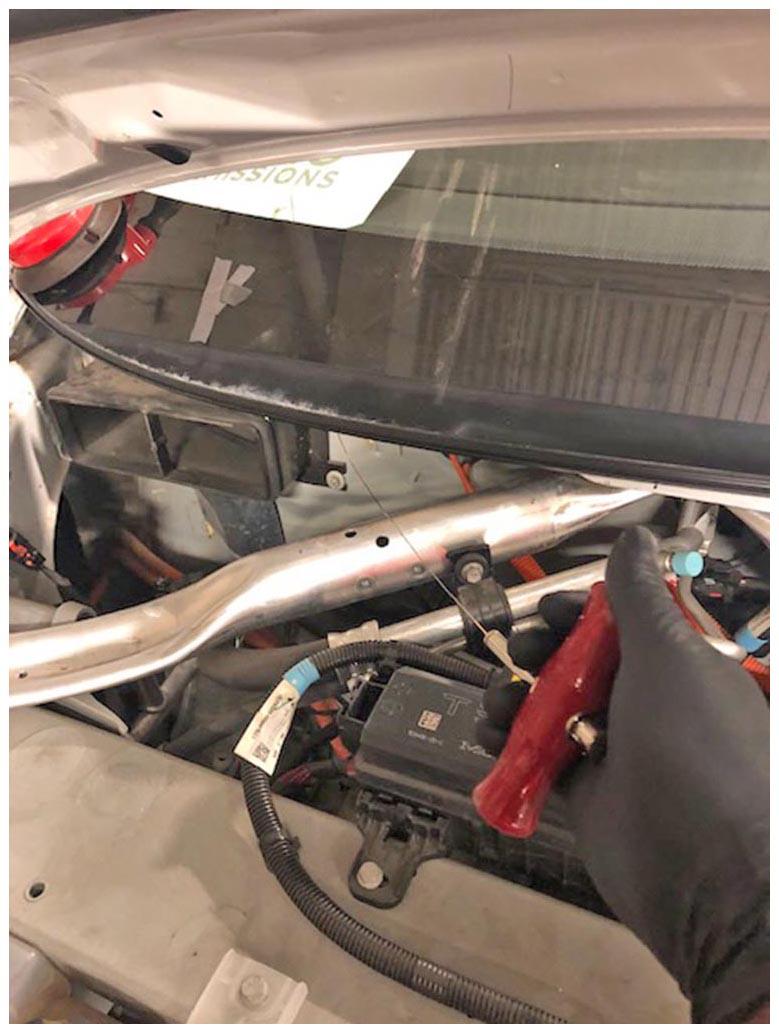 Courtesy of TESLA, INC. Courtesy of TESLA, INC.
|
CAUTION:
Do not cut the locator pins located at the top of the windshield.
CAUTION:
Use protective material to prevent damage to the speaker grille and the VIN plate.
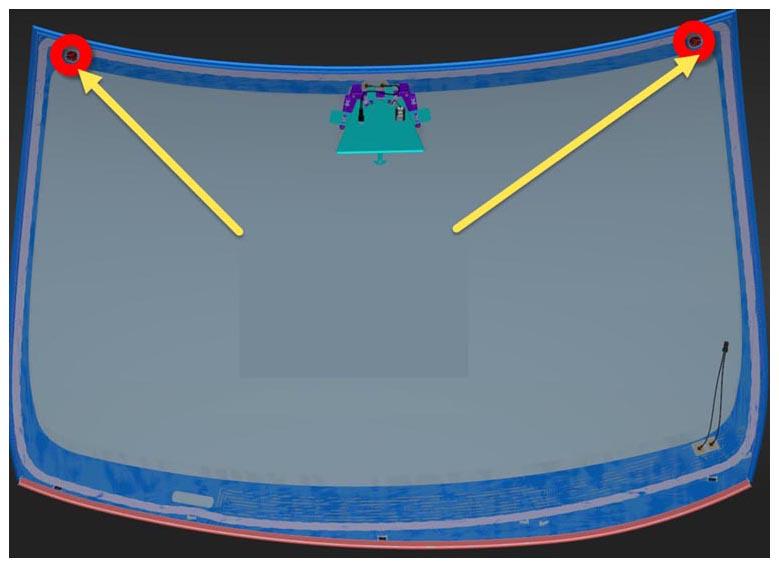 Courtesy of TESLA, INC. Courtesy of TESLA, INC.
|
- Cut the square wires with diagonal cutters, and then remove the T-handles from the vehicle.
- Attach suction handles (x2) to the LH and RH side of the windshield.
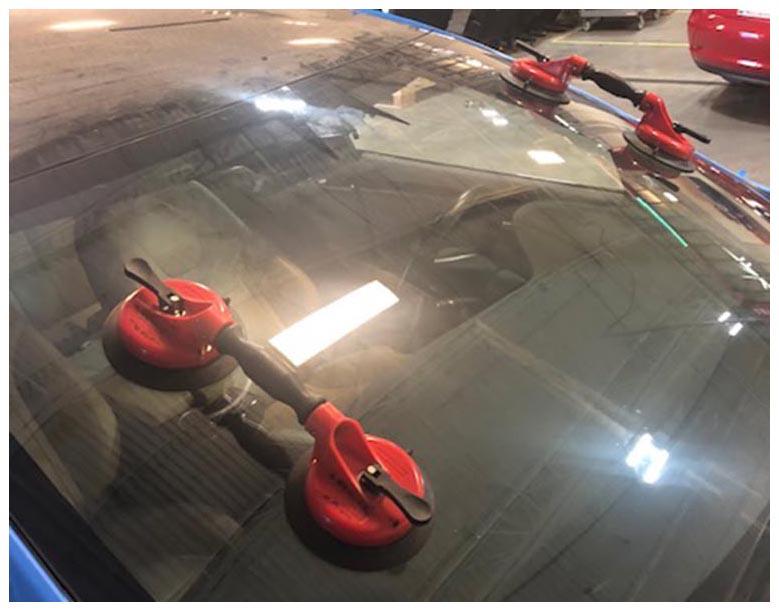 Courtesy of TESLA, INC. Courtesy of TESLA, INC.
|
- Partially close the hood for added clearance between the hood and the windshield.
- With an assistant, remove the windshield from the vehicle.
- Remove the suction handles from the windshield.
- Inspect the windshield for damage. If the damage is not repairable such as cracks on the glass, damaged heater grids, or camera mounts, replace the windshield. See WINDSHIELD (REMOVE AND REPLACE)