- Pull vehicle into stall, Pop the Frunk from MCU Prepare the vehicle for lifting: Air suspension vehicles only: Put the vehicle into Jack mode and roll down LF window.
NOTE:
All these step could be combine as a one process since we were inside the vehicle and open doors and lower windows at the same times.
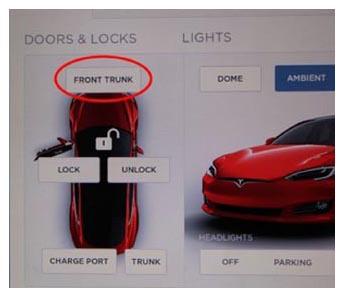
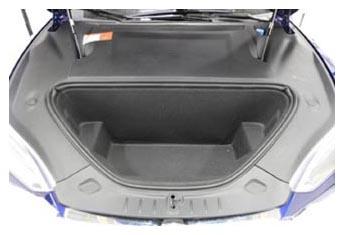
- Open hood.
NOTE:
Using MCU touchscreen > Controls > Frunk Trunk.
 Courtesy of TESLA, INC. Courtesy of TESLA, INC.
|
 Courtesy of TESLA, INC. Courtesy of TESLA, INC.
|
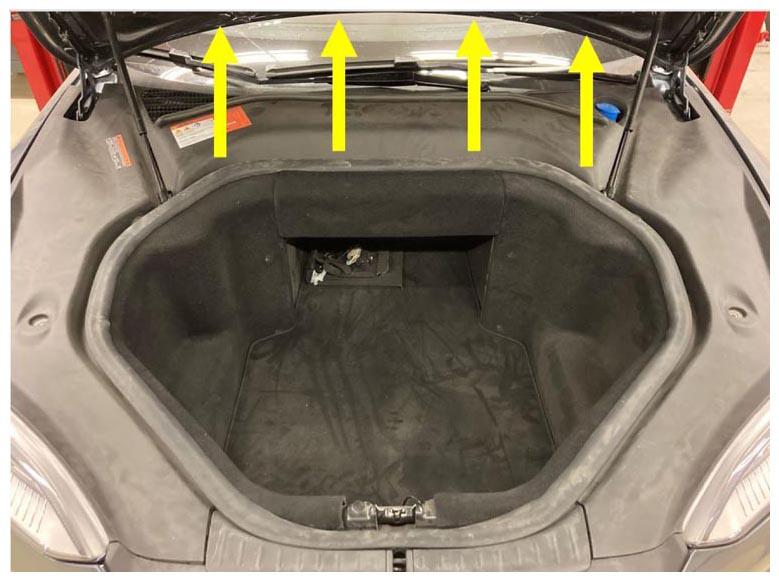
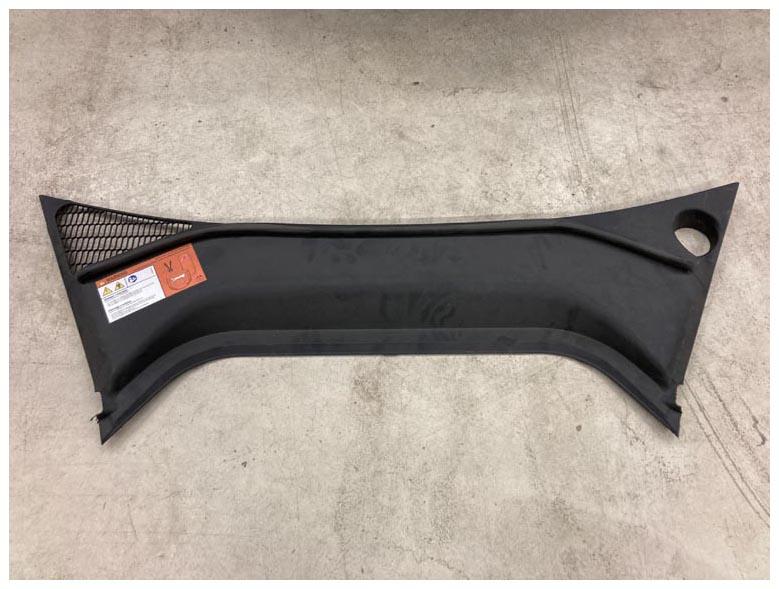
- Remove rear underhood apron.
NOTE:
8x clips.
 Courtesy of TESLA, INC. Courtesy of TESLA, INC.
|
 Courtesy of TESLA, INC. Courtesy of TESLA, INC.
|
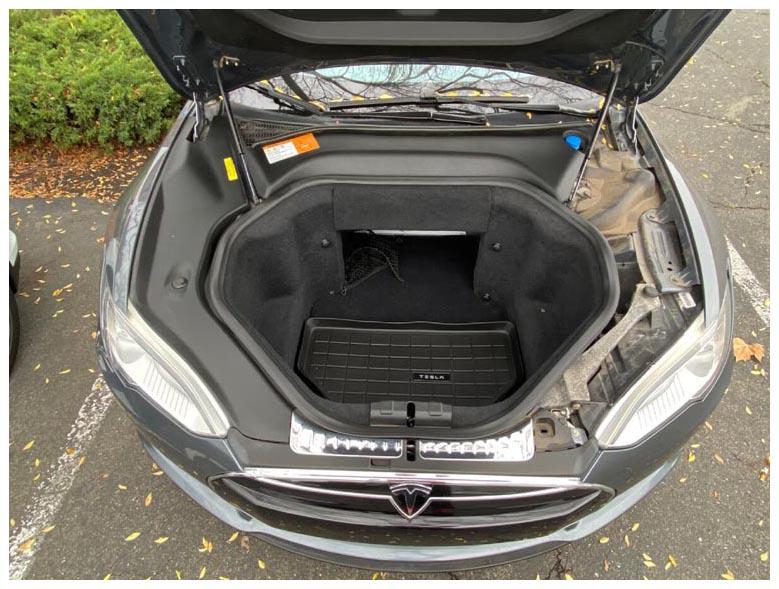
- Remove LH underhood apron.
NOTE:
9x clips.
 Courtesy of TESLA, INC. Courtesy of TESLA, INC.
|
 Courtesy of TESLA, INC. Courtesy of TESLA, INC.
|
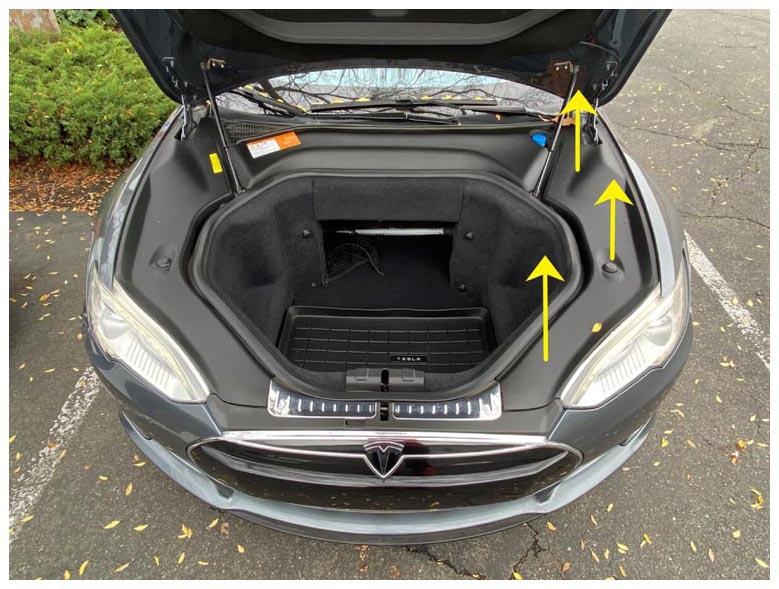
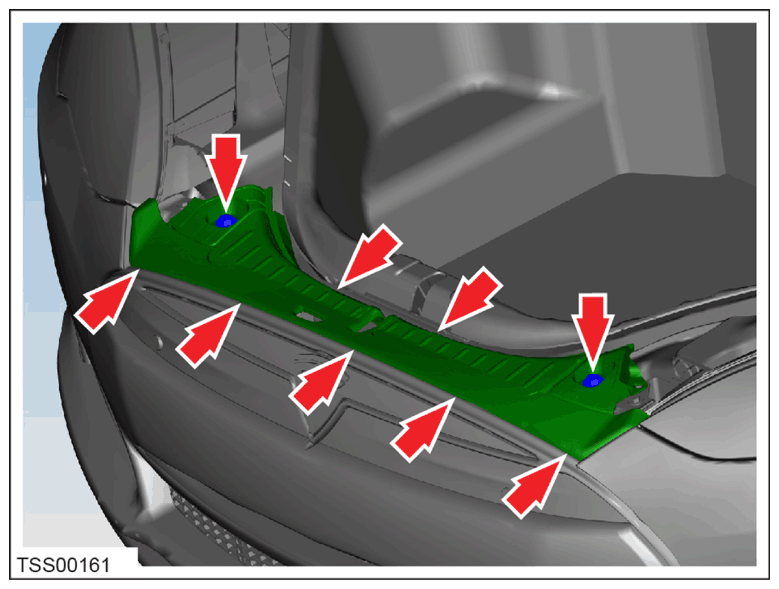
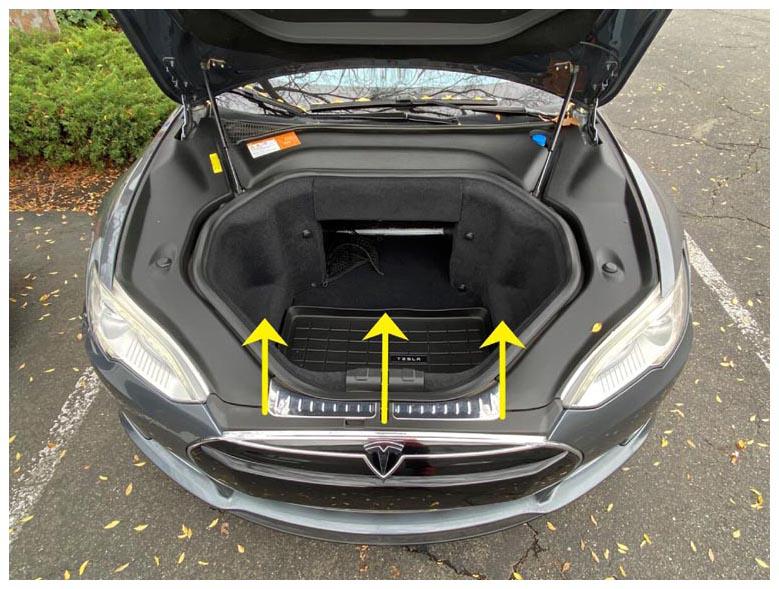
- Remove front underhood apron.
NOTE:
2x push clips, 7x clips.
 Courtesy of TESLA, INC. Courtesy of TESLA, INC.
|
 Courtesy of TESLA, INC. Courtesy of TESLA, INC.
|
- Peel back the carpeting at the front and rear of the underhood storage unit. Release the bolts (x4) bolts.
NOTE:
8 mm Nut (x2) Torque: 4 N.m 13 mm Bolt (x2) Torque 8 N.m.
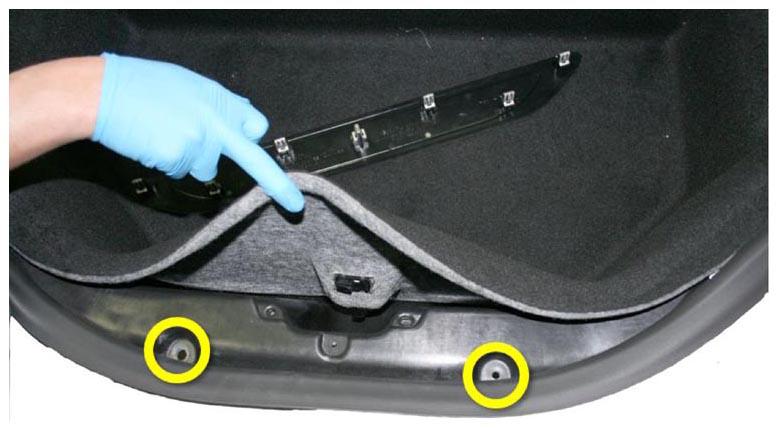 Courtesy of TESLA, INC. Courtesy of TESLA, INC.
|
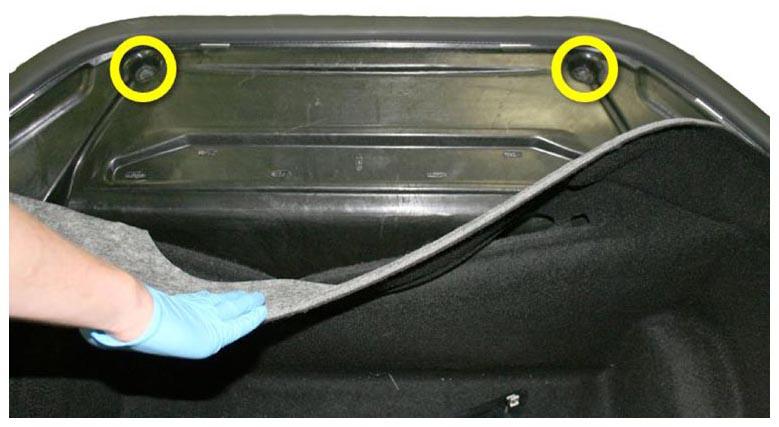 Courtesy of TESLA, INC. Courtesy of TESLA, INC.
|
- Disconnect emergency hood release and front light harness.
NOTE:
Electrical Connection (x2).
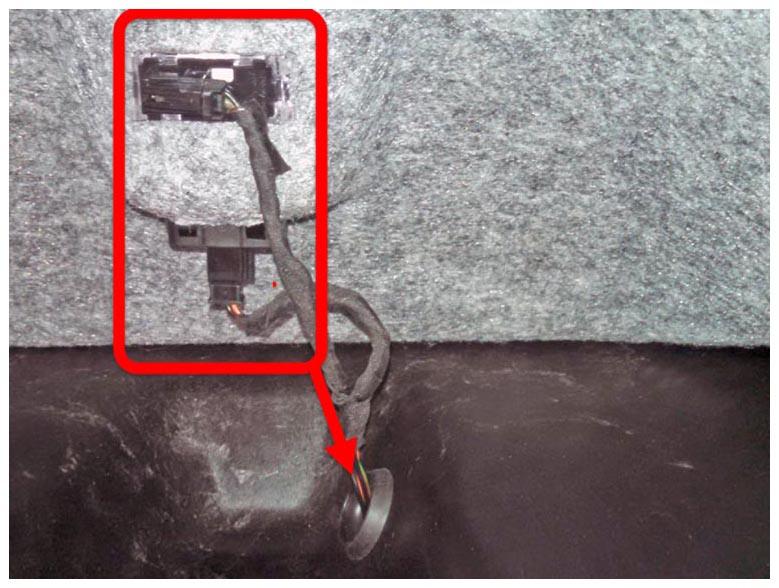 Courtesy of TESLA, INC. Courtesy of TESLA, INC.
|
- Remove under hood storage unit from vehicle.
- On the RH side rail, disconnect the front fascia harness connector.
NOTE:
Electrical Connection (x1).
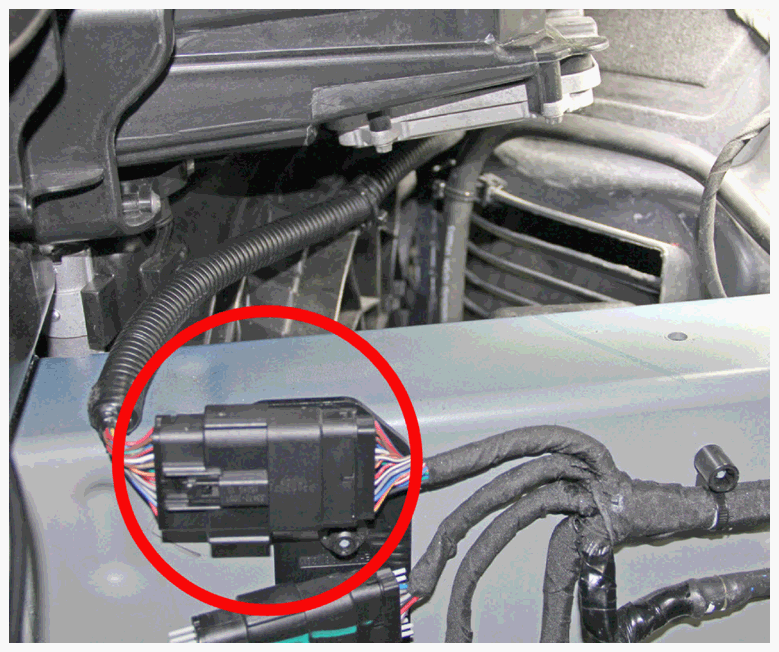 Courtesy of TESLA, INC. Courtesy of TESLA, INC.
|
- Release the edge clip that secures the fascia harness to the RH active shutter.
NOTE:
Edge Clip (x1).
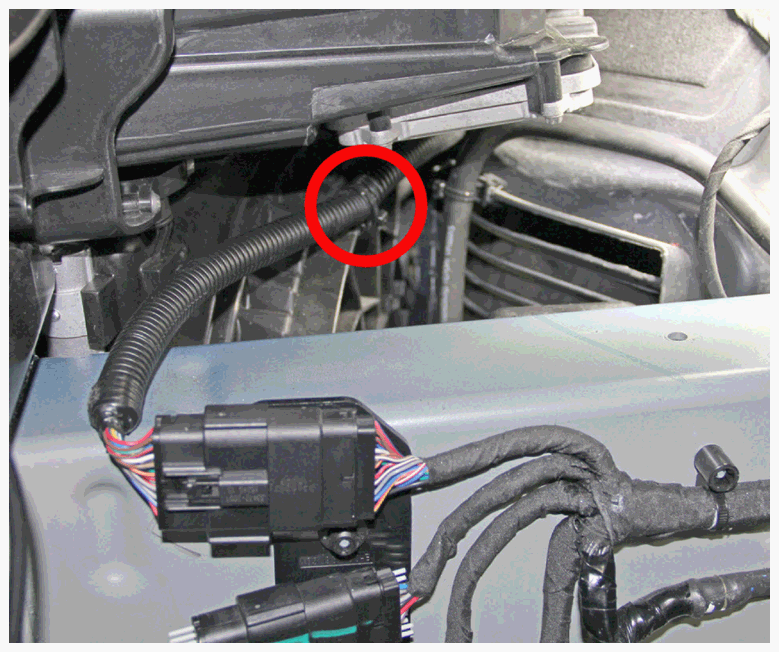 Courtesy of TESLA, INC. Courtesy of TESLA, INC.
|
- Remove the plastic rivets (x8) that secure the undershield to the lower valance and 10 mm bolts (x2).
NOTE:
Plastic Rivet (x8) 10 mm Bolt (x2) Torque: 4 N.m.
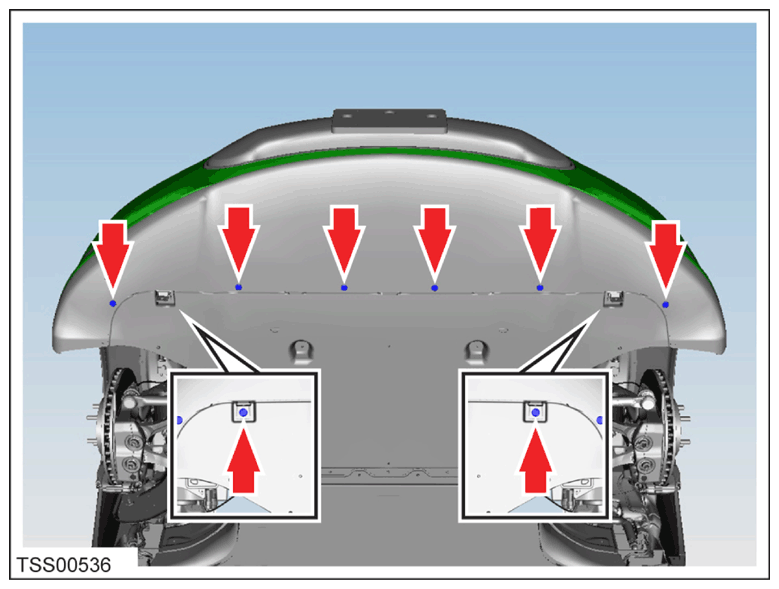 Courtesy of TESLA, INC. Courtesy of TESLA, INC.
|
- Apply Masking Tape to the both side of fender to fascia to prevent damage to paint.
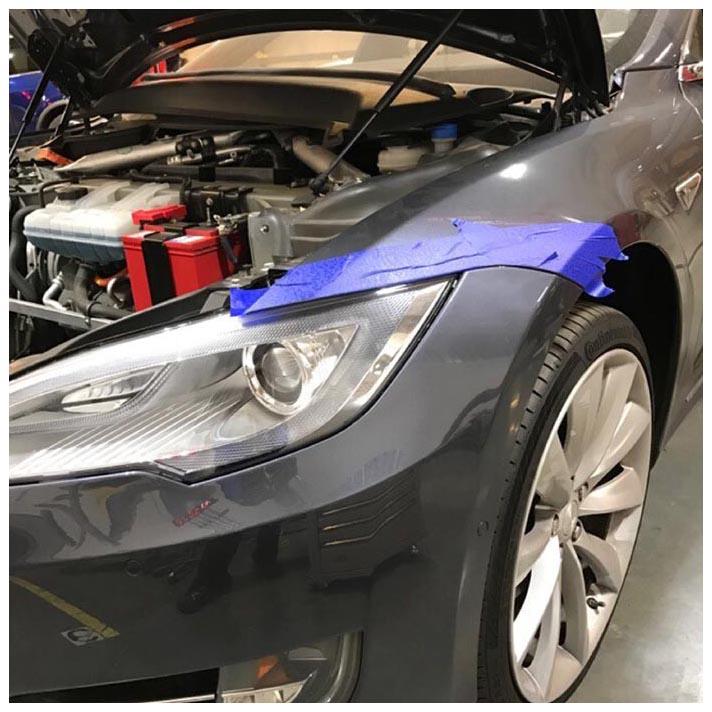 Courtesy of TESLA, INC. Courtesy of TESLA, INC.
|
- Remove the bolts that secure the fascia and applique to the fascia carrier.
NOTE:
10 mm Bolt (x2) Torque: 4 N.m.
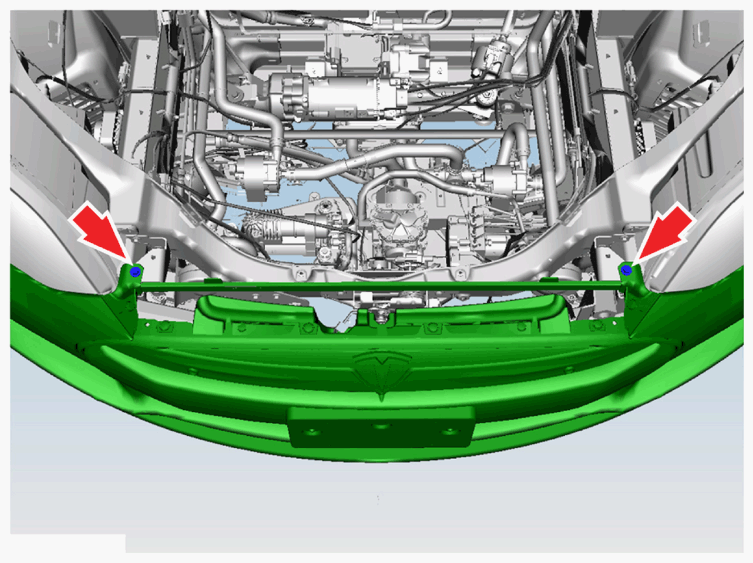 Courtesy of TESLA, INC. Courtesy of TESLA, INC.
|
- Remove the screw that secures the fascia panel to the LH and RF fender.
NOTE:
T25 Screw (x2) Torque: N/A.
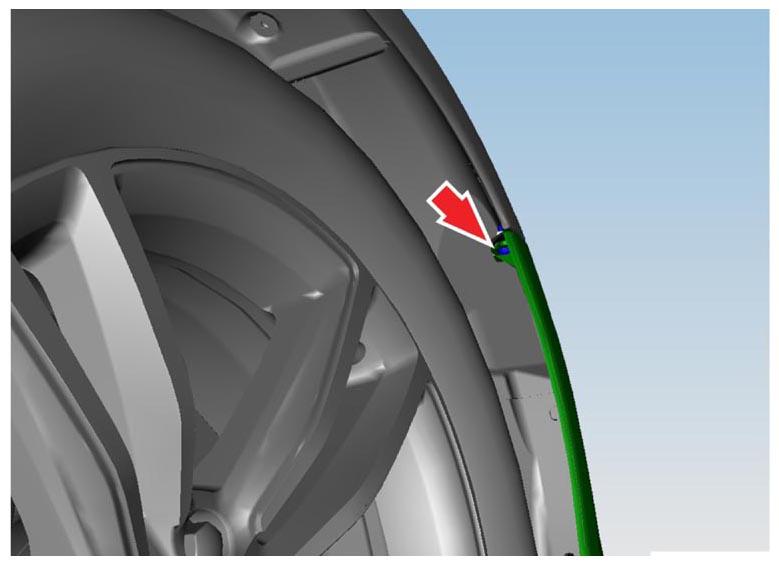 Courtesy of TESLA, INC. Courtesy of TESLA, INC.
|
- Carefully release the fascia from the LH and RH fender brackets (x2).
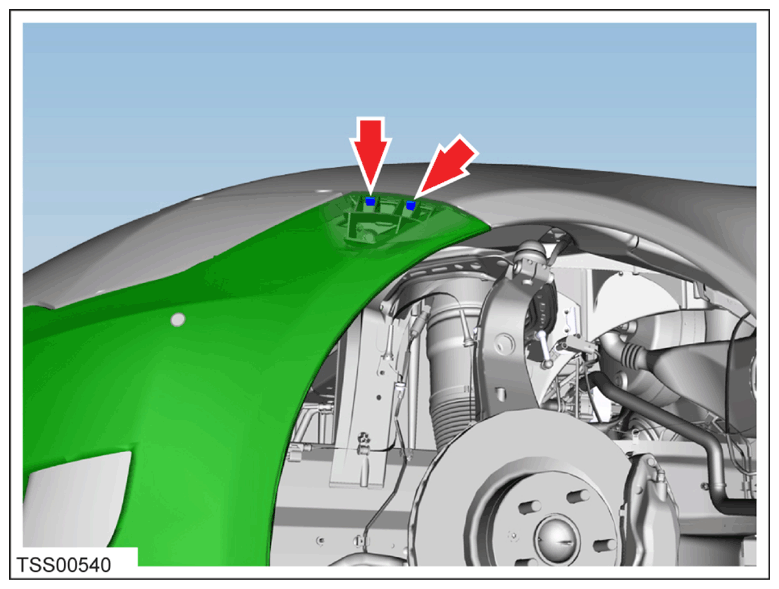 Courtesy of TESLA, INC. Courtesy of TESLA, INC.
|
- Remove the fascia assembly.
NOTE:
With assistance, release the fascia panel from the fascia carrier.
- Remove the radar sensor from bracket, disconnect the harness on the bottom of the radar sensor.
NOTE:
Electrical Connector (x1)
NOTE:
Use a trim tool or flathead screwdriver to gently pry up the tab on the top of the inner bracket. Gently release the radar sensor from the bracket.
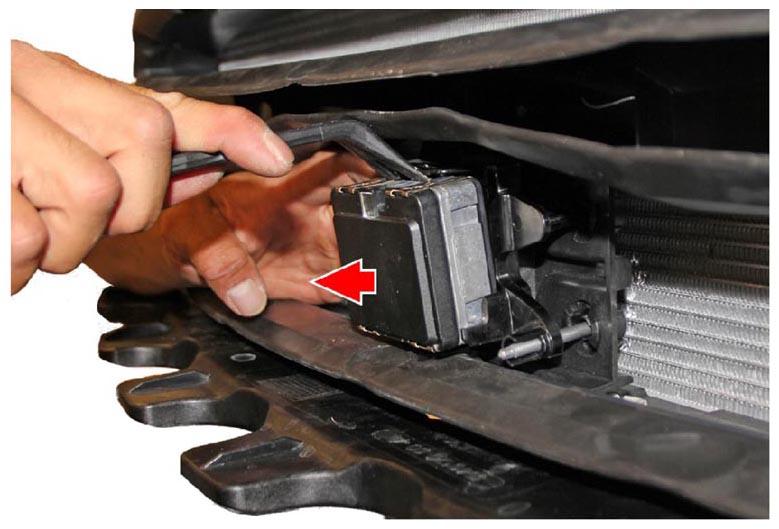 Courtesy of TESLA, INC. Courtesy of TESLA, INC.
|
- Remove bolts from radar sensor bracket.
NOTE:
10 mm Bolt (x4) Torque: N/A.
- Remove radar bracket. Push up bracket, tilt bottom bracket outward about 20 degree and remove bracket from the mounting bracket.
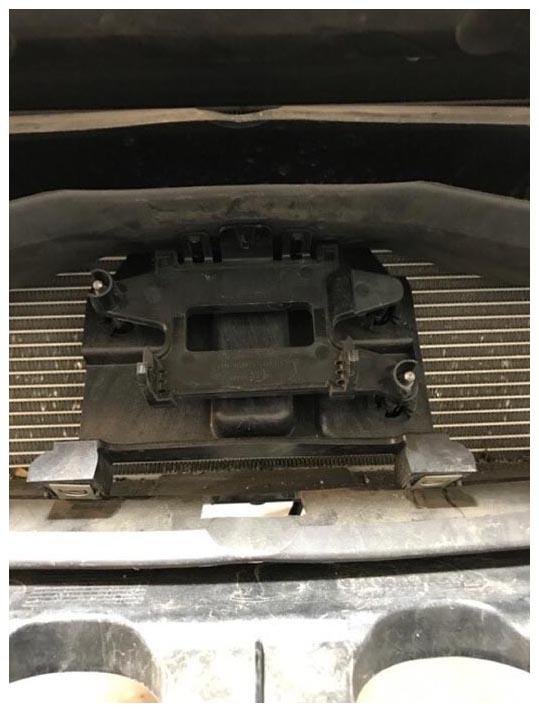 Courtesy of TESLA, INC. Courtesy of TESLA, INC.
|