Diagnostic Procedure
- Check EVAP canister for damage or leaks. See SYSTEM/COMPONENT TESTS
article. If canister is okay, go to next step. If canister is not okay, replace as necessary and retest system.
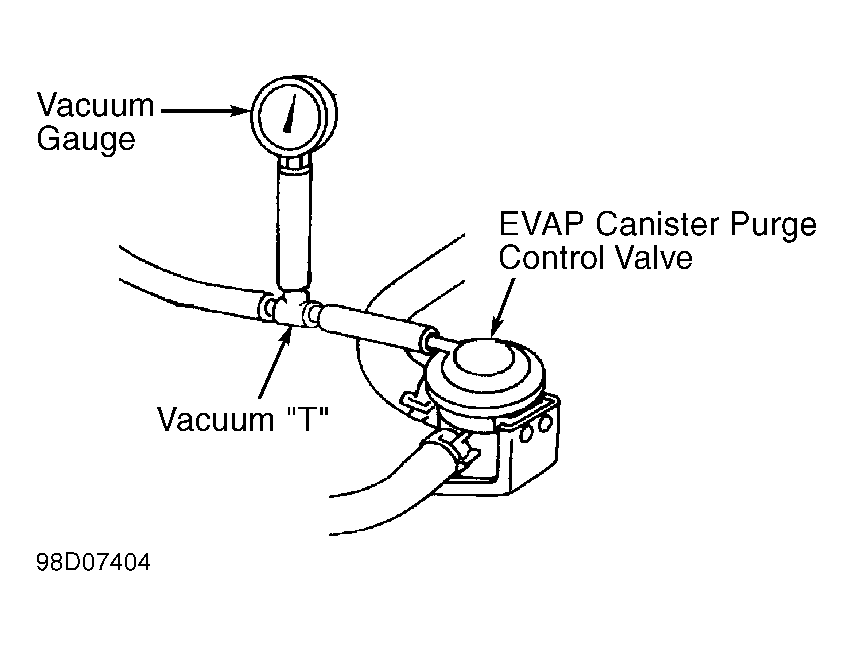
- Start engine and allow it to reach normal operating temperature. Turn ignition off. Disconnect vacuum hose to EVAP canister purge control valve and install vacuum gauge. See Fig 1. Start engine and let idle for at least 80 seconds. While monitoring vacuum gauge, increase engine speed to 2000 RPM. Release accelerator pedal and note vacuum. Vacuum should be present with engine revved to 2000 RPM, and no vacuum present at idle. If vacuum is as specified, go to step 5). If vacuum is not as specified, go to next step.
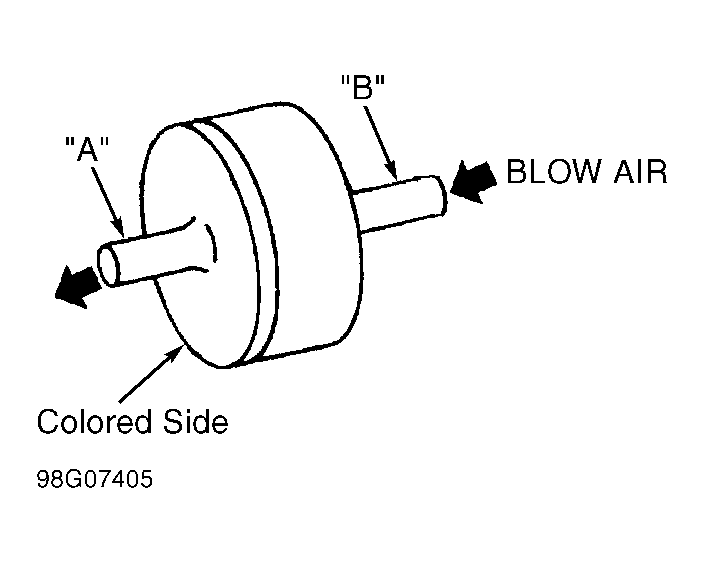
- Turn ignition off. Check EVAP system hoses for clogging. Check for proper routing and connections. Check one-way valve. Ensure air flows from port "A" through port "B" only. See Fig 2. Repair as necessary. If no problem is found, go to next step.
- Remove EVAP canister purge control solenoid valve. Apply battery voltage to EVAP canister purge control solenoid valve. See Figure. Air should pass through ports "A" and "B" only with battery voltage applied. Replace EVAP canister purge control solenoid valve if operation is not as specified.
- Check EVAP canister purge volume control valve. See step 3) under DTC P0443: EVAP CANISTER PURGE VOLUME CONTROL VALVE . Repair as necessary. If no problem is found, go to next step.
- Remove EVAP canister purge control solenoid valve. Using fused jumper wires, apply battery voltage to EVAP canister purge control solenoid valve. See Figure. Air should pass through ports "A" and "B" only with battery voltage applied. Replace EVAP canister purge control solenoid valve if operation is not as specified. If operation is as specified, go to next step.
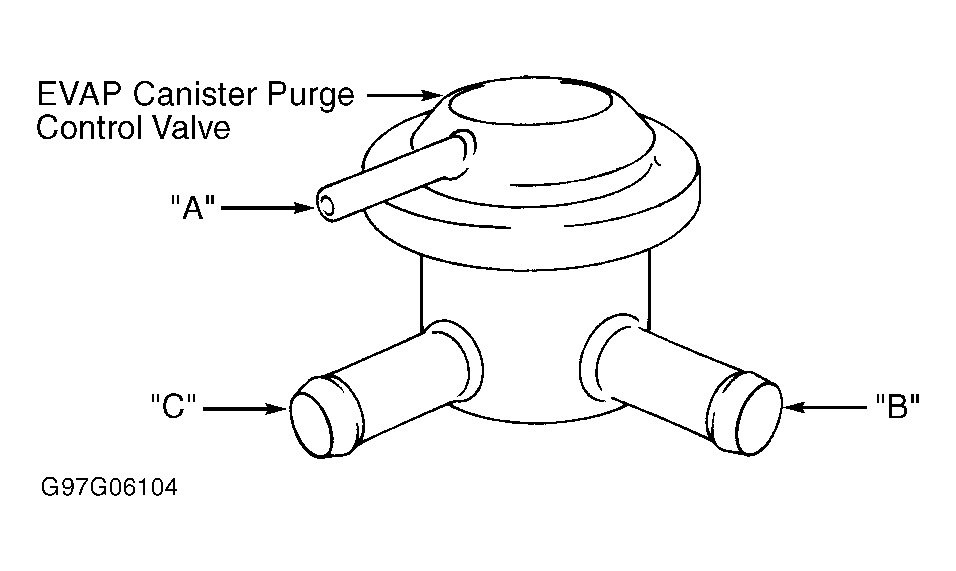
- Remove EVAP canister purge control valve. Blow air into ports "A", "B" and "C", one at a time. See Fig 3. Ensure no air leaks are present. Using a hand-held vacuum pump, apply vacuum to port "A". Blow air into port "C". Ensure air flows from port "B". Replace EVAP canister purge control valve if operation is not as specified. If operation is as specified, go to next step.
- Check EVAP control system pressure sensor. See step 7) under DTC P0450: EVAP CONTROL SYSTEM PRESSURE SENSOR . Repair as necessary. If no problem is found, go to next step.
- Check EVAP canister vent control valve. See step 3) under DTC P0446: EVAP CANISTER VENT CONTROL VALVE . Repair as necessary. If no problem is found, go to next step.
- Check for obstructed or leaking EVAP system hoses. Inspect EVAP system components for damage or poor connections. Check for obstructed water separator. Repair or replace as necessary. If no problem is found, go to next step.
- Check for intermittent problem. Check all circuit related wiring, harness connectors and terminals for corrosion, damaged or backed-out terminal pins, or wires which may be broken inside the insulation. Repair as necessary.
 Courtesy of NISSAN MOTOR CO., U.S.A.
 Courtesy of NISSAN MOTOR CO., U.S.A.
 Courtesy of NISSAN MOTOR CO., U.S.A.