360° View Monitor Control Module Removal/Installation
- Disconnect the negative battery terminal. (See NEGATIVE BATTERY TERMINAL DISCONNECTION/CONNECTION
.)
- Remove the following parts:
- Passenger-side front scuff plate (See FRONT SCUFF PLATE REMOVAL/INSTALLATION
.)
- Passenger-side side trim (See FRONT SIDE TRIM REMOVAL/INSTALLATION
.)
- Side wall (See SIDE WALL REMOVAL/INSTALLATION
.)
- Partially peel back the floor covering.
- Remove the foot support. (See FOOT SUPPORT REMOVAL/INSTALLATION
.)
- While pressing the tabs in the directions of arrows (1) shown in the figure below, pull the spacer in the direction of arrow (2) to detach the spacer tabs from the cover.
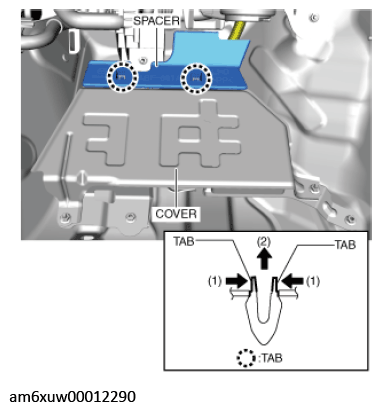 Courtesy of MAZDA MOTORS CORP.
- Remove the spacer.
- Remove the nuts.
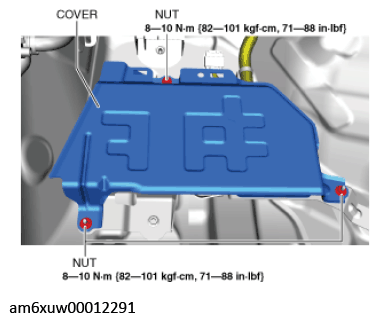 Courtesy of MAZDA MOTORS CORP.
- Remove the cover.
- Disconnect the connector.
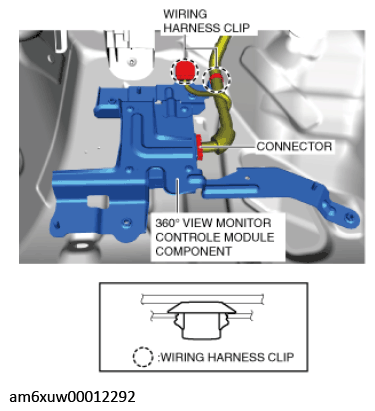 Courtesy of MAZDA MOTORS CORP.
- Remove the wiring harness clips.
- Remove the nuts.
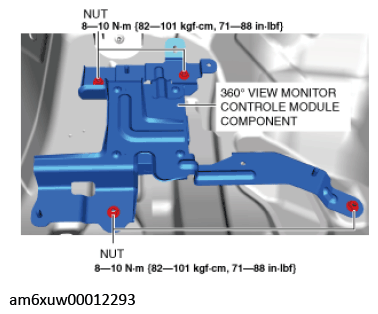 Courtesy of MAZDA MOTORS CORP.
- Remove the 360° view monitor control module component.
- Remove the screws.
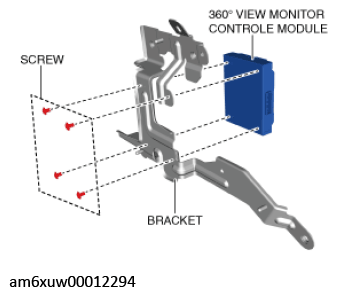 Courtesy of MAZDA MOTORS CORP.
- Remove the 360° view monitor control module from the bracket.
- Install in the reverse order of removal.
- Perform the 360° view monitor system aiming. (See 360°VIEW MONITOR SYSTEM AIMING .)