With Rain Sensor
- Insert a tape-wrapped Flathead screwdriver into the notch and pry with the screwdriver in the direction shown by the arrow in illustration to remove the covers.
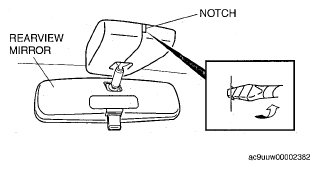 Courtesy of MAZDA MOTORS CORP.
- Remove the covers.
- Remove the rain sensor. (See
RAIN SENSOR REMOVAL/INSTALLATION
.)
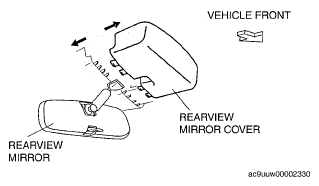 Courtesy of MAZDA MOTORS CORP.
- Make a tool as shown in the illustration using wire.
CAUTION:
- Using the tool with bare hands can cause injury. Always wear gloves when using the tool.
- To prevent damage to the lens sensor, do not use a screwdriver.
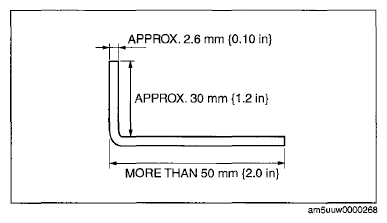 Courtesy of MAZDA MOTORS CORP.
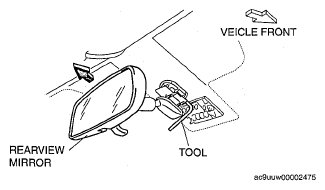
- Insert the tool to the position shown in the illustration and push the center part of the spring.
CAUTION:
- Perform the procedure while being careful not to damage the lens sensor.
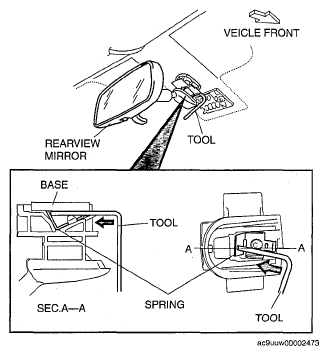 Courtesy of MAZDA MOTORS CORP.
- Remove the rearview mirror in the direction of the arrow in illustration.
CAUTION:
- When removing the rearview mirror, the mirror may hit the top sealing, possibly damaging it. Therefore, hold the mirror body securely by hand when removing the rear view mirror so that the mirror does not contact it.
 Courtesy of MAZDA MOTORS CORP.