Front Evaporator Temperature Sensor: Disassembly
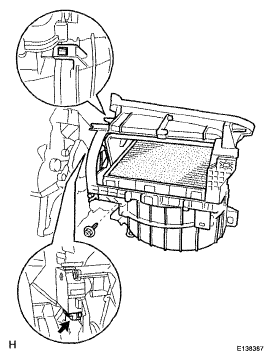
- REMOVE BLOWER ASSEMBLY
- Remove the screw.
- Disconnect the connector.
- Detach the claw and remove the blower unit.
 Courtesy of © TOYOTA, LICENSE AGREEMENT TMS1002
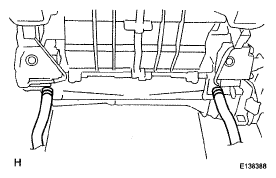
- REMOVE DRAIN COOLER HOSE
- Remove the 2 drain hoses.
 Courtesy of © TOYOTA, LICENSE AGREEMENT TMS1002
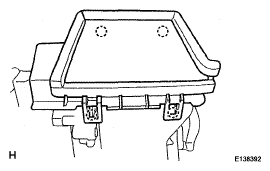
- REMOVE AIR DUCT LH
- Detach the 4 claws and remove the duct.
 Courtesy of © TOYOTA, LICENSE AGREEMENT TMS1002
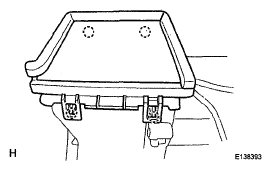
- REMOVE AIR DUCT RH
- Detach the 4 claws and remove the duct.
 Courtesy of © TOYOTA, LICENSE AGREEMENT TMS1002
- REMOVE COOL AIR BYPASS SERVO MOTOR LH
- Disconnect the connector.
- Remove the 2 screws and damper servo.
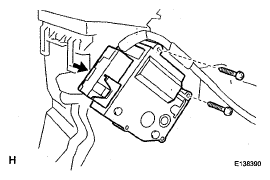 Courtesy of © TOYOTA, LICENSE AGREEMENT TMS1002
- REMOVE COOL AIR BYPASS SERVO MOTOR RH
- Disconnect the connector.
- Remove the 2 screws and damper servo.
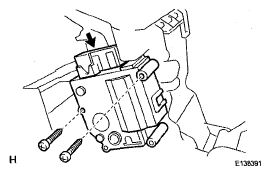 Courtesy of © TOYOTA, LICENSE AGREEMENT TMS1002
- REMOVE AIR MIX SERVO MOTOR LH (Cool)
- Disconnect the connector.
- Remove the 2 screws and damper servo.
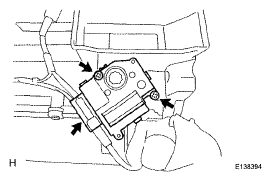 Courtesy of © TOYOTA, LICENSE AGREEMENT TMS1002
- REMOVE AIR MIX SERVO MOTOR RH (Cool)
- Disconnect the connector.
- Remove the 2 screws and damper servo.
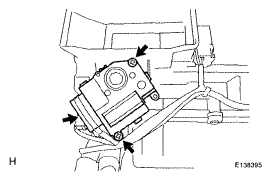 Courtesy of © TOYOTA, LICENSE AGREEMENT TMS1002
- REMOVE AIR OUTLET SERVO MOTOR LH (Face)
- Detach the 3 claws and remove the lever.
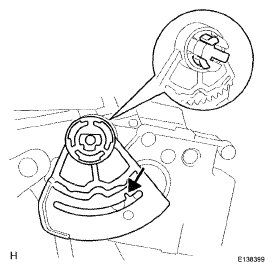 Courtesy of © TOYOTA, LICENSE AGREEMENT TMS1002
- Disconnect the connector.
- Remove the 2 screws and damper servo.
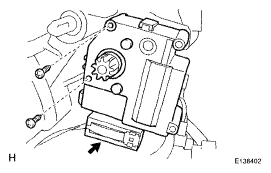 Courtesy of © TOYOTA, LICENSE AGREEMENT TMS1002
- REMOVE AIR OUTLET SERVO MOTOR RH (Face)
- Detach the claw and remove the lever.
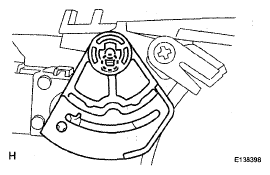 Courtesy of © TOYOTA, LICENSE AGREEMENT TMS1002
- Disconnect the connector.
- Remove the 2 screws and damper servo.
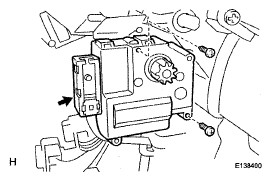 Courtesy of © TOYOTA, LICENSE AGREEMENT TMS1002
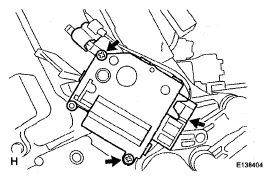
- REMOVE REAR MODE SERVO MOTOR LH
- Disconnect the connector.
- Remove the 2 screws and damper servo.
 Courtesy of © TOYOTA, LICENSE AGREEMENT TMS1002
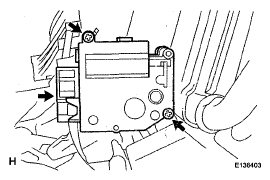
- REMOVE REAR MODE SERVO MOTOR RH
- Disconnect the connector.
- Remove the 2 screws and damper servo.
 Courtesy of © TOYOTA, LICENSE AGREEMENT TMS1002
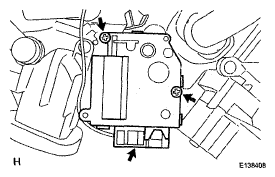
- REMOVE REAR AIR MIX SERVO MOTOR LH
- Disconnect the connector.
- Remove the 2 screws and damper servo.
 Courtesy of © TOYOTA, LICENSE AGREEMENT TMS1002
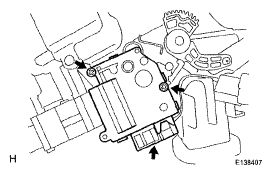
- REMOVE REAR AIR MIX SERVO MOTOR RH
- Disconnect the connector.
- Remove the 2 screws and damper servo.
 Courtesy of © TOYOTA, LICENSE AGREEMENT TMS1002
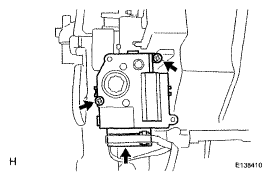
- REMOVE AIR MIX SERVO MOTOR LH (Hot)
- Disconnect the connector.
- Remove the 2 screws and damper servo.
 Courtesy of © TOYOTA, LICENSE AGREEMENT TMS1002
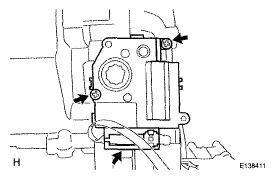
- REMOVE AIR MIX SERVO MOTOR RH (Hot)
- Disconnect the connector.
- Remove the 2 screws and damper servo.
 Courtesy of © TOYOTA, LICENSE AGREEMENT TMS1002
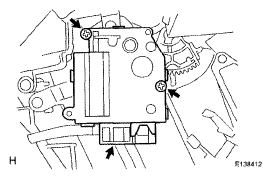
- REMOVE HOT AIR BYPASS SERVO MOTOR
- Disconnect the connector.
- Remove the 2 screws and damper servo.
 Courtesy of © TOYOTA, LICENSE AGREEMENT TMS1002
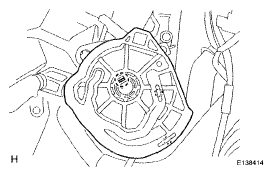
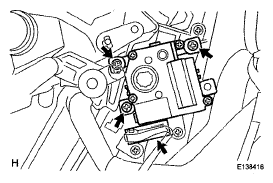
- REMOVE FRONT FOOT/DEF SERVO MOTOR LH
- Detach the claw and remove the main plate.
 Courtesy of © TOYOTA, LICENSE AGREEMENT TMS1002
- Disconnect the connector.
- Remove the 3 screws and damper servo.
 Courtesy of © TOYOTA, LICENSE AGREEMENT TMS1002
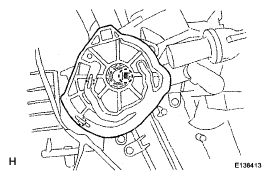
- REMOVE FRONT FOOT/DEF SERVO MOTOR RH
- Detach the claw and remove the main plate.
 Courtesy of © TOYOTA, LICENSE AGREEMENT TMS1002
- Disconnect the connector.
- Remove the 3 screws and damper servo.
Courtesy of © TOYOTA, LICENSE AGREEMENT TMS1002
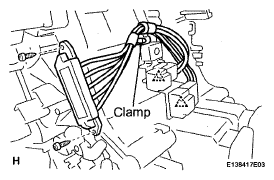
- REMOVE PTC HEATER ASSEMBLY (w/ PTC Heater)
- Remove the 2 screws.
- Detach the 3 clamps and remove the PTC heater.
 Courtesy of © TOYOTA, LICENSE AGREEMENT TMS1002
- REMOVE AIR CONDITIONER HARNESS
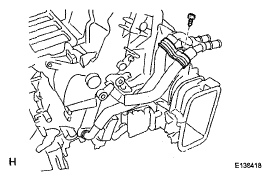
- REMOVE AIR CONDITIONER RADIATOR ASSEMBLY
- Remove the screw and bracket.
 Courtesy of © TOYOTA, LICENSE AGREEMENT TMS1002
- Remove the radiator, as shown in the illustration.
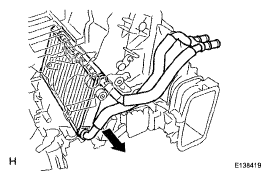 Courtesy of © TOYOTA, LICENSE AGREEMENT TMS1002
- REMOVE EVAPORATOR SUB-ASSEMBLY
- Remove the butyl tape and packing from the A/C tube.
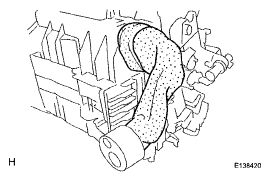 Courtesy of © TOYOTA, LICENSE AGREEMENT TMS1002
- Remove the 6 screws.
- Detach the 3 claws and remove the front cooling unit case.
- Remove the evaporator.
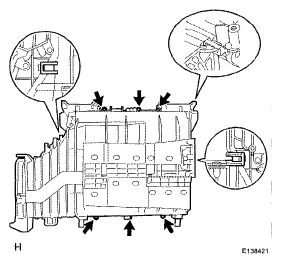 Courtesy of © TOYOTA, LICENSE AGREEMENT TMS1002
- REMOVE FRONT EVAPORATOR TEMPERATURE SENSOR
- Detach the clamp and remove the sensor.
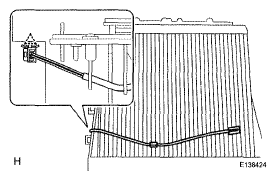 Courtesy of © TOYOTA, LICENSE AGREEMENT TMS1002