ACIS Vacuum Switching Valve (ES300, GS300 & SC300)
- On GS300 and SC300, remove engine wire clamp from dipstick if equipped. Remove bolt and A/T fluid dipstick and guide. Remove and discard "O" ring. On ES300, remove engine cover and wire harness cover. On all models, remove emission control valve set. Disconnect vacuum hoses and electrical connector from Vacuum Switching Valve (VSV). See Figure-6.
- Remove VSV if necessary. Measure resistance between VSV terminals. On ES300, if resistance is 33-39 ohms at 68°F (20°C), go to next step. On GS300 and SC300, if resistance is 39-45 ohms at 68°F (20°C), go to next step. If resistance is not as specified, replace ACIS VSV.
- Check for continuity between VSV case and each terminal at VSV connector (this checks for an internal short). If continuity does not exist, go to next step. If continuity exists, replace VSV.
- Apply compressed air to port "E". See Fig 1. Air should flow out of filter, but not out of port "F". Apply 9-14 volts and ground to VSV terminals. Apply compressed air to port "E". Air should flow out of port "F", but not out of filter. If ACIS VSV does not function as specified, replace ACIS VSV.
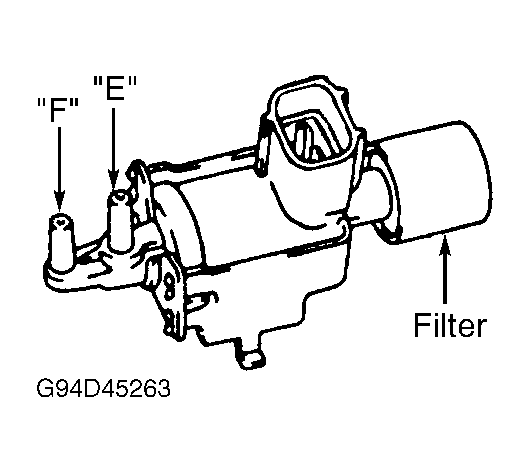 Courtesy of © TOYOTA, LICENSE AGREEMENT TMS1002