Floor Console Replacement: [M/T]
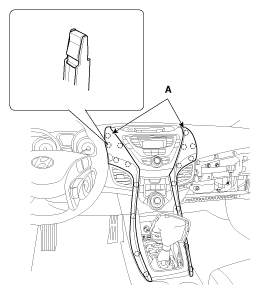
- Using a screwdriver or remover, remove the crash pad center garnish (A).
 Courtesy of HYUNDAI MOTOR AMERICA
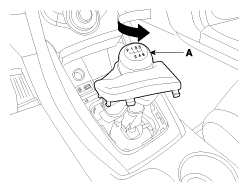
- Using a screwdriver or remover, remove the gear boot (A).
 Courtesy of HYUNDAI MOTOR AMERICA
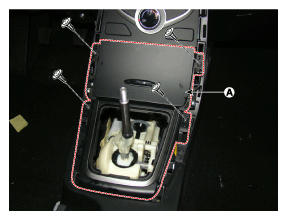
- After loosening the mounting screws, then remove the console upper cover (A).
 Courtesy of HYUNDAI MOTOR AMERICA
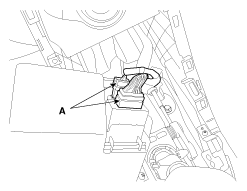
- Disconnect the multimedia jack connectors (A).
 Courtesy of HYUNDAI MOTOR AMERICA
- Using a screwdriver or remover, remove the parking brake cover (A).
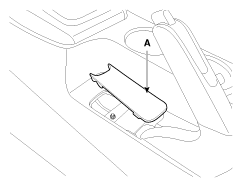 Courtesy of HYUNDAI MOTOR AMERICA
- Remove the console tray mat (A).
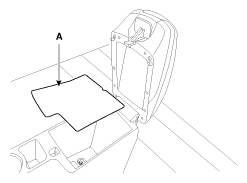 Courtesy of HYUNDAI MOTOR AMERICA
- After loosening the mounting screws and bolts, then remove the floor console assembly (A).
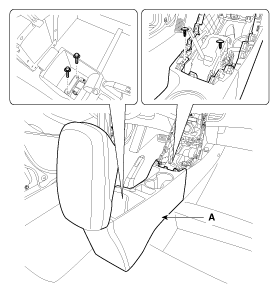 Courtesy of HYUNDAI MOTOR AMERICA
- After loosening the mounting screws, bolts, clips, then remove the console side cover (A).
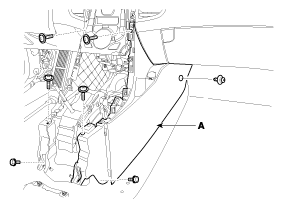 Courtesy of HYUNDAI MOTOR AMERICA
- Disconnect the connector (A).
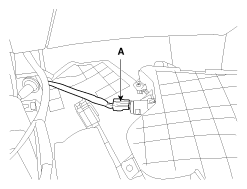 Courtesy of HYUNDAI MOTOR AMERICA
- Install in the reverse order of removal.
NOTE:
- Make sure the connectors are connected in properly.
- Replace any damaged clips.