Installation Procedure
- Install the differential carrier assembly to the vehicle.
- Perform the following procedure before installing the axle mounting bolts.
- 2.1 Remove all traces of the original adhesive patch.
- 2.2 Clean the threads of the bolt with brake parts cleaner or the equivalent and allow to dry.
- 2.3 Apply Threadlocker GM P/N 12345382 (Canadian P/N 10953489) to the threads of the bolt.
- Install the differential carrier assembly right side axle mount bolt and nut. Tighten the bolts to 100 N.m (75 lb ft).
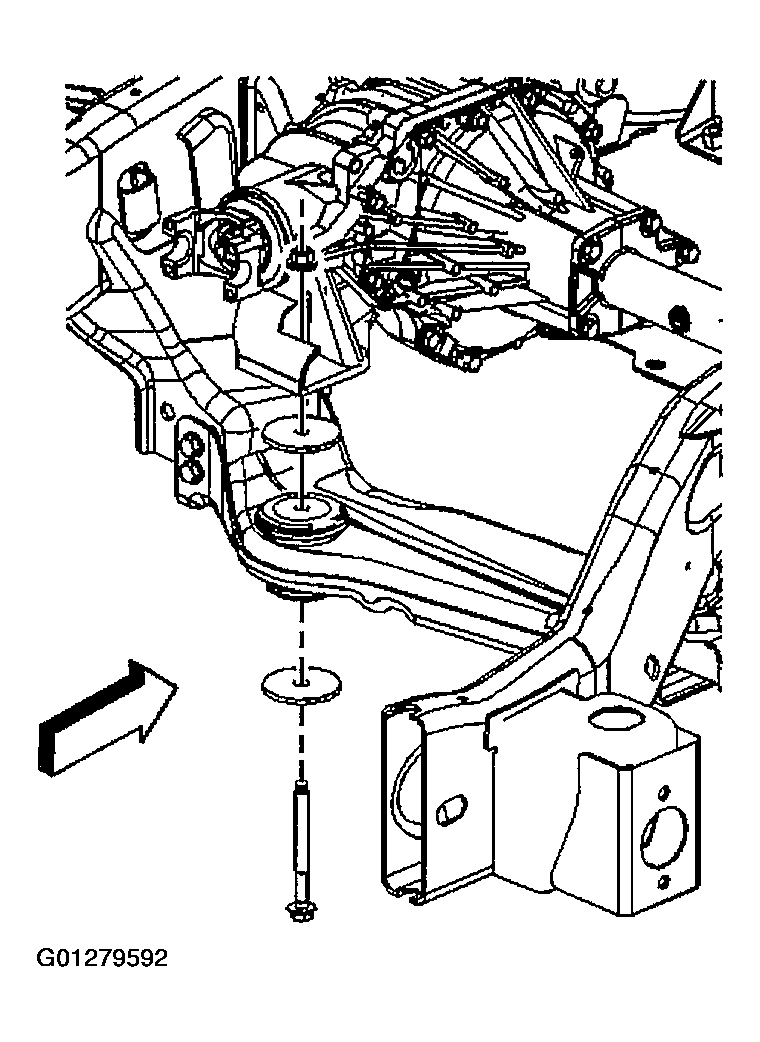 Courtesy of GENERAL MOTORS CORP.
- Install the differential carrier assembly left side axle mount bolt and nut. Tighten the bolts to 100 N.m (75 lb ft).
- Remove the transmission jack.
- Install the lower control arm crossmember.
- Connect the vent hose (1) to the differential carrier case assembly (2).
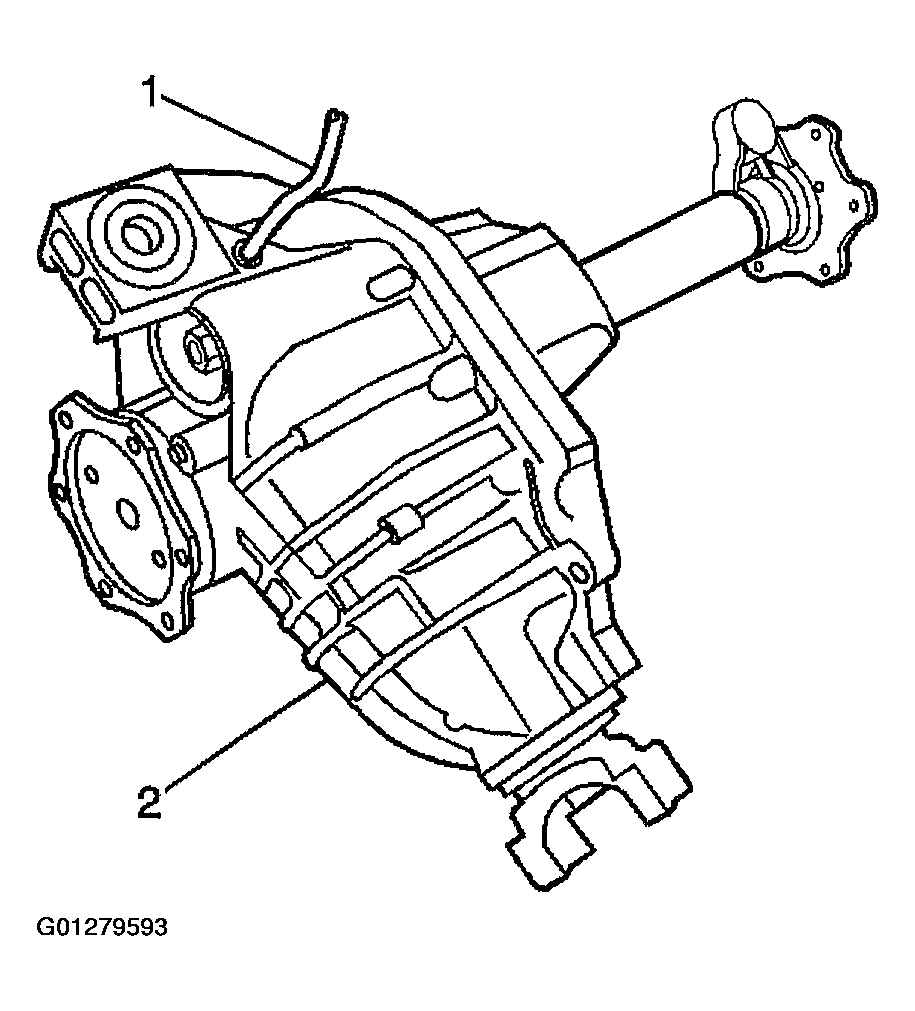 Courtesy of GENERAL MOTORS CORP.
- Install the wheel drive shafts. Refer to WHEEL DRIVE SHAFT REPLACEMENT
.
- Install the front propeller shaft to the differential carrier assembly. Refer to PROPELLER SHAFT REPLACEMENT - FRONT
.
- Inspect the lubricant level and add, if necessary. Refer to Lubricant Level Inspection - Front Drive Axle .
- Install the catalytic converter guard. Refer to
- Install the engine protection shield. Refer to
- Remove the jack or utility stands.
- Lower the vehicle.