VSA Off Switch Removal, Installation, and Test: Installation
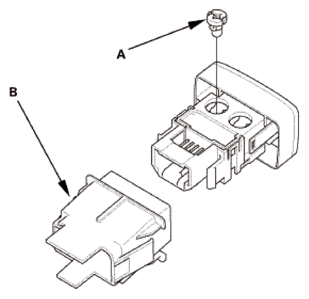
- VSA Off Switch Bulb (If necessary)
- Install the bulb (A).
- Install the cover (B).
 Courtesy of AMERICAN HONDA MOTOR CO., INC.
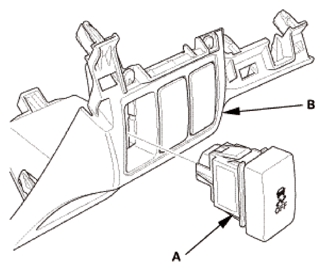
- VSA Off Switch
- Install the VSA OFF switch (A) to the driver's dashboard lower cover (B).
 Courtesy of AMERICAN HONDA MOTOR CO., INC.
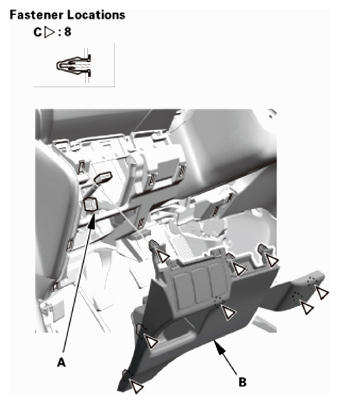
- Driver's Dashboard Lower Cover
- Connect the connector (A), then install the driver's dashboard lower cover (B). Make sure the clips (C) snap into place securely.
 Courtesy of AMERICAN HONDA MOTOR CO., INC.
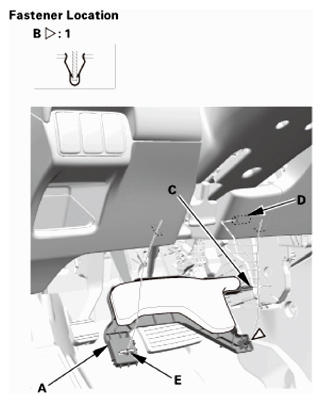
- Driver's Dashboard Undercover
- Install the driver's dashboard undercover (A). Make sure the clip (B) snap into place securely, and the pin (C) into the holder (D) securely.
- Turn the lock knob (E) 90 °.
 Courtesy of AMERICAN HONDA MOTOR CO., INC.
- Driver's Dashboard Panel Assembly
- Connect the connector (A), then install the driver's dashboard panel assembly (B). Make sure the clips (C) snap into place securely.
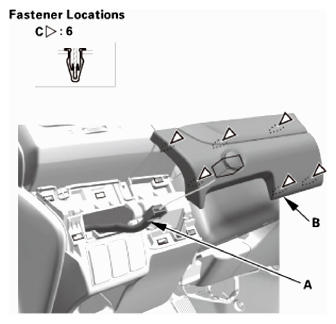 Courtesy of AMERICAN HONDA MOTOR CO., INC.