Automatic Transmission Range Selector Cable Adjustment
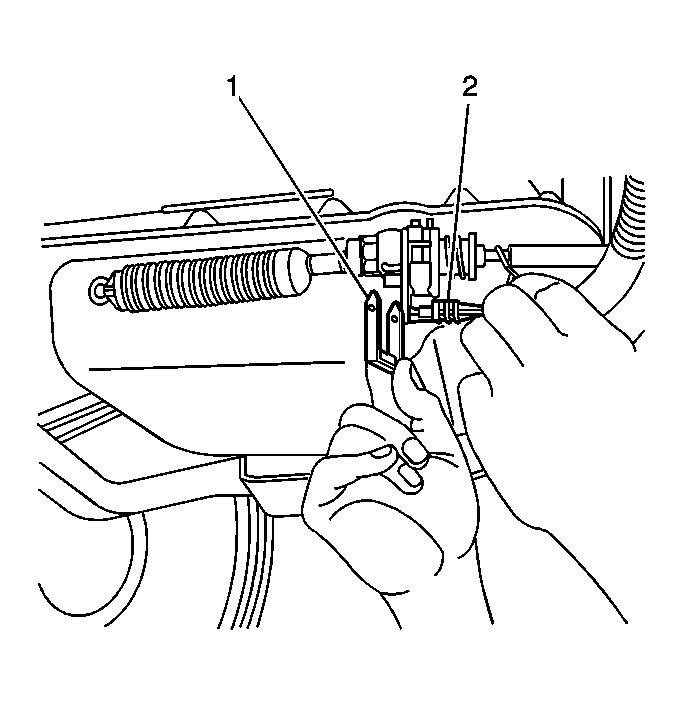 Courtesy of GENERAL MOTORS CORP.
- Apply the park brake.
- Place the transmission range selector control lever (column or floor shift) into the NEUTRAL position.
- Raise and suitably support the vehicle. Refer to Lifting and Jacking the Vehicle
in General Information.
- Remove the positive assurance pin (2) from the bracket.
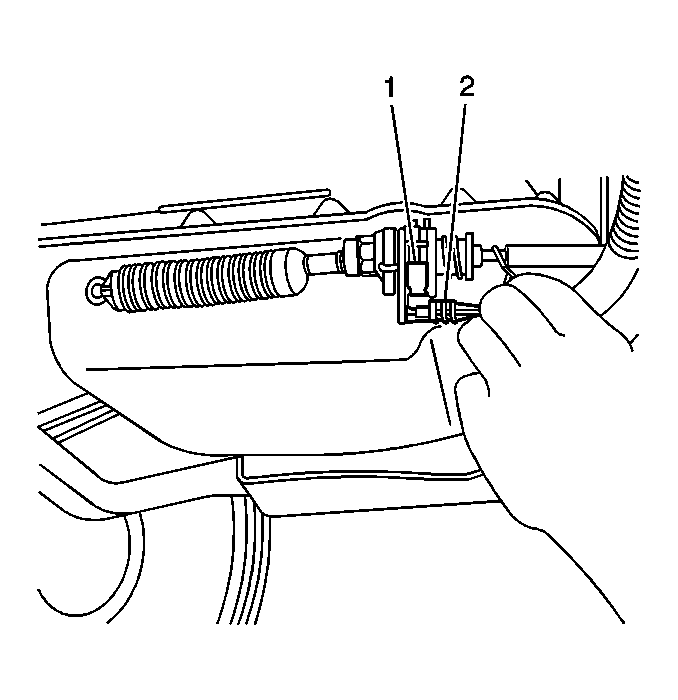 Courtesy of GENERAL MOTORS CORP.
- Release the cable lock tab (1).
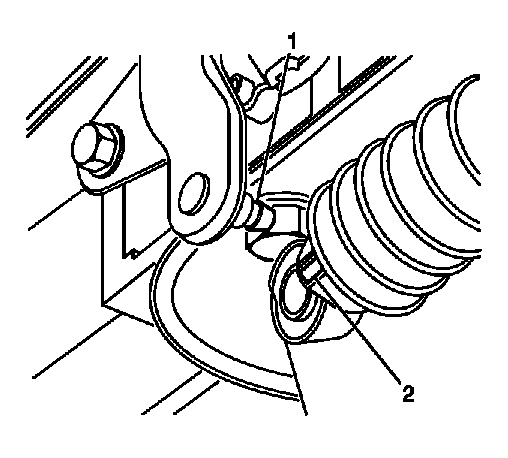 Courtesy of GENERAL MOTORS CORP.
- Ensure that the transmission range selector lever is in the NEUTRAL position. Rotate the range select lever fully clockwise then counter clockwise two detents.
- Pull the cable end completely forward and release it. This allows the adjustment spring to position the cable to its most rearward position. Use care not to pull the cable past the ball stud, this will result in a misadjusted cable.
- If the adjustment body is not free to move under spring load, a proper adjustment can still be made. Push the adjustment body against the rearward stop. Pull the cable end just far enough forward to install it to the ball stud.
- Install the range selector cable end (2) to the range selector lever ball stud (1).
Courtesy of GENERAL MOTORS CORP.
- Depress the locking tab of cable (1) to set the adjustment.
Courtesy of GENERAL MOTORS CORP.
- Install the positive assurance pin (2) into the bracket.
- Lower the vehicle.
- Check the vehicle for proper operation. The following conditions must be met:
- When moving the shift lever from Park to L, all detent positions will be attainable.
- There will be an equal amount of "free play" between the shift lever and the gate in the drive and reverse detent. If there is no "free play", the adjustment is not acceptable.
- With the key in the "on" position and shift lever in reverse, the key will not be removable, and the steering wheel will not be locked.
- With the key in the "locked" position, and the shift lever in the "park" position, the key will be removable, the steering wheel will be locked, and the shift lever will not disengage park.