Removal Procedure
- Disconnect Battery Negative Cable. Refer to Battery Negative Cable Disconnection and Connection
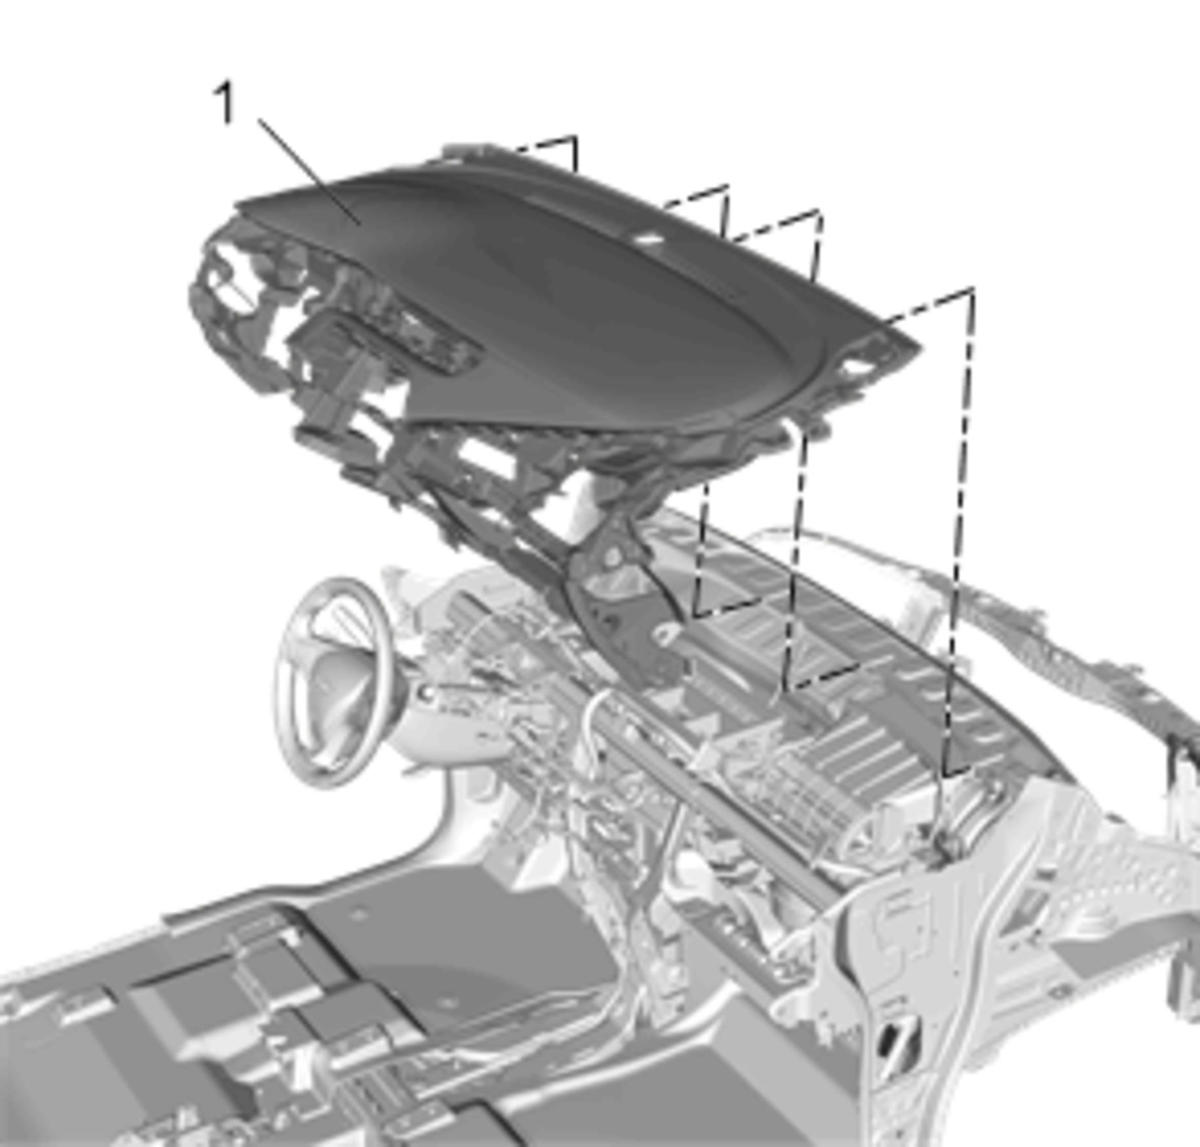 Courtesy of GENERAL MOTORS COMPANY
- Remove Instrument Panel Assembly (1). Refer to Instrument Panel Assembly Replacement
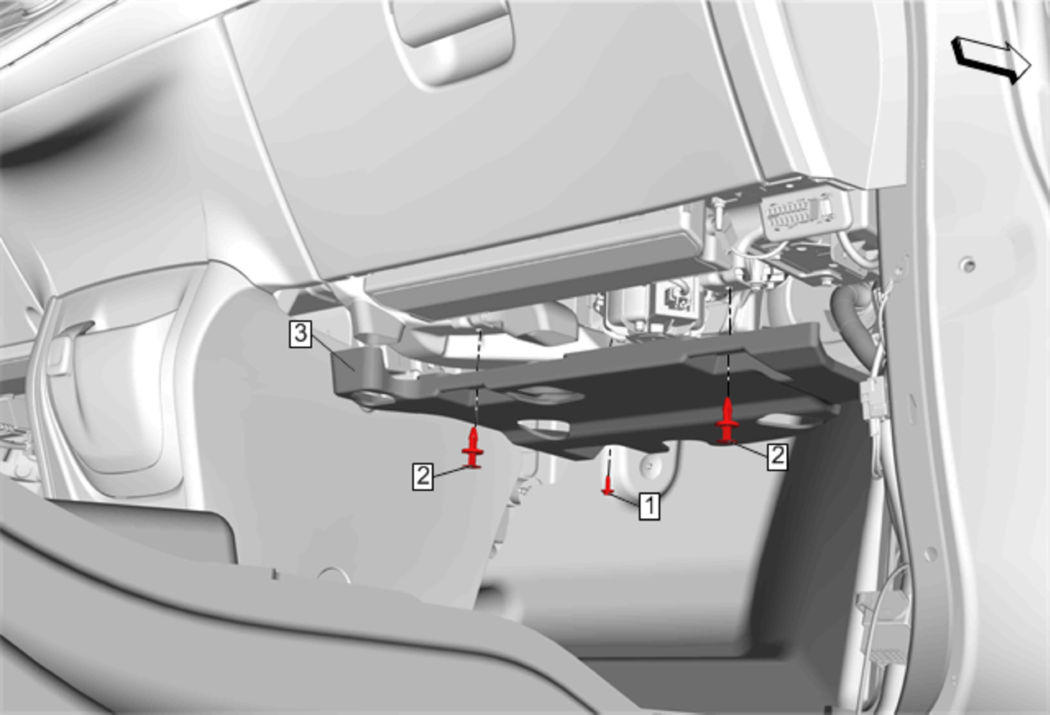 Courtesy of GENERAL MOTORS COMPANY
- Remove Instrument Panel Lower Trim Panel Insulator (3). Refer to Instrument Panel Lower Trim Panel Insulator Replacement
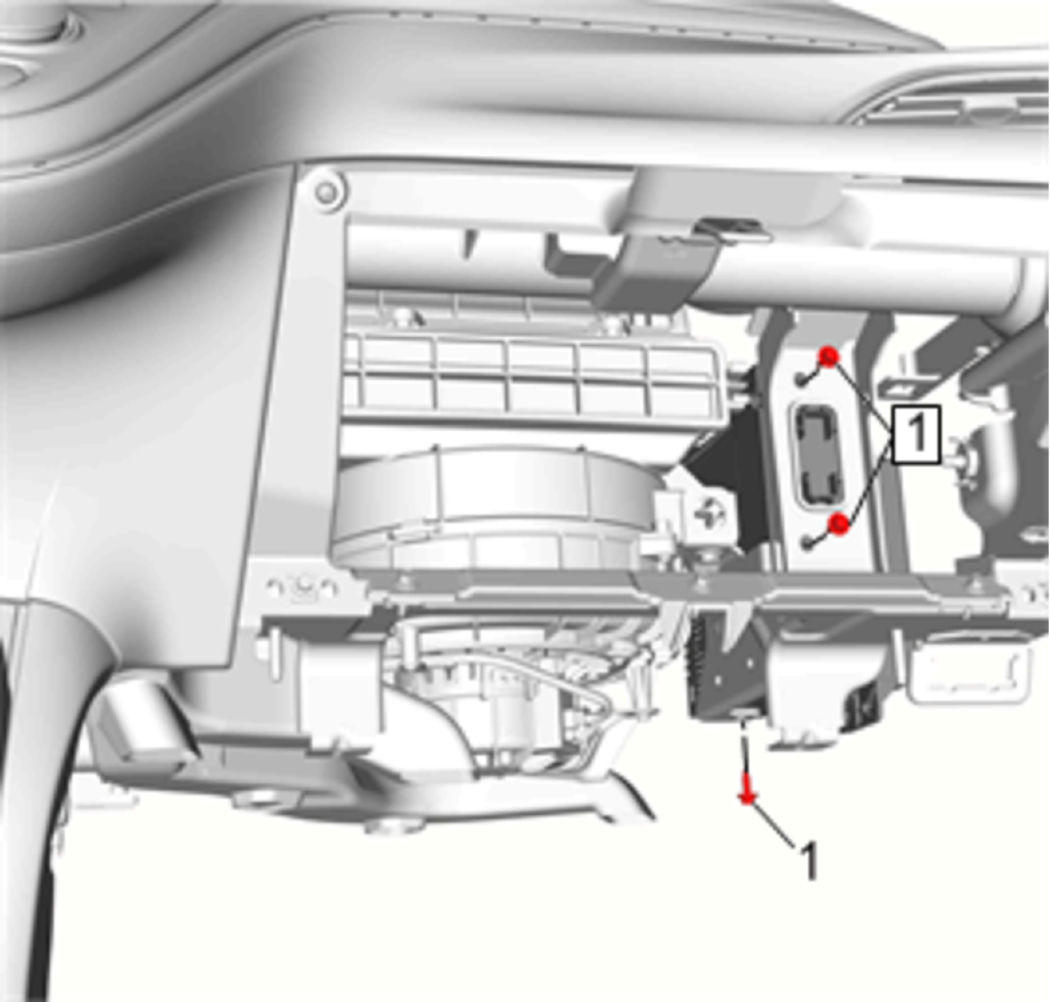 Courtesy of GENERAL MOTORS COMPANY
- Remove Radio Assembly Bolts (1)
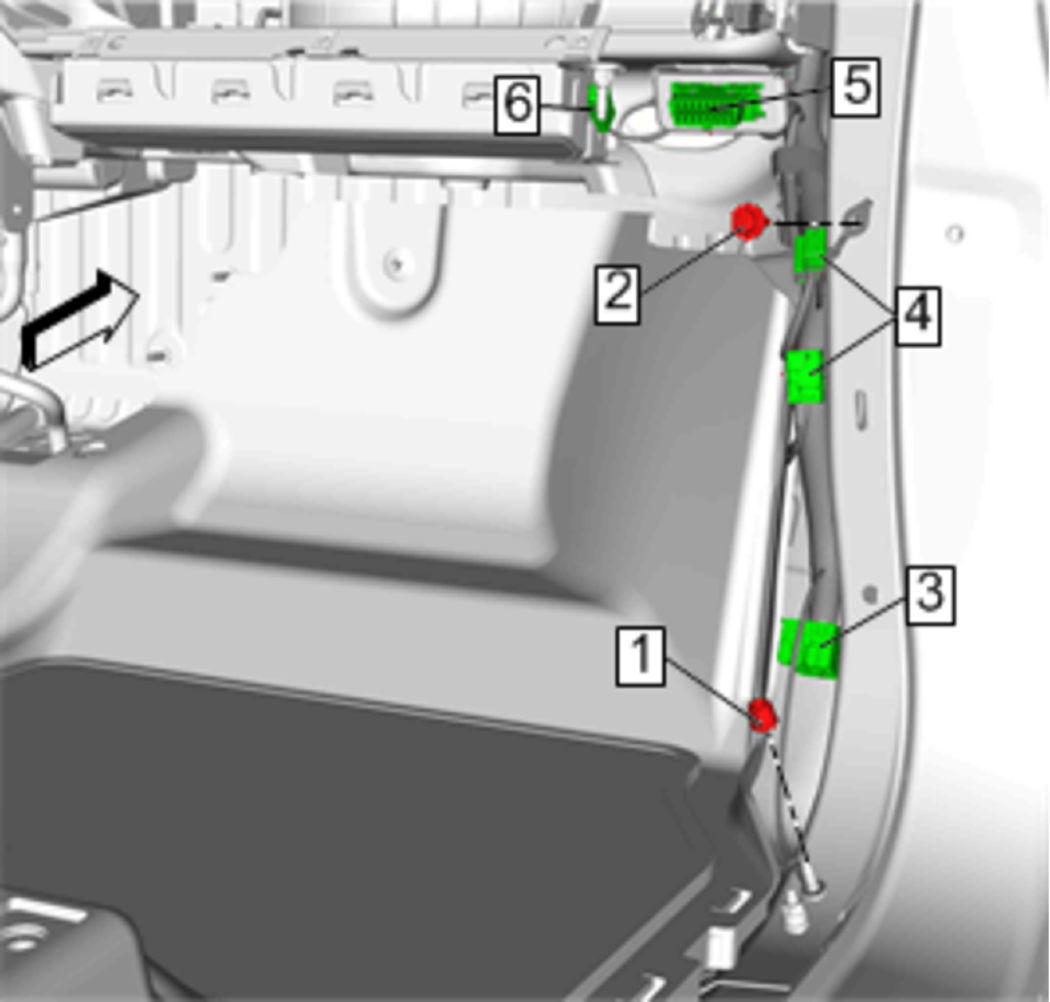 Courtesy of GENERAL MOTORS COMPANY
- Remove the ground nut (1) and ground wire.
- Remove the ground bolt (2) and ground wire.
- Unclip and disconnect the I/P main harness connector (3).
- Disconnect the coax antenna connectors (4).
- Unclip the passenger side DLC connector (5).
- Disconnect the passenger side airbag connector (6).
 Courtesy of GENERAL MOTORS COMPANY
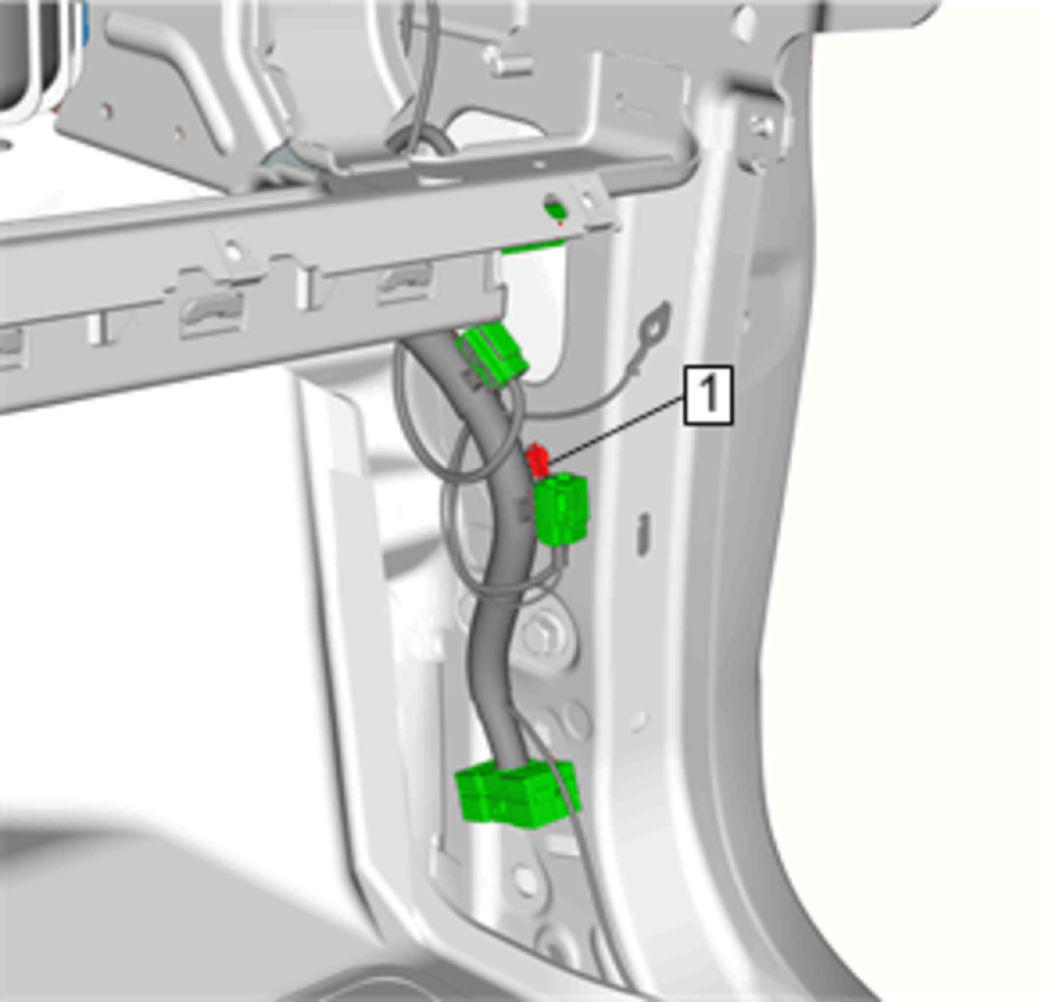
- Unclip the harness retainer (1).
 Courtesy of GENERAL MOTORS COMPANY
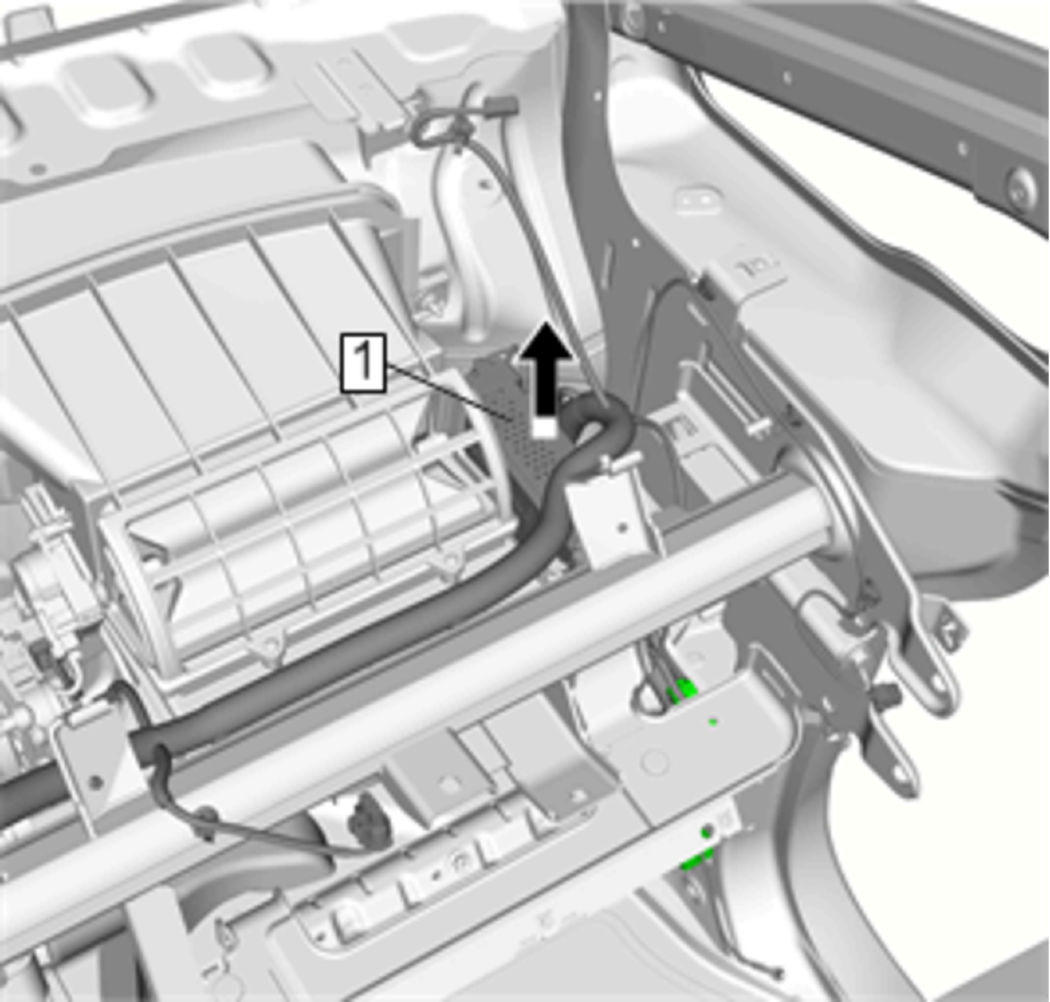
- Pull the radio assembly (1) upward with the harness.
 Courtesy of GENERAL MOTORS COMPANY
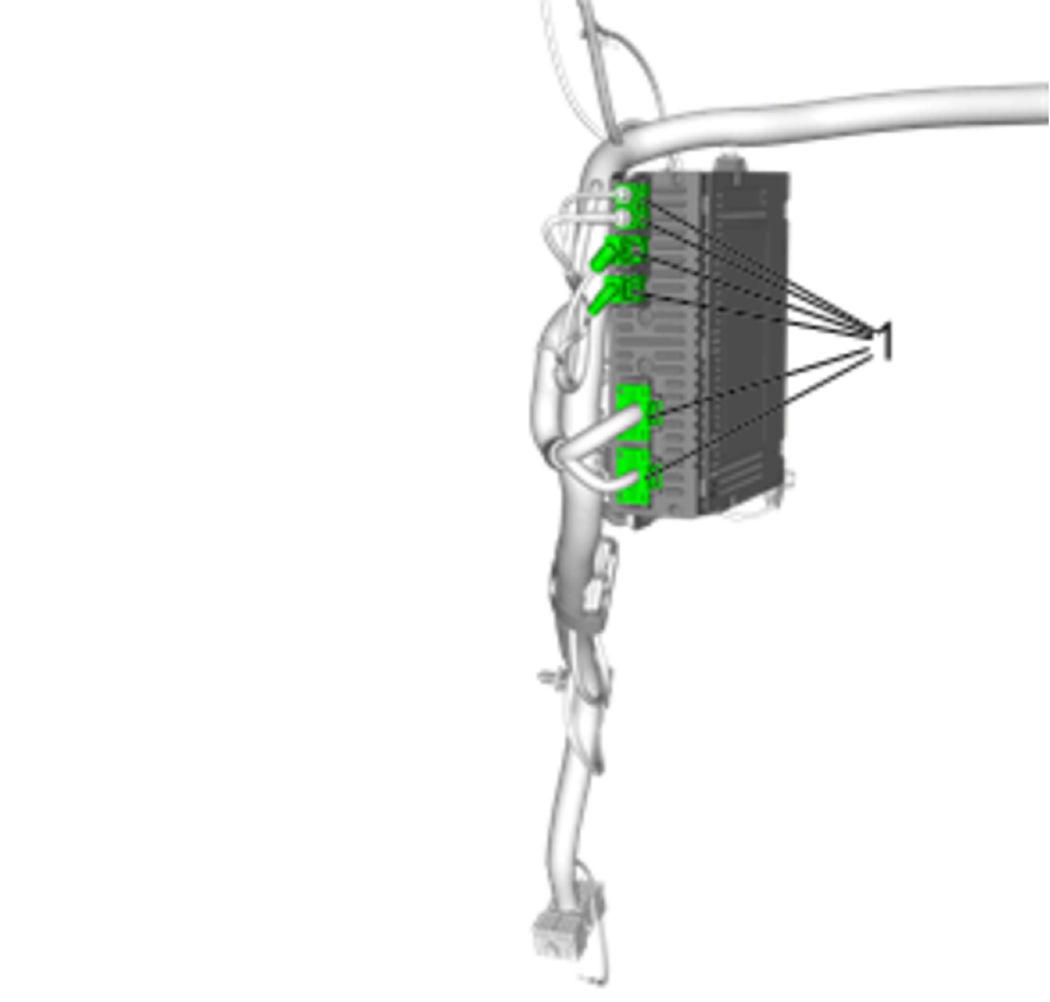
- Position the radio and harness assembly toward the interior of the vehicle.
- Disconnect the electrical connectors (1).
- Detach the wiring harness securing clips.
- Remove the radio from the vehicle.
 Courtesy of GENERAL MOTORS COMPANY
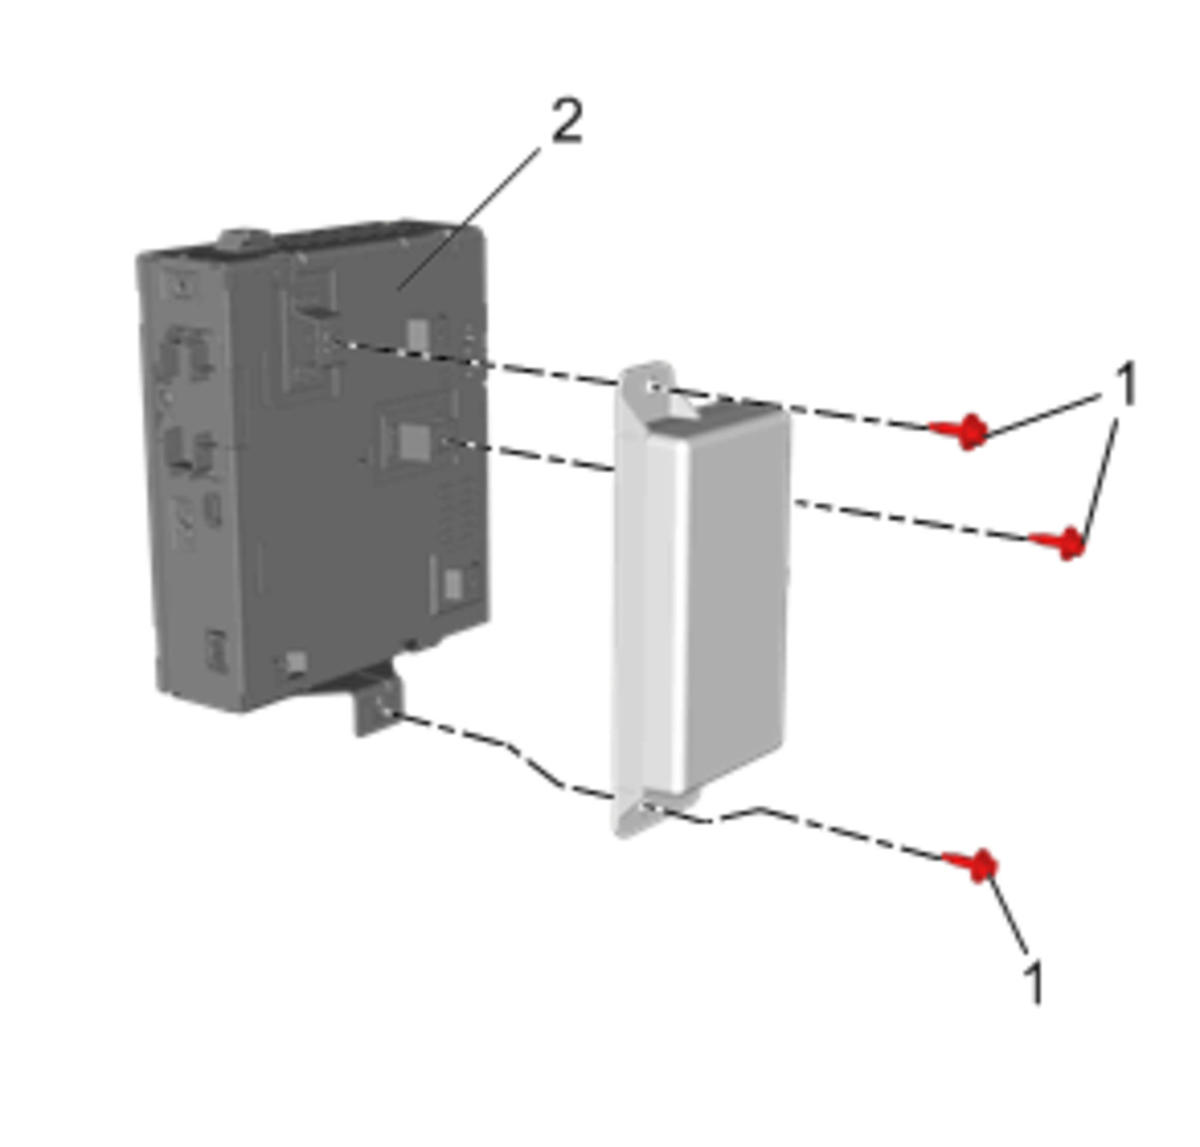
- Remove Bolts (1)
- Remove Communication Interface Module Battery @ Radio Assembly (2)