Removal Procedure
- Open the hood.
- Disconnect the negative battery cable. Refer to Battery Negative Cable Disconnection and Connection .
- Remove the air cleaner assembly. Refer to Air Cleaner Assembly Replacement
.
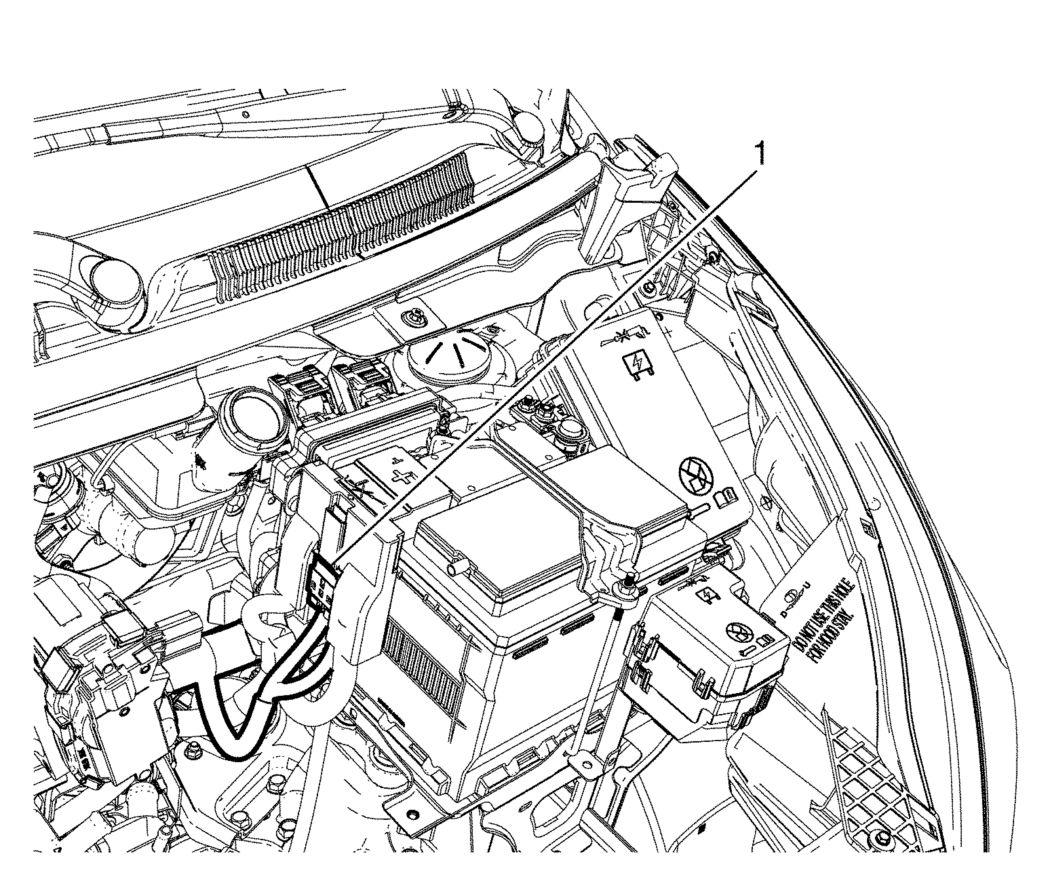
- Disconnect the body wiring master harness connector (1) from the battery positive cable junction block.
 Courtesy of GENERAL MOTORS COMPANY
- Remove the battery. Refer to Battery Replacement .
- Remove the fuse block cover.
 Courtesy of GENERAL MOTORS COMPANY
- Remove the auxiliary fuse block cover.
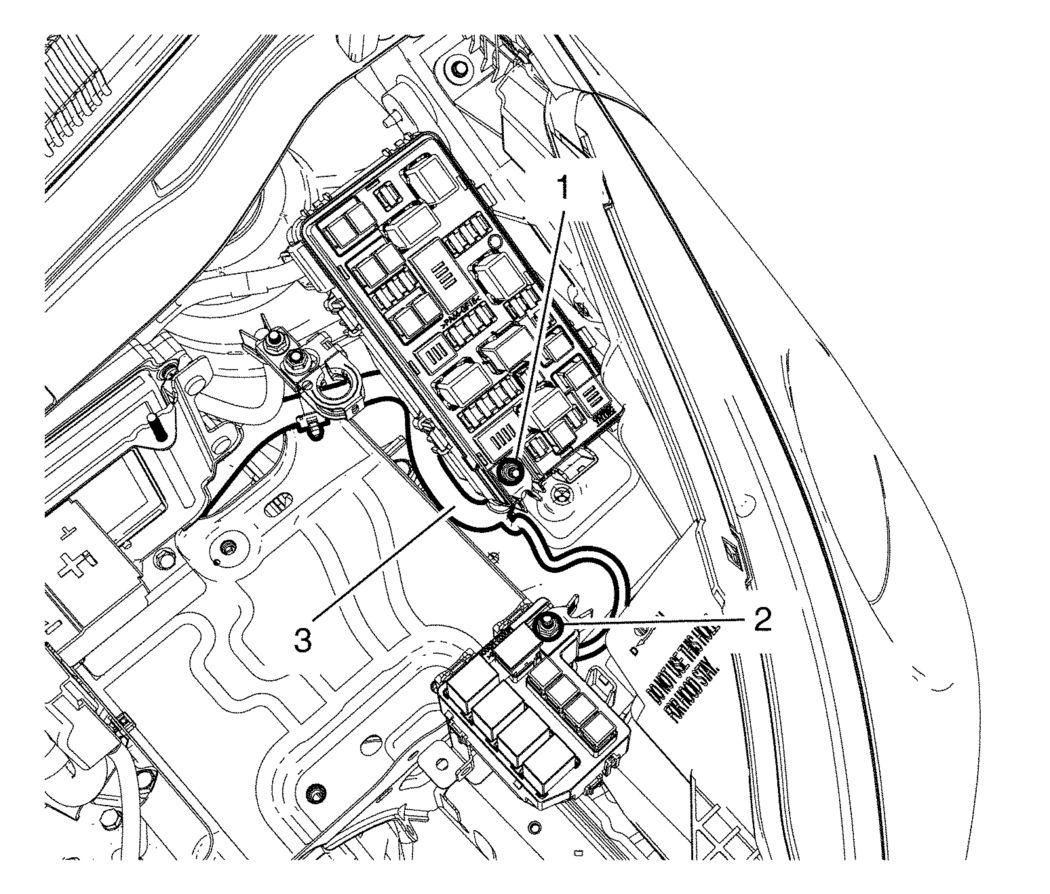
- Remove the positive battery cable nut (1) from the fuse block.
- Remove the positive battery cable nut (2) from the auxiliary fuse block.
- Remove the positive battery cable (3) from the fuse block and auxiliary fuse block.
- Remove the battery tray. Refer to Battery Tray Replacement .
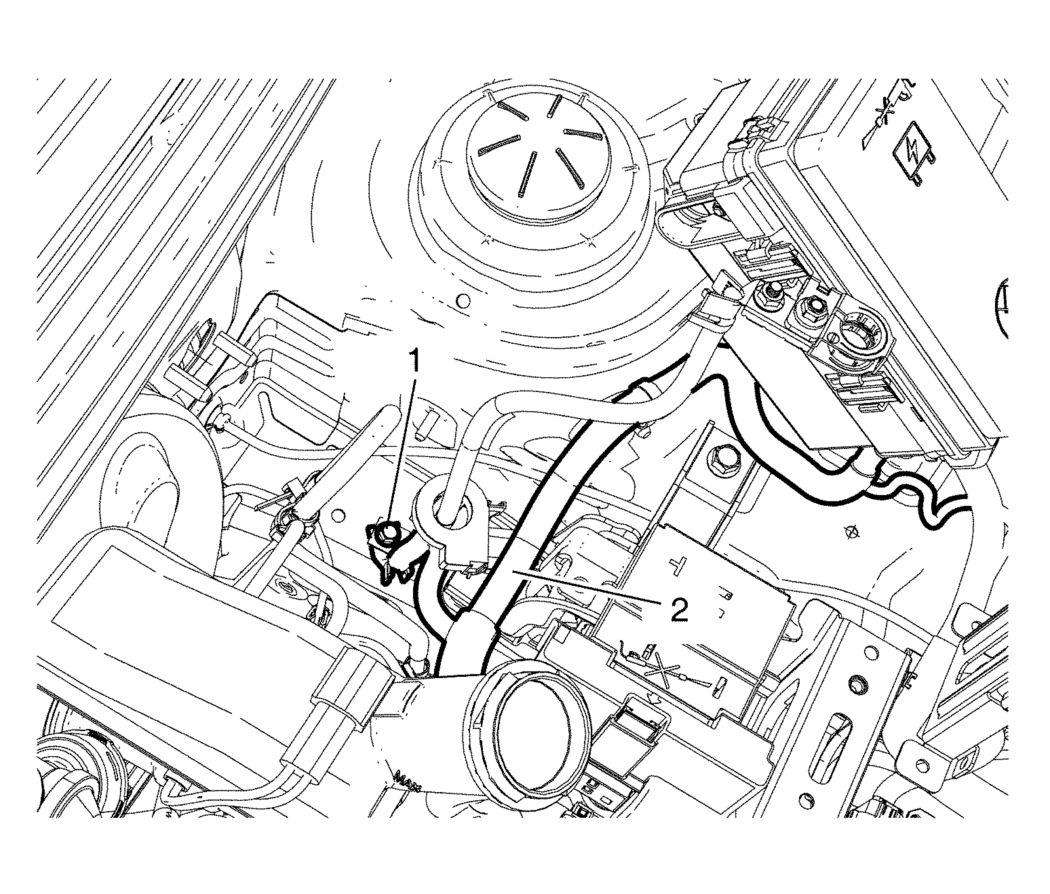
- Remove the battery negative cable frame ground bolt (1).
 Courtesy of GENERAL MOTORS COMPANY
- Remove the battery negative cable (2).
- Raise the vehicle. Refer to Lifting and Jacking the Vehicle
.
- Remove the exhaust pipe assembly. Refer to Exhaust Pipe Replacement (LFM)
.
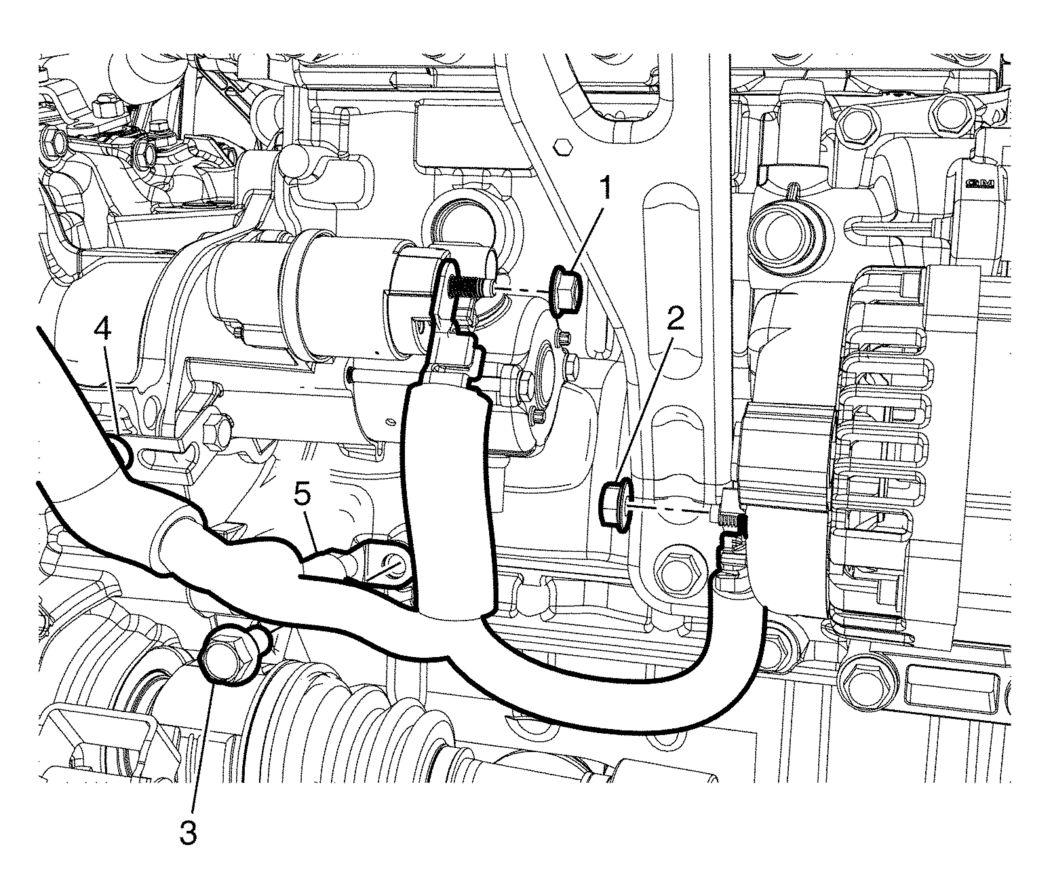
- Remove the starter solenoid B (+) nut (1).
 Courtesy of GENERAL MOTORS COMPANY
- Remove the generator B (+) nut (2).
- Remove the engine harness and battery cable male ground bolt (3).
- Remove the retainer (4).
- Remove the battery positive and negative cable (5) from the vehicle.