Sensor Removal
- Raise vehicle on a suitable support. Remove tire/wheel assembly from vehicle.
- Dismount tire from wheel following tire changer manufacturer's instructions while paying special attention to the following to avoid damaging tire pressure sensor:
- Place the sensor's cap and valve on a dry, clean surface after removal. The cap is aluminum and the valve is nickel-plated to prevent corrosion. DO NOT substitute a cap or valve made of any other material.
- Position the bead breaking fixture 90 degrees from valve stem when separating tire bead from wheel.
- Position the mounting/dismounting head so tire iron (or pry bar) can be inserted slightly clockwise of sensor body when prying tire bead up and over the mounting/dismounting head.
- Using tire machine, rotate tire/wheel assembly clockwise when transferring the tire bead to the outside of the wheel rim.
- Repeat items for inner bead.
- Remove the TORX screw (3) from the tire pressure sensor (2) and pull it straight off the tire pressure valve stem (1) (see Fig 1).
- Remove the tire pressure valve stem by pulling it through the rim.
- Follow Sensor Installation below, to replace the sensor.
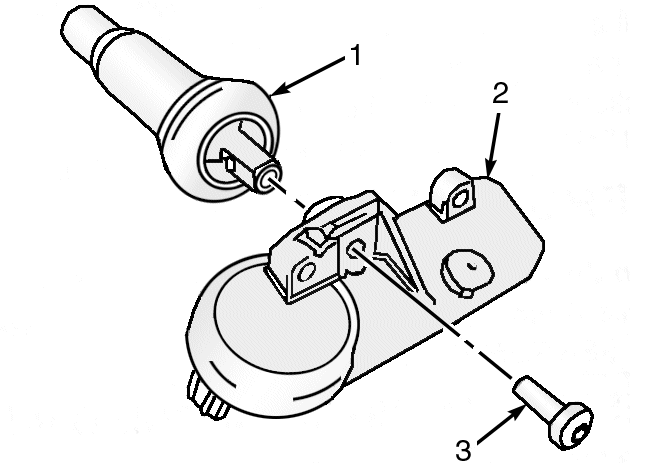 Courtesy of GENERAL MOTORS CORP.