Removal Procedure
- Remove the case side cover. Refer to CASE SIDE COVER REPLACEMENT
.
- Remove the oil pump. Refer to OIL PUMP REPLACEMENT
.
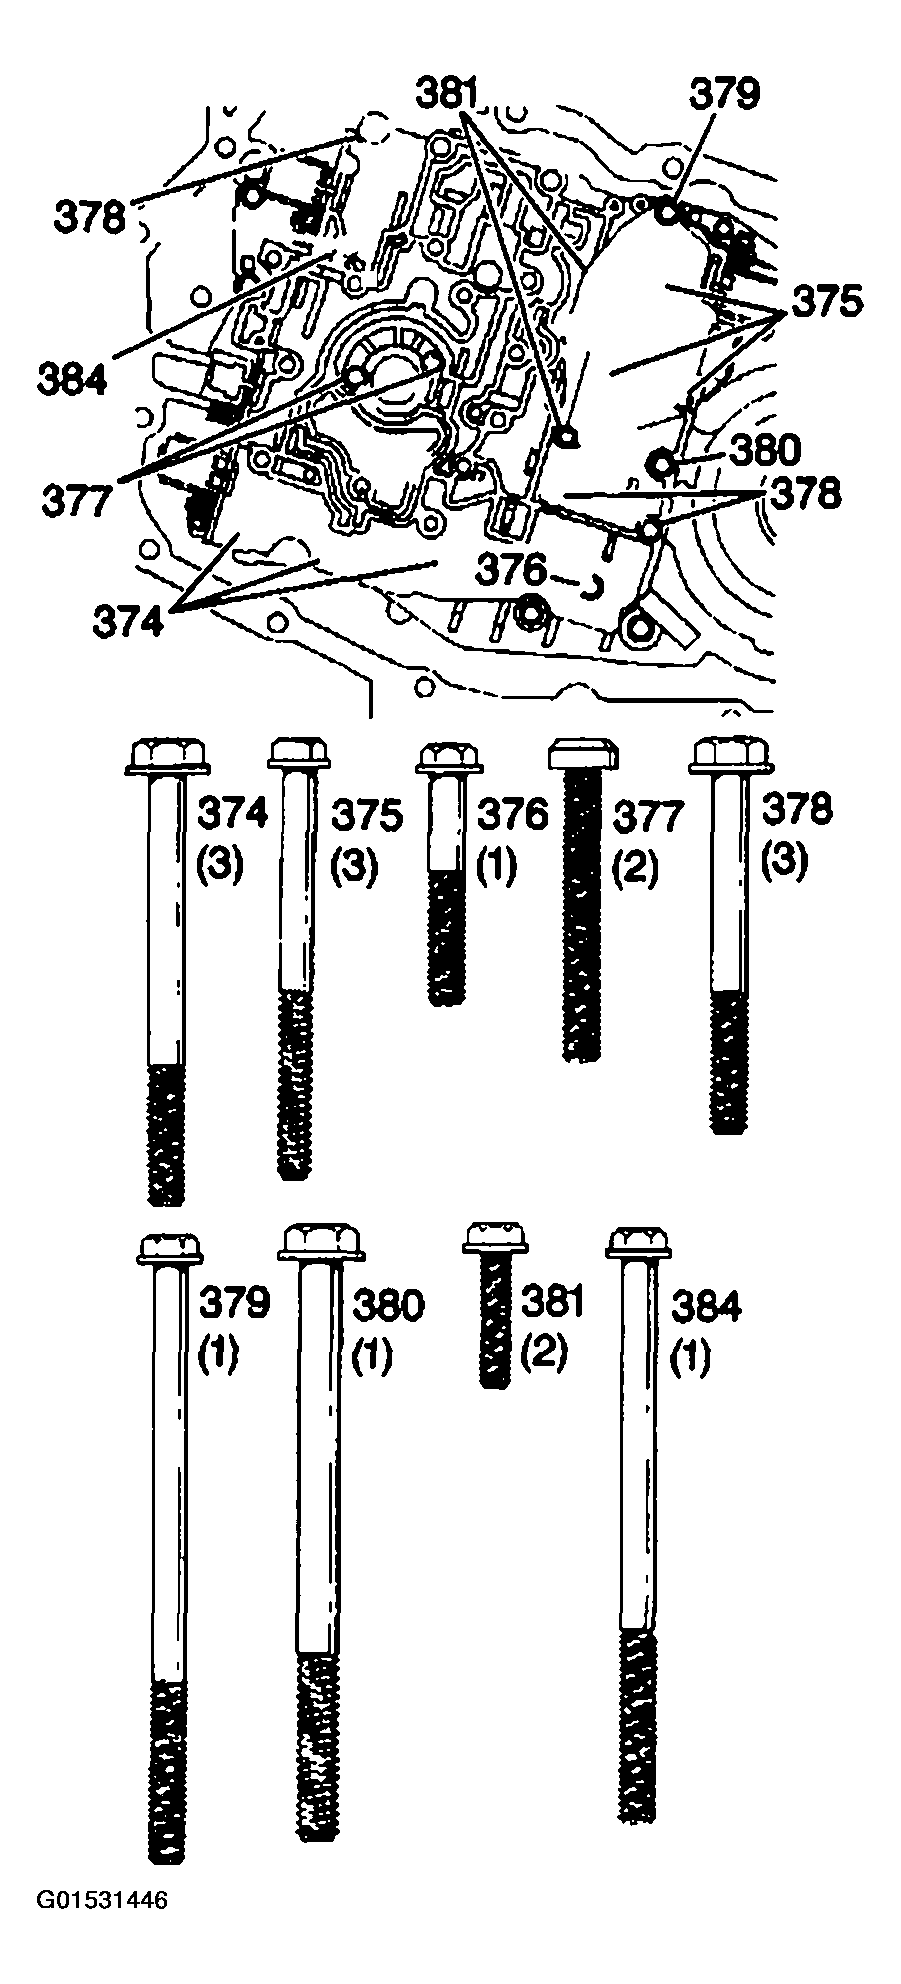
- Remove the valve body bolts (374-381, 384).
 Courtesy of GENERAL MOTORS CORP.
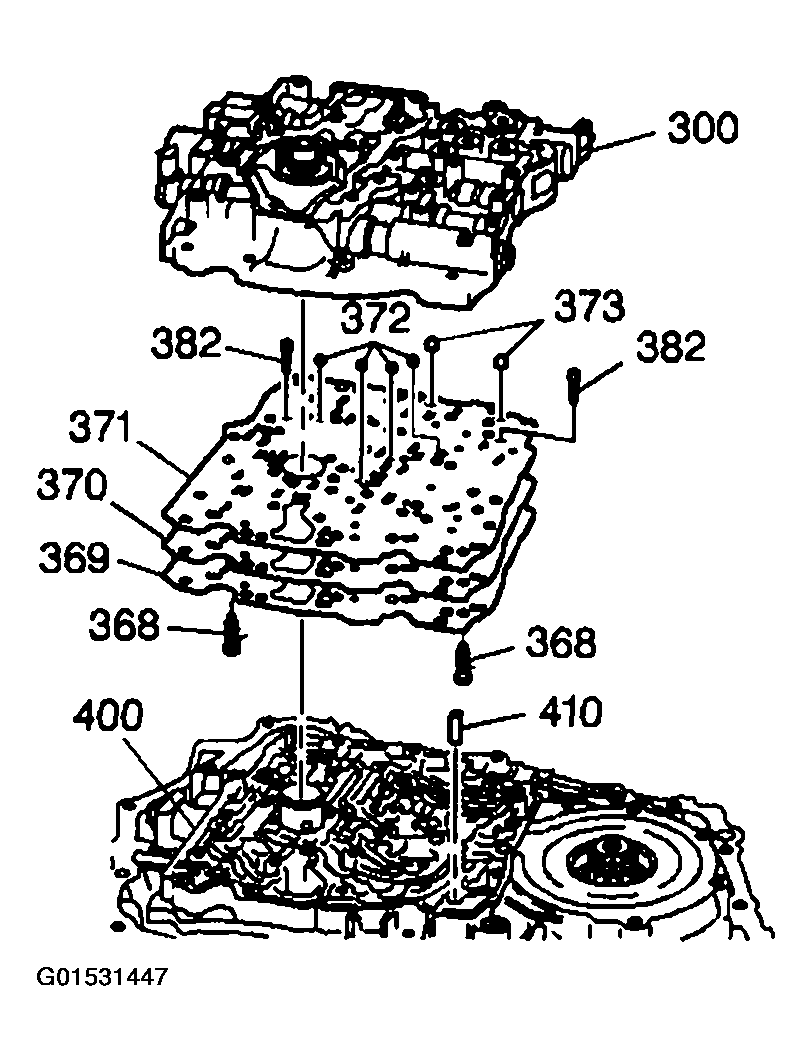
- Remove the valve body (300) while keeping the spacer plate (370) with the transaxle.
 Courtesy of GENERAL MOTORS CORP.
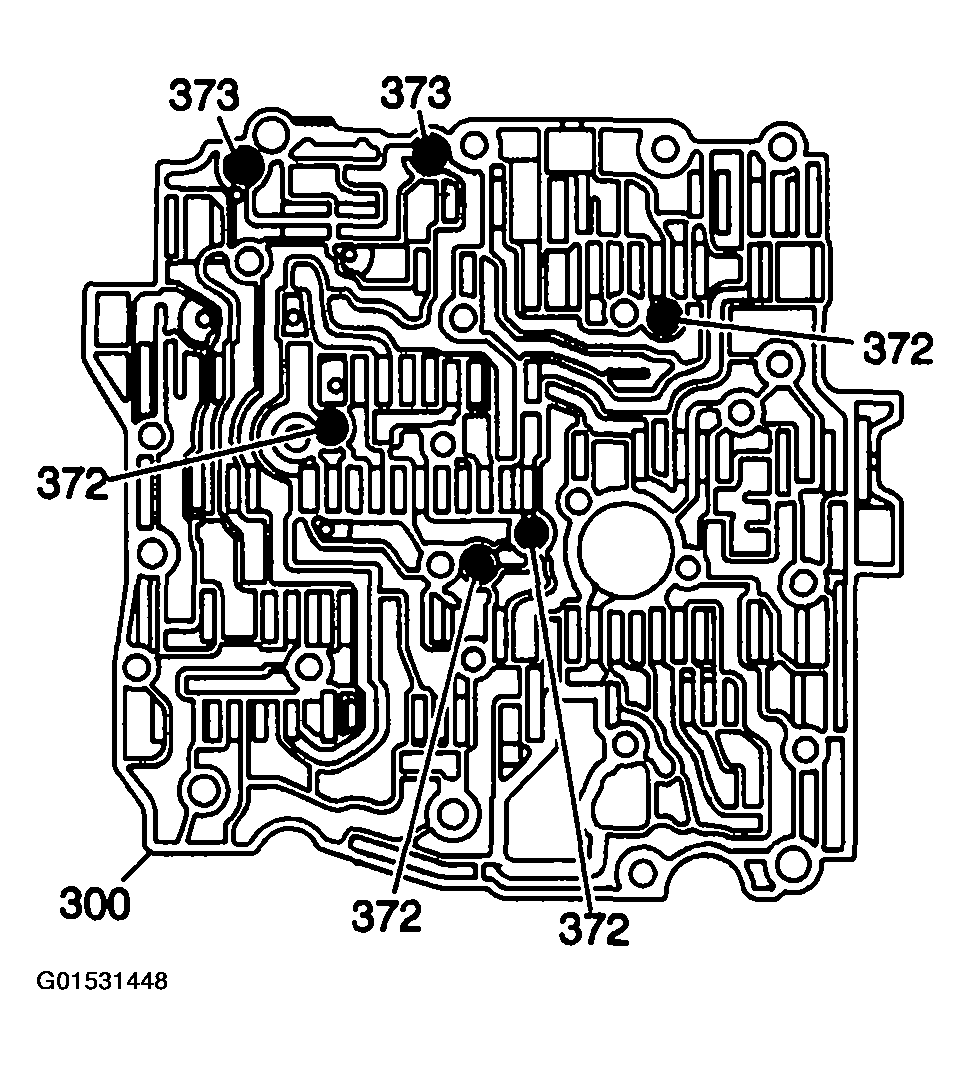
- Remove the ball check valves (372, 373) from the valve body.
 Courtesy of GENERAL MOTORS CORP.
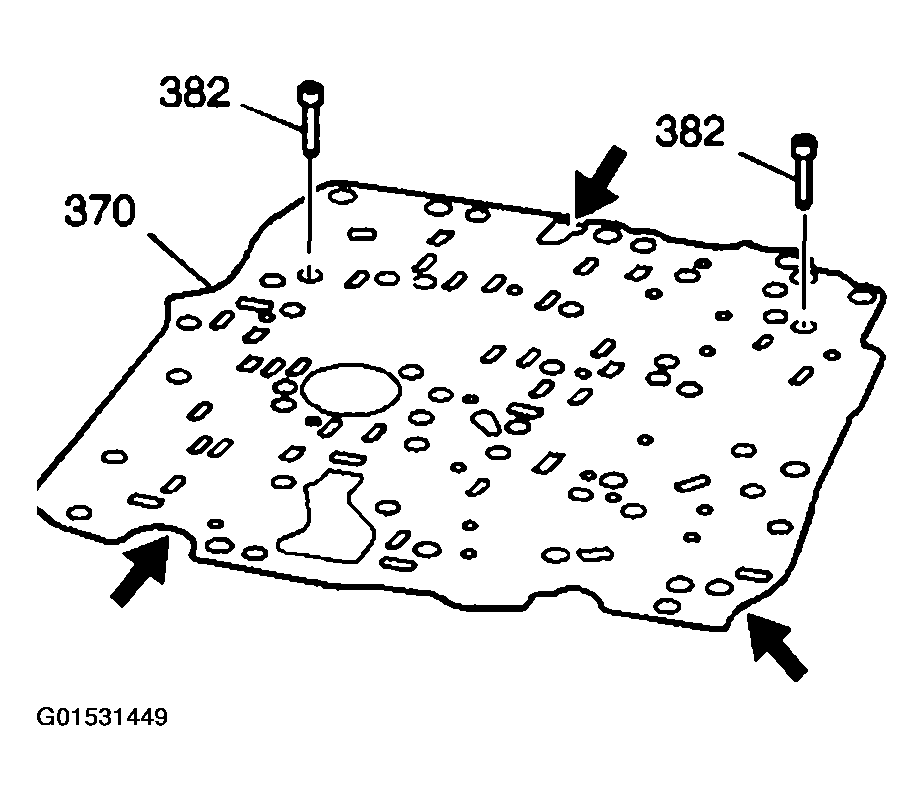
- Remove the spacer plate (370) and gasket.
 Courtesy of GENERAL MOTORS CORP.
- Remove the ball check valves (372) from the case cover.
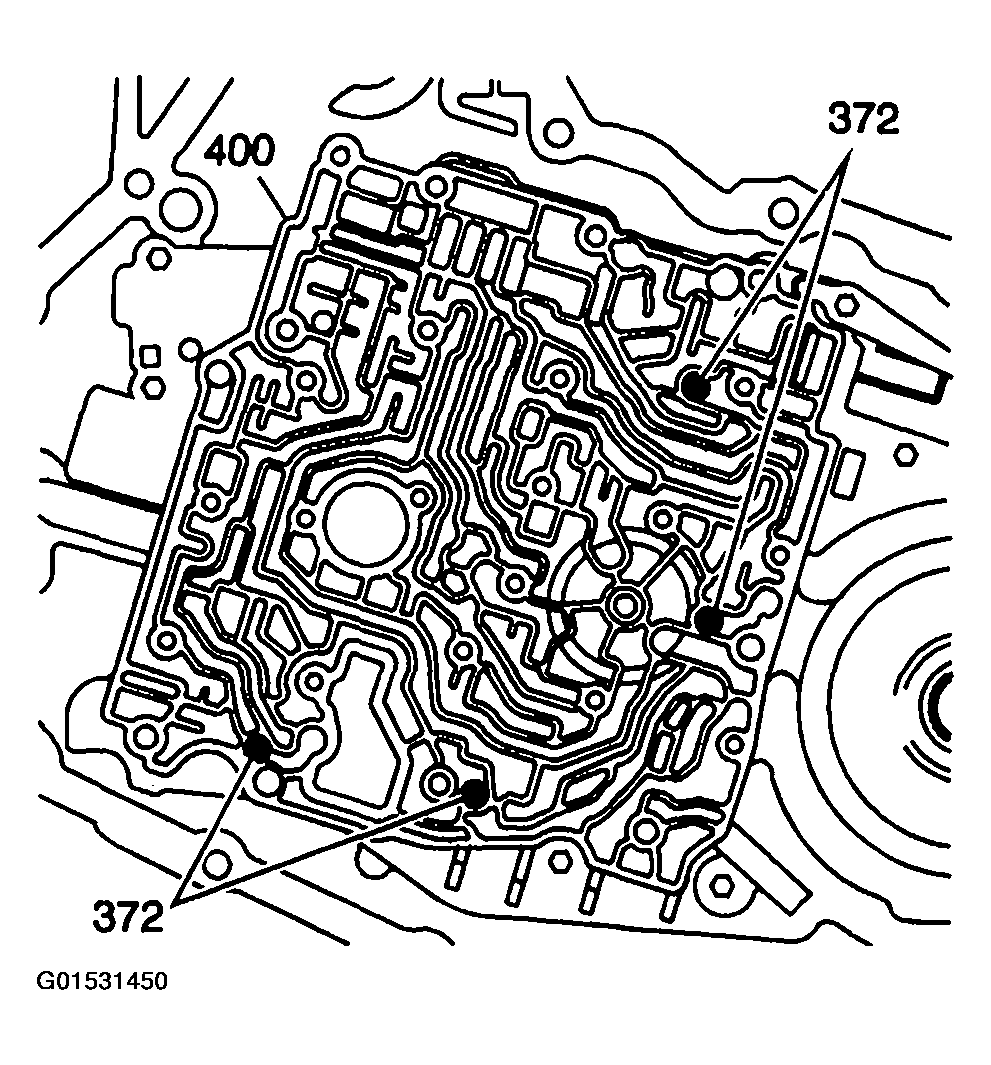 Courtesy of GENERAL MOTORS CORP.
- Inspect each check valve seat in the spacer plate (370) for excessive peening. Place a ball check valve (372) on each seat and use a flashlight in order to look for visible light between the valve and the seat.
- Inspect all components removed from the transaxle. Refer to TRANSFER CASE - STEYR
.
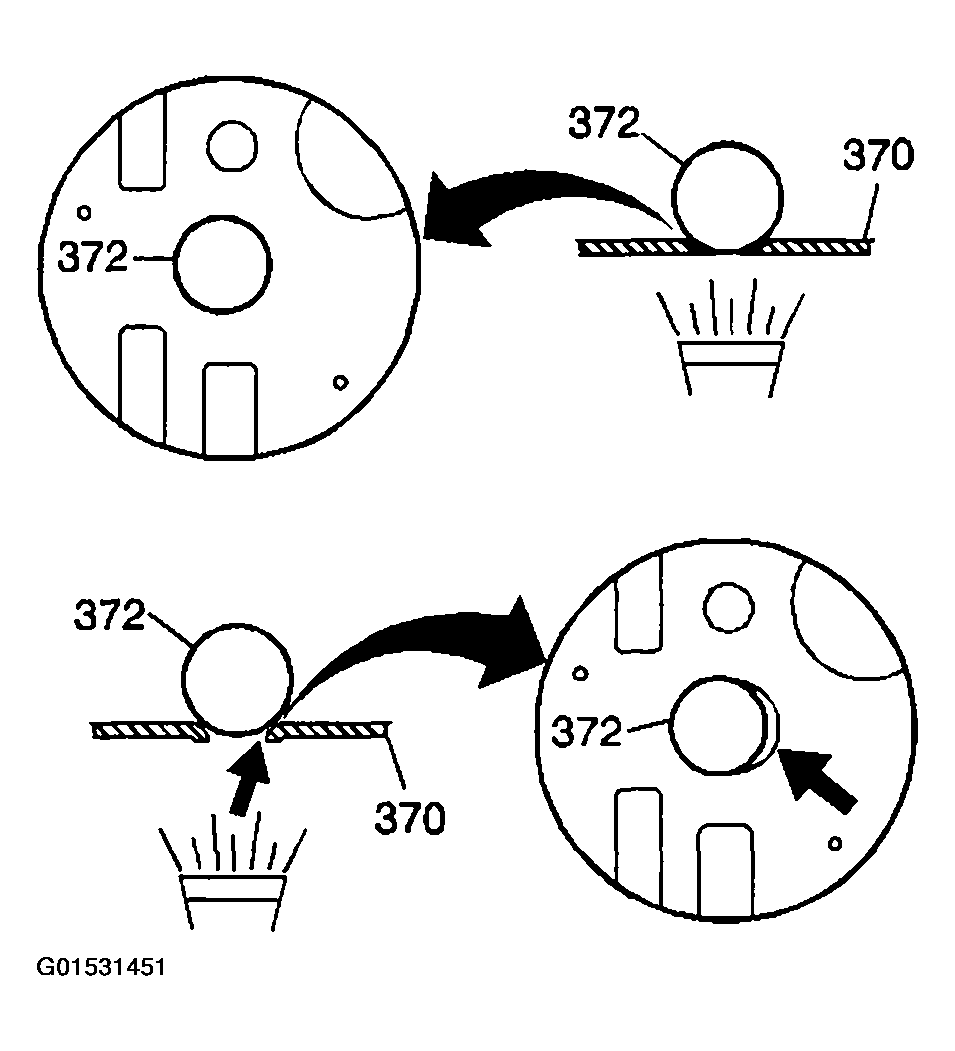 Courtesy of GENERAL MOTORS CORP.