Removal Procedure
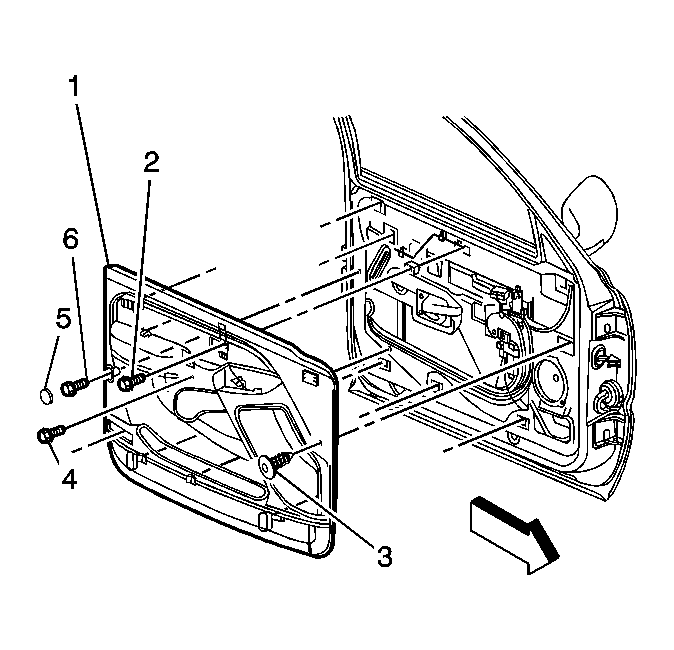 Courtesy of GENERAL MOTORS CORP.
- Remove the door handle bezel. Refer to Handle Bezel Replacement - Inside .
- Remove the door trim panel upper extension. Refer to Trim Panel Replacement - Upper Extension .
- Using a suitable flat-bladed tool, gently pry the manual lock lever from the door trim panel.
- Remove the push in fastener (3) at the front edge of the door trim.
- Remove the cap (5) covering the screw on the rear edge of the trim panel.
- Remove the trim panel screws.
- Remove the screw (2) from within the opening where the manual door lock lever resides.
- Remove the screw (4) from the opening in front of the armrest.
- Remove the screw (6) from the rear edge of the trim panel.
- Carefully slide the trim panel (1) up in order to release the retainers from the door.
- Disconnect the electrical connectors.