Liftgate Latch Replacement
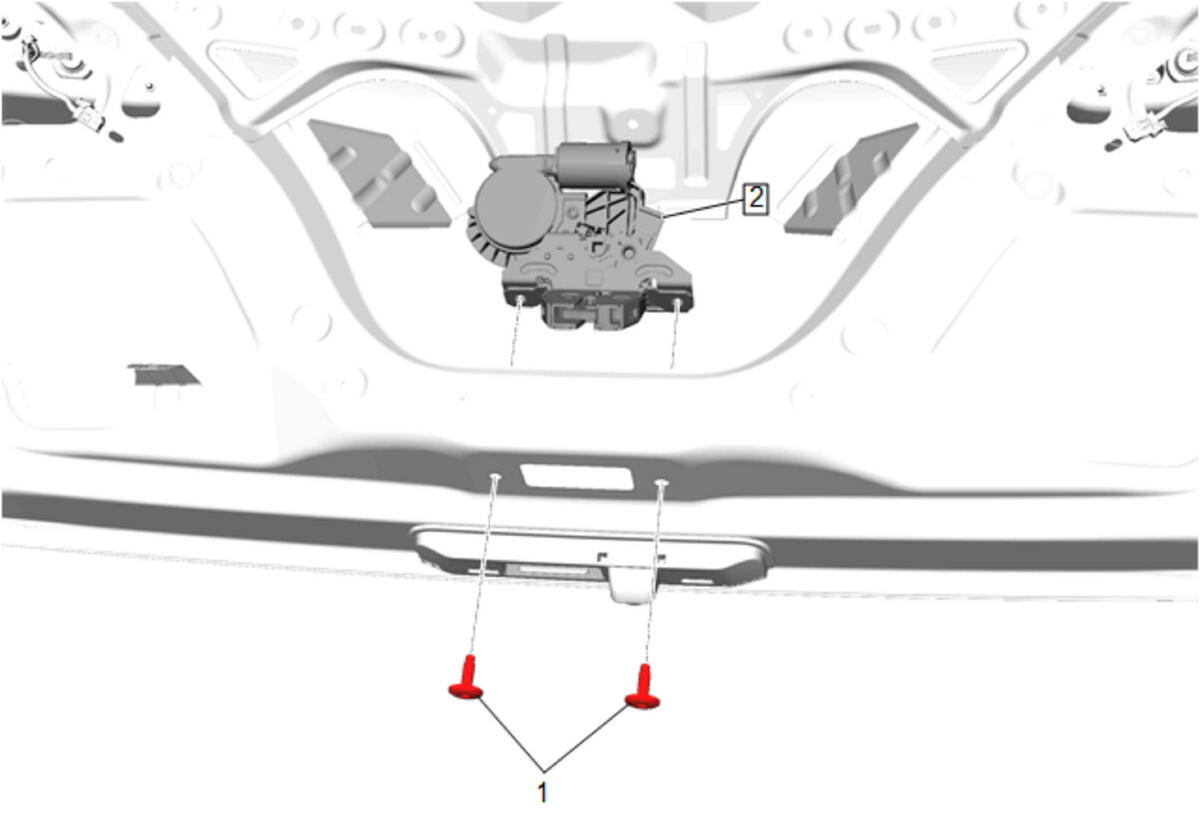 Courtesy of GENERAL MOTORS COMPANY Courtesy of GENERAL MOTORS COMPANY
|
NOTE:
Callouts in the following chart represent components shown in graphic above.
| Callout |
Component Name |
Preliminary Procedure
Liftgate Lower Trim Finish Panel Replacement |
| 1 |
Liftgate Latch Bolt [2x]
- If NEW threaded components are being installed, loosen the adhesive using a metal pick or similar tool before proceeding. If threaded components are reused, prepare the threaded components using the following steps:
- Remove any loose cured adhesive from the external threads of the components using a lint free cloth.
- Thread the cleaned components into the internal mating threads and remove to loosen trapped cured adhesive.
- Apply thread locking adhesive to the external threads of the components. Adhesives, Fluids, Lubricants, and Sealers
- Ensure there are no gaps in the thread locking adhesive once applied to the component.
Tighten
22 N.m (16 lb ft) |
| 2 |
Liftgate Latch
Procedure
Disconnect the electrical connector. |