Removal Procedure
 Courtesy of GENERAL MOTORS CORP.
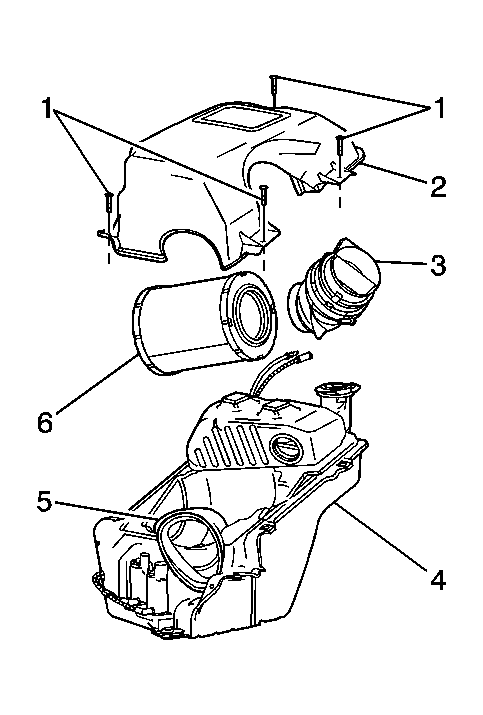
- Remove the air cleaner cover (2), the filter element (6), the mass air flow (MAF)/intake air temperature (IAT) sensor (3), and the air inlet duct (5) from the lower air cleaner housing/washer solvent tank assembly (4). Refer to Air Cleaner Element Replacement .
 Courtesy of GENERAL MOTORS CORP.
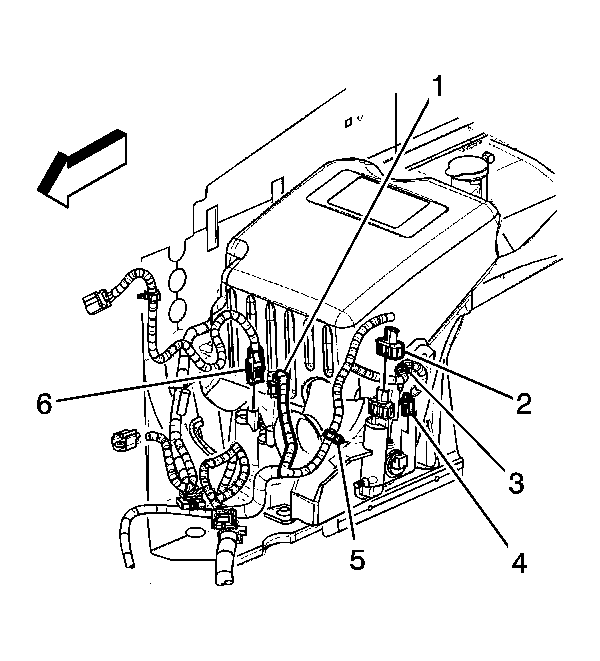
- Disconnect the following electrical connectors:
- Windshield washer pump (1)
- Headlamp washer pump (2), if equipped
- Low solvent level sensor (4)
- Lift gate washer pump (6), if equipped
- Remove the washer solvent level sensor wire harness from the wire harness retaining clips (3, 5).
 Courtesy of GENERAL MOTORS CORP.
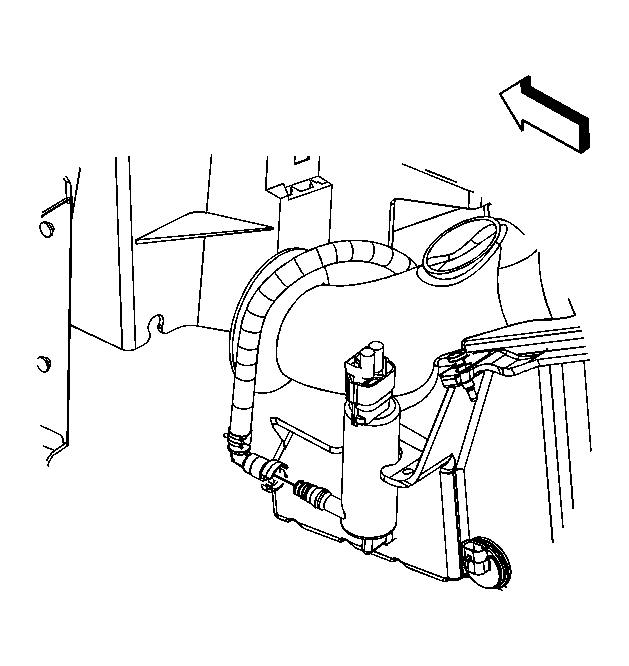
- If applicable, disconnect the headlamp washer hose from the headlamp washer pump located on the lower air cleaner housing/washer solvent tank. Cap the headlamp washer pump outlet fitting to prevent loss of washer solvent.
 Courtesy of GENERAL MOTORS CORP.
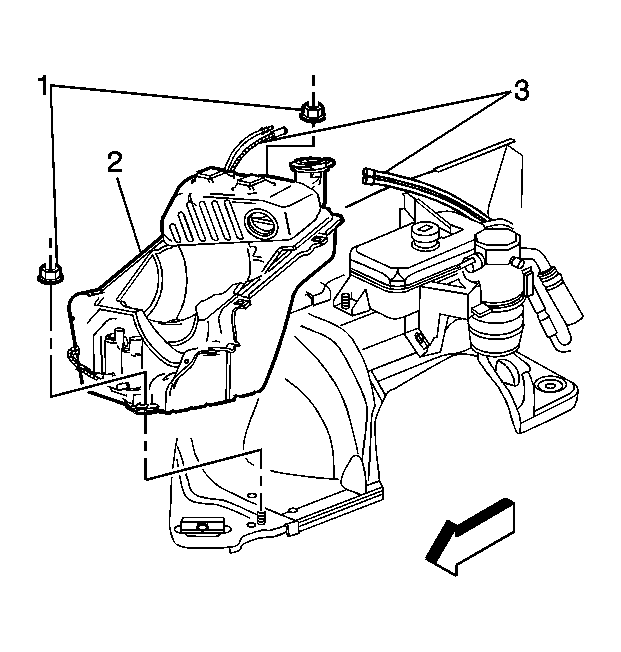
- Disconnect the washer pump hoses (3) and plug the washer pump outlet ports to prevent loss of washer solvent.
- Remove the 2 air cleaner housing/washer solvent tank assembly retaining nuts (1) from the mounting studs.
- Lift the lower air filter housing/washer solvent tank assembly (2) off of the studs and remove the assembly.